Hi All! This is Jera from Quilting In The Rain and I am thrilled to be posting on U Create for the first time! A little bit about myself…
- I started quilting 5 years ago and immediately got the quilting bug.
- I work full time (in the biotech industry) and started my blog one year ago as an outlet to my creative side.
- I quickly learned that I love teaching others to quilt, hence all of my tutorials. Stop by my blog for simple, unique and clear tutorials! 🙂
- I am a self-described fabric addict – gorgeous fabrics are what inspire me to quilt!
- My dream is to open a fabric shop – my online shop will launch this Fall!
- And lastly, I’m a mommy-to-be! I’m 10 weeks along!
Thanks so much for checking out my tutorial. As mentioned above, I love simple and this tutorial is only 3 steps…
Materials (57″ x 50.5″ quilt top):
- 1 jelly roll (you will have plenty of leftover strips!)
- 1 solid white jelly roll
- 3 yards backing
Step 1 – Trim the strips from both the colored and solid white jelly roll to the exact measurements represented in the cutting diagram below. (Note: the measurements below are the exact cutting measurements of the unfinished pieces). Since a jelly roll strip is 2.5″x44″ long, in some cases you will need to sew a couple of strips together and then trim it to get the measurements shown below.
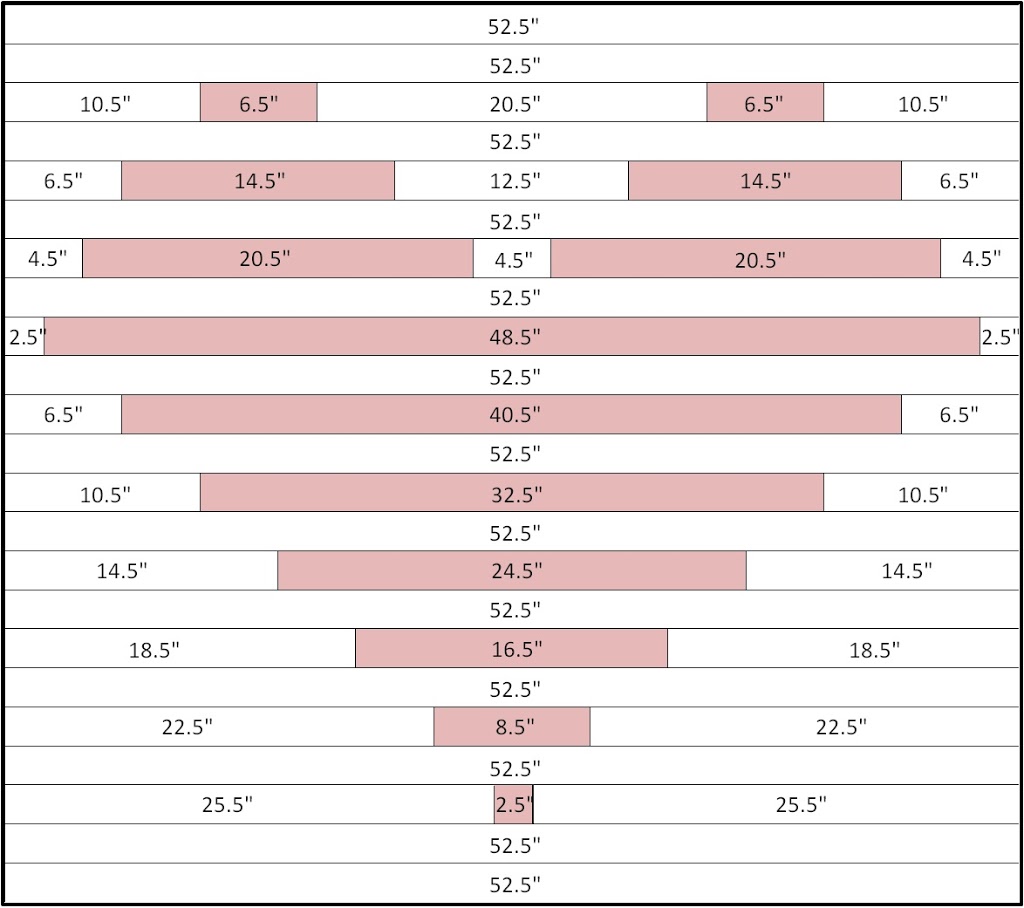 Step 2 – Using a 1/4″ seam allowance, sew all the pieces in each row together, and then sew all rows together.
 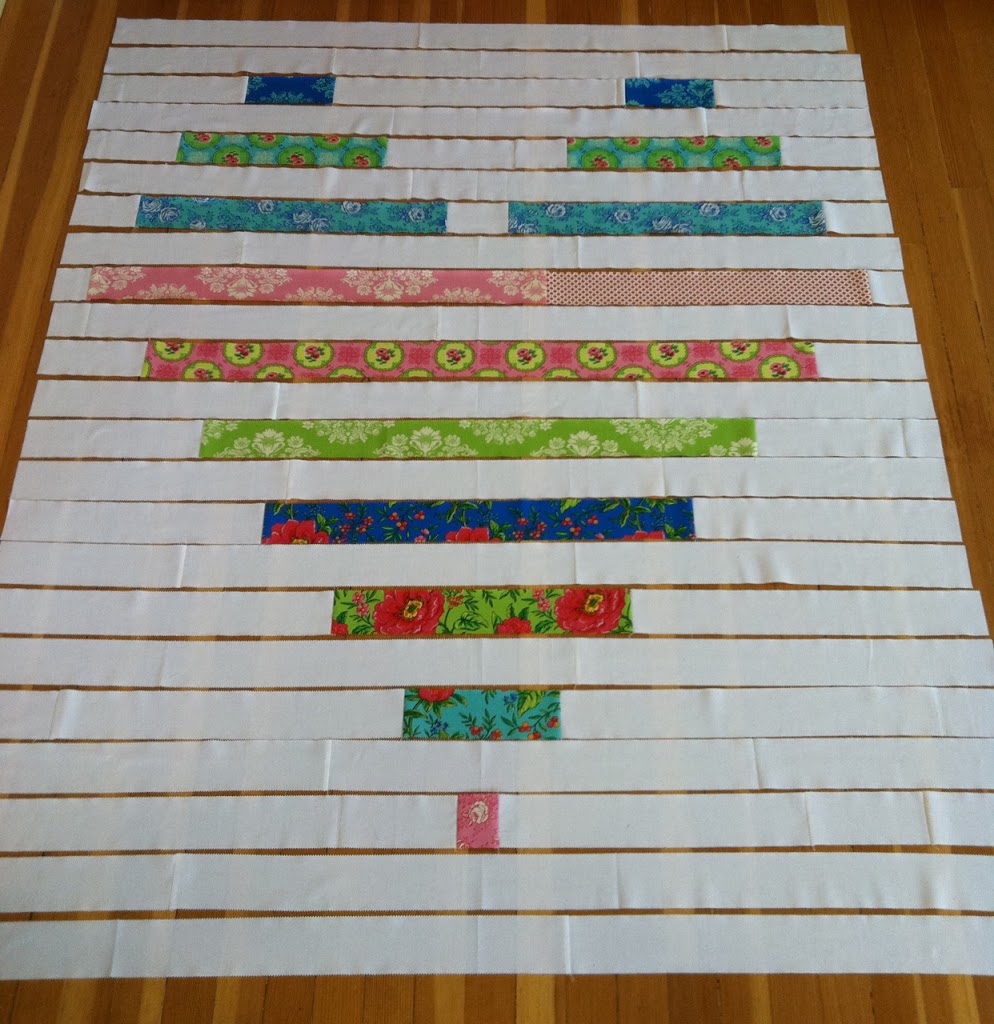 Step 3 – Add the borders. Sew enough strips together until you have these measurements:
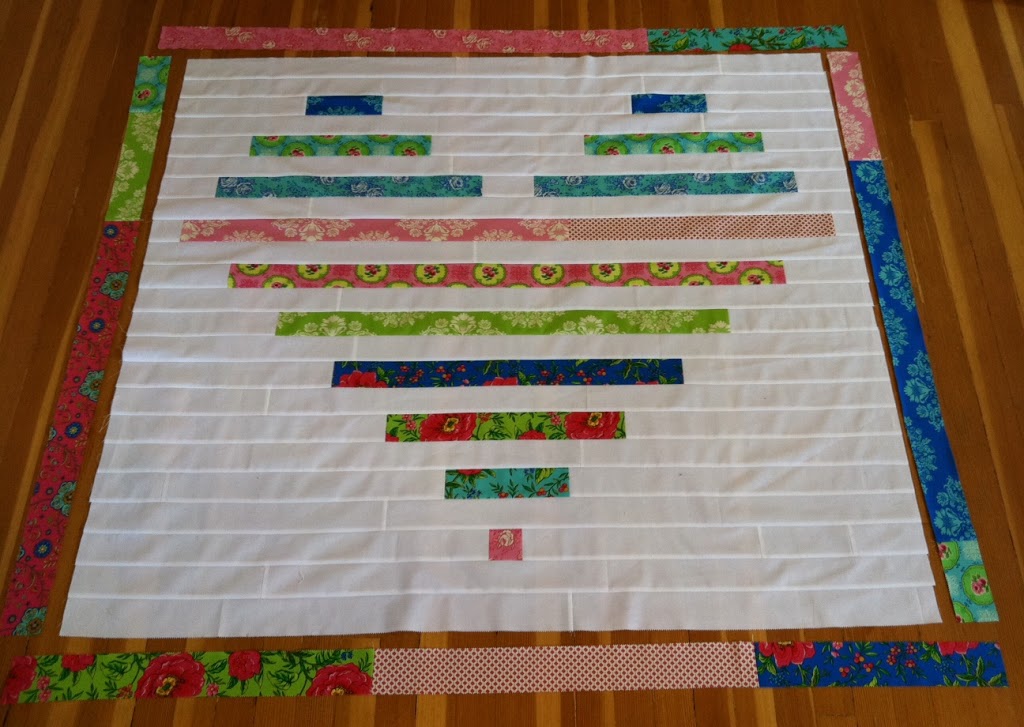
- Left and right borders – 46.5″ long. Sew these on first.
- Top and bottom borders – 57″ long.
 Baste and quilt. Sew together six leftover strips to create the binding. A binding tutorial can be found here.
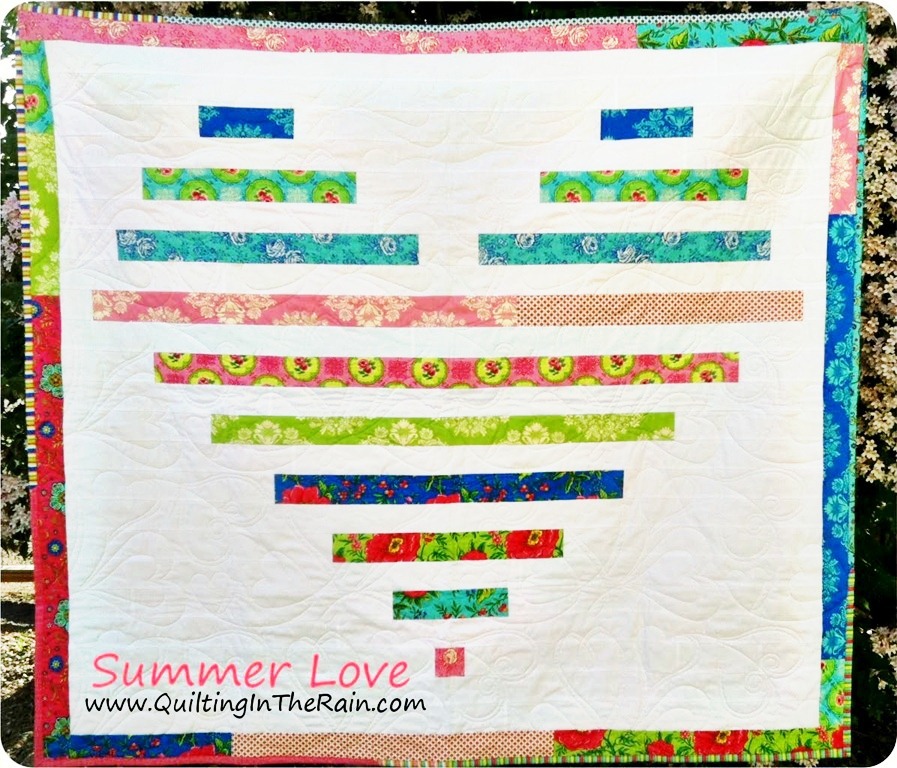
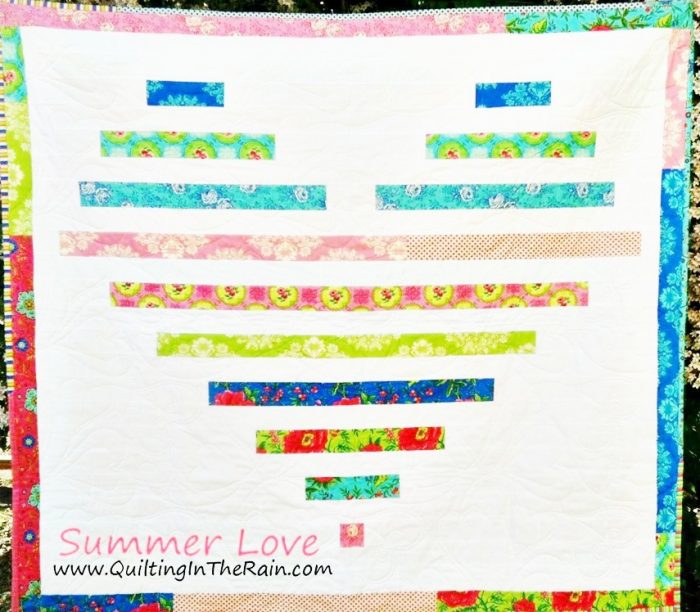
That’s it! Simple and absolutely beautiful! Thank you for checking out my tutorial! Happy Quilting! -Jera at www.QuiltingInTheRain.blogspot.com


Isn’t it beautiful?! Lately I’m really loving quilts with lots of white material in between! Jera thanks again for sharing this amazing tutorial with us!
I am to make for a young lady the has a very big heart. She is a giving person. Thank for the tutorial
LOVE THAT!! You may now be responsible for me starting to quilt now!
This is beautiful:) Sandra H
Oh, that is so lovely!
Thank you! Thank you! Thank you!
I love this heart quilt and super love your simple-to-follow-and-easy-to-understand tutorials!!! I am a new quilter who would certainly not call myself a sew-er, so your blog immediately went to my favourites list!
Thanks everyone for your kind comments! Happy quilting! 🙂
Its so simple and so very pretty!
I love this! In fact, I’m starting it tomorrow. Can’t wait to see how it turns out. Thanks for the fabulous tutorial!
What a Fun QUILT! Thanks so much for the Tutorial!!
Thank you so much for this tutorial! It was the second quilt I’ve ever made and it was a super easy baby gift that everyone raved over.
Hi there! I loved this quilt so much, I just made it as a baby quilt too! Here is a link to it, I also gave credit for finding it here on your blog…enjoy! Thanks again…Tiffiny @smiliemommy =) http://www.freepatchworkquiltinfo.com/2013/12/baby-quilt-with-heart.html
So, I encountered this pattern a while ago, and have wanted to make it since. From Mid January this year, until Feb 14, I made three quilts like this for my favorite valentines…Darling Hubby, DD, and DS all got one, though I lengthened with background colors, and varied the heart. Your patterns are very inspiring! Thanks for sharing.
This is *perfect* for Christmas gifts for our daughters!! Thanks for developing the pattern and sharing!, Jera!
Love this – but as a beginner I think I’ll start with a pillow – I’ll have to adjust lengths – it will be cute as a Valentine pillow for couch ( hopefully) ha ha
The strip lengths don’t work unless you use 1/2” seams