Hi, I’m Terra from mama says sew. I am so excited to be here on UCreate today! I am the wife to an amazing husband and a stay-at-home mom of three adorable children. I mainly blog about things I make for them. Well, to be honest, my blog is mostly about things I make for my girls. My son gets the short end of the stick when it comes to crafting. There are also a few things for Mama thrown in, because every mama needs a little time for herself.
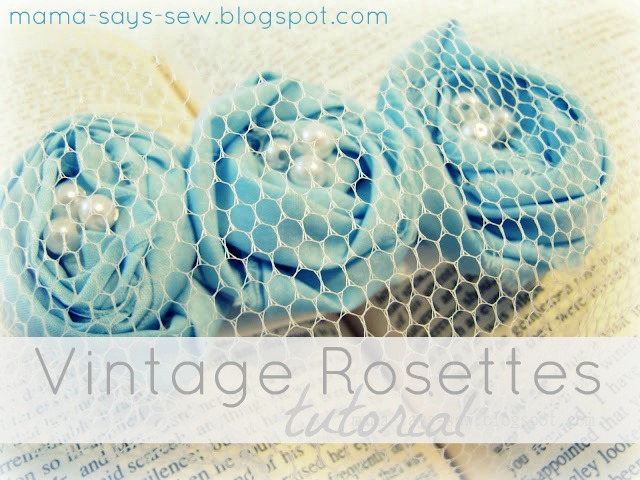
Okay, enough about me. Let’s get to the good part! Today I am going to show you how to make this vintage-inspired hair accessory.
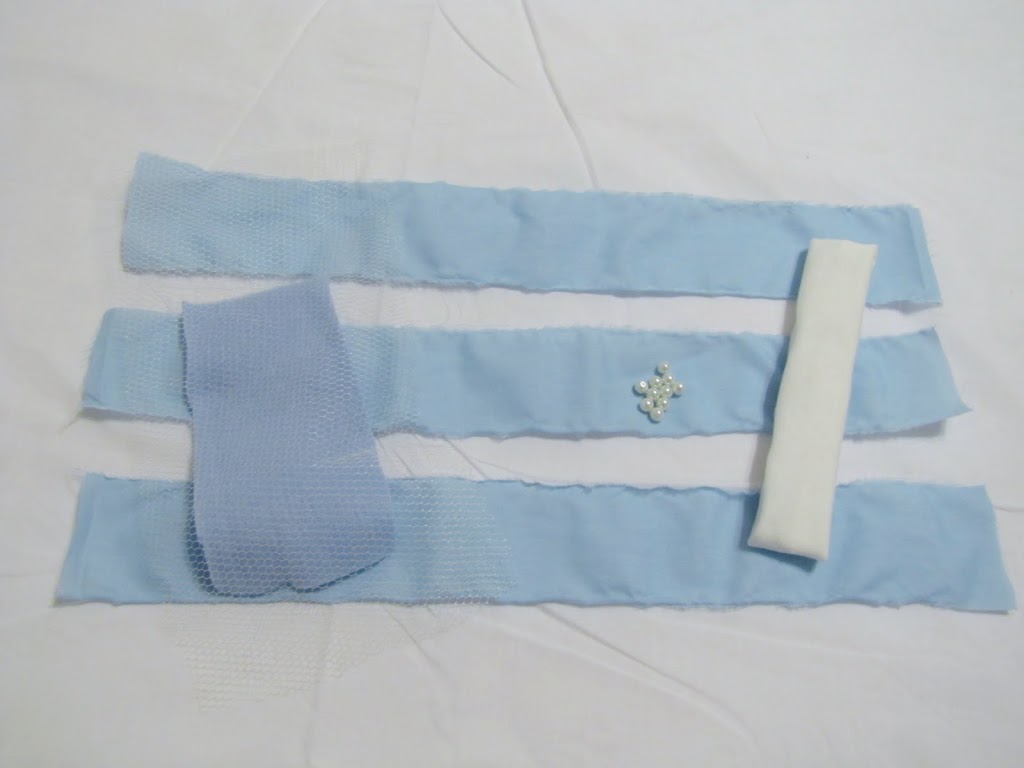
You will need:
-Three strips of fabric (mine were about 2.5 inches wide and 14 inches long)
-A scrap of netting big enough to cover the rosettes (I used about 12 inches by 5 inches for mine)
-Scraps of a heavy fabric that won’t fray, such as felt (best if it matches your rosettes)
-9 glass pearls
-A Headband
-More pearls or feathers {or whatever your heart desires!} for embellishment
-Glue sticks and a glue gun
First you’re going to make three rosettes from the three strips of fabric. If you already know how to make them, you can skip the next couple of steps. I’ll just show you quickly how I make mine.
Start by folding your fabric strip in half. It’s okay if its not perfect. That’s part of the charm! I start by rolling mine a few times, like this:
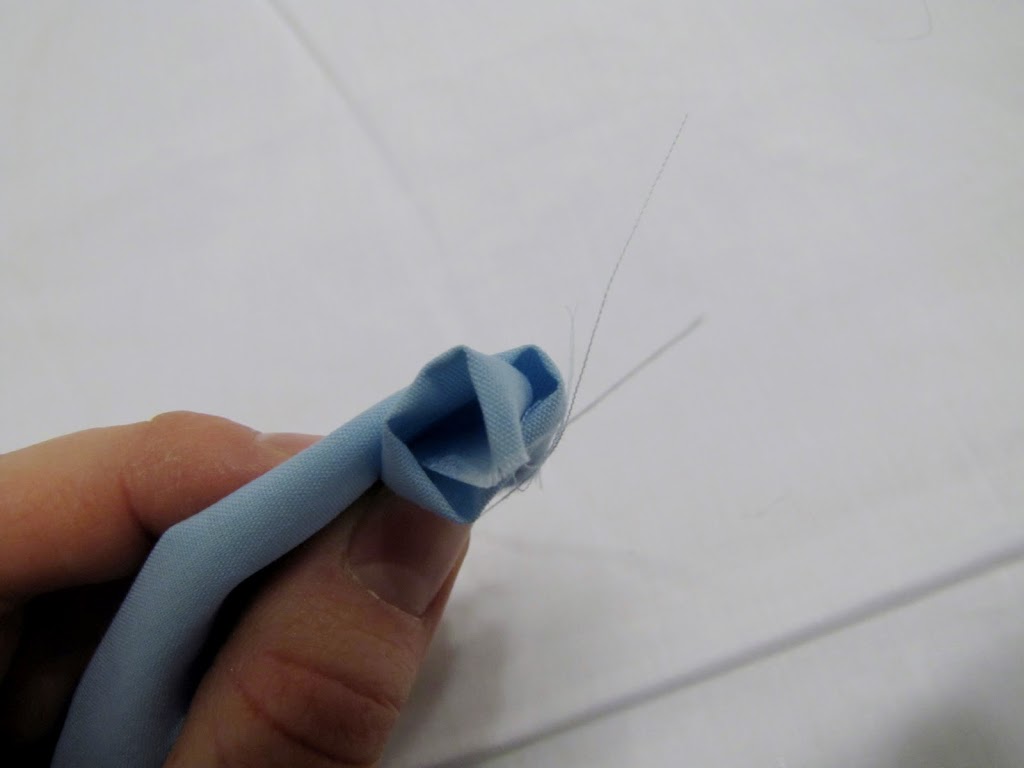
Then I squish the roll down between my thumb and fingers. Keep rolling, adding some twists to your strip as you go.

When it’s the size you want it, add a whole bunch of glue to the back of your rosette and glue down the tail so you’ll have a nice flat back to your rosette.

Trim off the tail that sticks out and there you go!

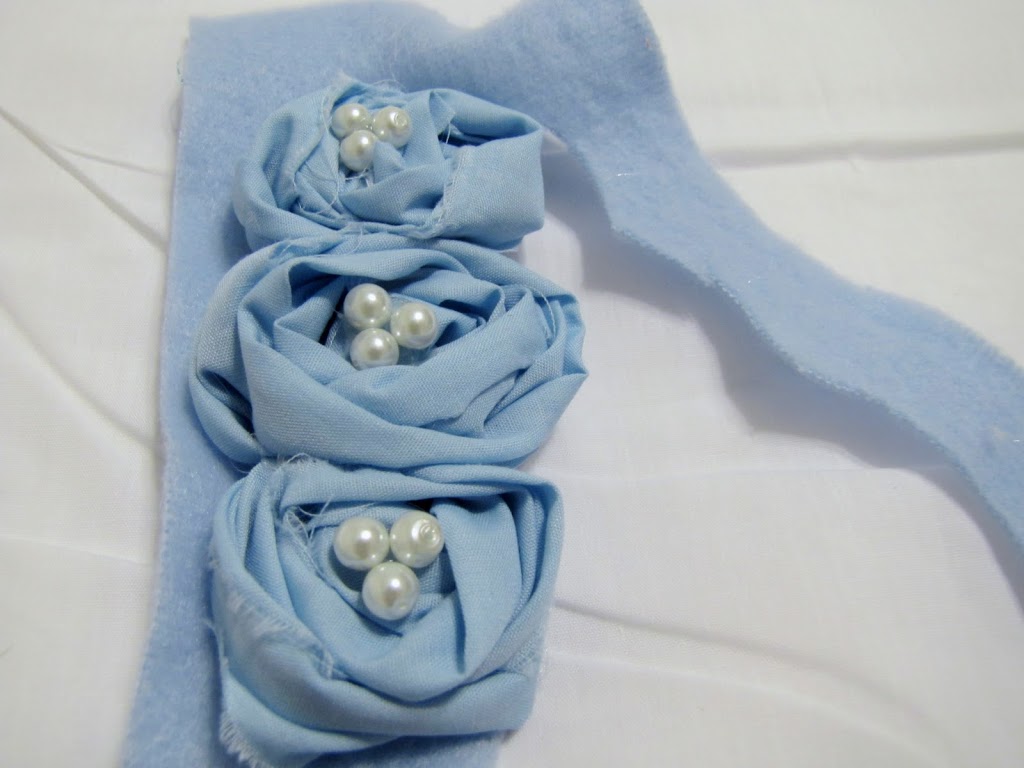
When you’ve finished making your three rosettes, add three pearls to the center of each of your rosettes. Let me just add a small disclaimer here. Obviously, these are small and we don’t want them in your baby’s mouth, so please don’t let a baby or child wear this unsupervised. Okay. Moving on.

Glue the rosettes to your felt scrap (fleece will do in a pinch, as I found out). You want to squish them together as much as possible. Hmm, we seem to be doing a lot of squishing today.
To make them more stable, glue the sides of the rosettes together as well.
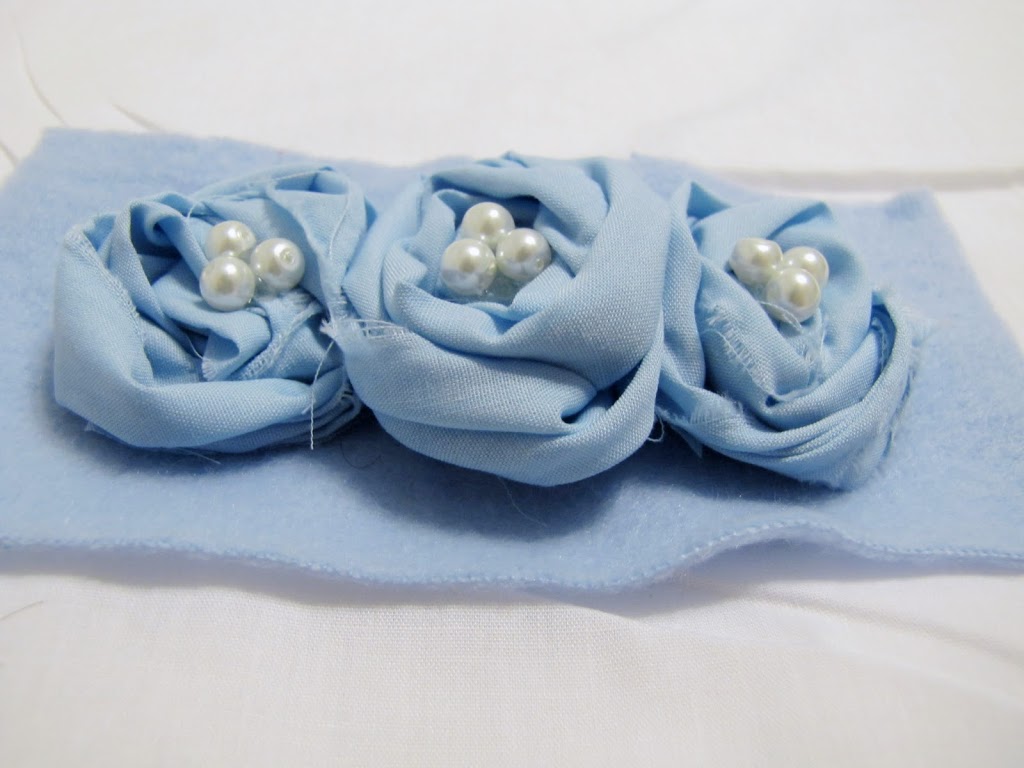
Trim off the edge of the felt.
Now for the netting. Pinch one end of your netting together, like this:

Glue it to the back of your rosettes, trying really hard not to burn yourself like I did. Do the same on the other end, trimming some of your netting off if you need to.
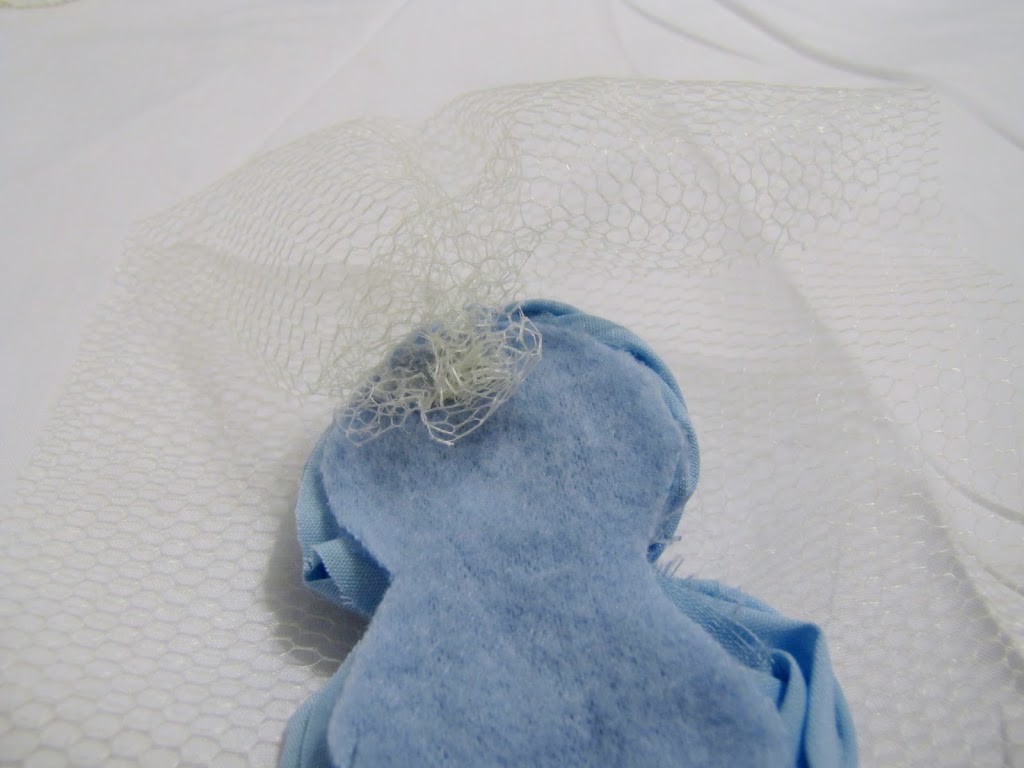
This is what it should look like after you have the netting glued on both sides.

Now add your embellishments and attach it to your headband.
I used a white knit headband about the width of my rosettes and just glued them on. If you use a thinner headband, I suggest cutting out a second piece of felt and sandwiching the headband between the two pieces when you glue.
Here’s one embellished with a feather:

This one has some extra pearls on the lower left, which are kind of hard to see, because my camera only wanted to focus on the netting.

That’s it! You’re done.
Now go take a picture of your baby wearing your beautiful creation.
Another tip: upload your picture to picnik and use the cross process tool to edit it. It will give your photograph a nice vintage feel.
I’d love it if some of you stop by my place some time.
Thanks to Kari for having me as a guest on U Create today!


Super cute! I love it! Can’t wait to make my own!
Biz
http://busybizblogs.blogspot.com/
These are really cute! I love hair accessories those are one of my favorite things to make! I love seeing all of the things you can make.
http://breakingfreefromoldways.blogspot.com/
Thank you for sharing!! I have been making a few of these myself but using fabric glue as I roll them. I hate that the glue gets sticky and leaves a trail of the glue on the beautiful rose.
xoxo
Kelli @ loveoursimplelife.blogspot.com
This has been exactly what I have wanted to find for my baby & little girls! THANK YOU! I can’t wait to try and make some for the princesses in my house.
Perfect hair accessory!
AWESOME!!! and I WILL be making this….if only I could figure out where to get the netting!!!!! Anyone??? I can’t ever find it that big of a net! I can only find smaller stuff. HELP! Thanks for this SUPER tutorial!!! Been wanting to make one of these for sometime now!
wow, super cute idea! Thanks for the inspiration!
Love this – thanks so much for sharing the tutorial!!