I am so thrilled with how these First Birthday pictures turned out that I wanted to share with you my little secret.

Look at these adorable pictures! Do they look professional? Do they look like they were done in a studio? These pictures were taken in the comfort of my very own home.
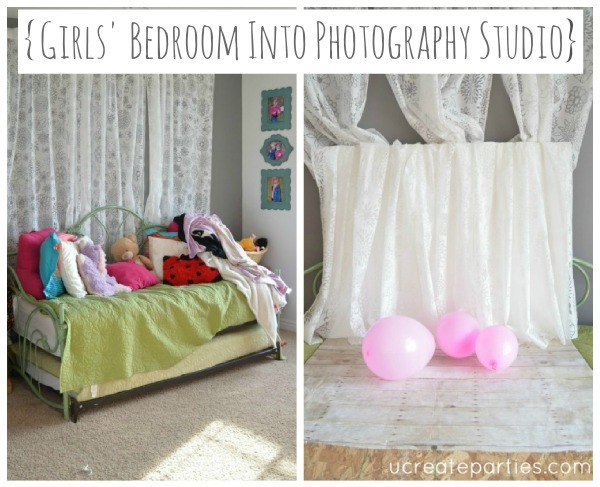
My girls have a great big window in their room and it is lets in plenty of light. So, naturally I love taking pictures in there. {I am not sure they like it though.} I don’t have a big fancy studio, but I kind of know how to create something out of seemingly nothing. Here is how I create backdrops and flooring for beautiful pictures.
 1. Snag a big old piece of particle board or wood sheeting from the hardware store…or I got this one from construction site (after asking the builder of course). There are dumpsters on construction sites that have plenty of fun wood finds. It’s not cool if you don’t ask permission though.
2. Get some Bulletin Board Paper from an office supply store or Amazon. It comes in a big roll and for a couple bucks. Get yourself a staple gun and attach it to the board. I staple the heck out of mine. Just make sure the staples go in all the way…we don’t want little ones to get hurt on them.
3. You have some seriously awesome “flooring.”
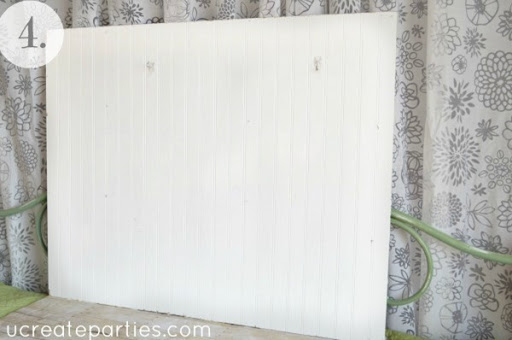
4. Find an piece of bead board hanging out at your sister’s garage in a pile reserved for the dump and TAKE IT. No need to ask in this situation. 😉 If this is not an option, ask your Facebook friends if they have any or grab a piece at the hardware store. You don’t need to do anything fancy to it; just prop it up.

5. To add a softer background, I draped the sheer IKEA curtains over the bead board until they hit the “flooring”. Even if your room doesn’t have sheer curtains, you can snatch some up at IKEA or even Wal-Mart/Target stores. They really add a very soft look.
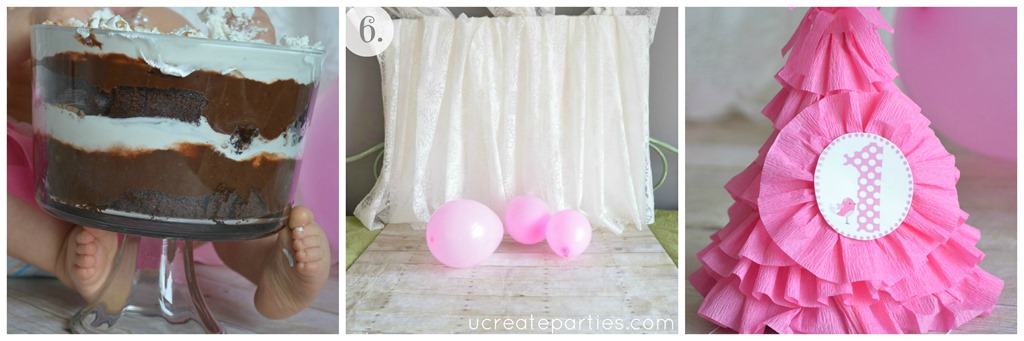
6. Add props! Babies love to play with things…anything. The balloons were a big hit; she also very much enjoyed the beads around her neck.

About 30 minutes later I had taken 183 pictures of this happy little princess! Don’t forget the cake…or in her case, a beautiful and messy trifle.

I LOVE the idea for your flooring!
OMG! Great info! Thanks for sharing & you’re right, these DO look like they were taken in a studio!! Those curtains are drool-worthy! She looks SOOO cute w/ the cream on her lil’ foot & those beads-tutu-hat-, Scrumptious! LOVE the shot of her “testing” the trifle, w/ her tongue……………….YUMMY!!!
LOVE…LOVE…LOVE . Thanks so much for sharing. My youngest is a boy though.
Becky, you’re a genius!! That LITTLE bit of trifle sure kept her occupied! Love the idea with the additional flooring bit- that really gives it a “studio feel”.
Thank you so much. That trifle idea was definitely the brain child of her mother!
Thanks for taking the time to comment.
What kind of poster board did you use to get this look? It’s incredible but I’m a little stumped
The background is beadboard and the “floor” is bulletin board paper from an office supply store…or hobby lobby.
You can also grab it on Amazon http://amzn.to/1VRSoeE