 I am all about sharing pretty pictures, and amazing themes and ideas for your next party…but let’s face it, not all of us are professional event planners, so how do we pull off what we see in the pictures? Well, I’ve found some pretty amazing people willing to share some tricks and tips and I’m looking forward to sharing them with you in the {party 101} series! 🙂 Let’s get started shall we?
Remember the gorgeous pictures from this photo shoot? They came from a photography workshop by the talented Jeanna Hayes, a photographer from Las Vegas. When I saw her work, I knew I had to ask her to share some of her secrets… AND she is today’s creative guest! 🙂
~*~
My name is Jeanna Hayes and I am the wife of the most amazing man in the world, mama of an extremely kissable 2 year old, full-time photographer, who keeps an astoundingly clean home, and cooks gourmet meals every night (yeahhhh right on those last two!! :). Basically, I am just a girl who loves her family to pieces, and wants beautiful photos to remember every stage of our imperfect, but happy life! I can’t wait to share a few (hopefully helpful) “tips” today!
4 Tips on Getting Amazing Party Photos:
1. Lighting is Everything!
Have you ever noticed that if you step out of the house around noon, everything looks so…. drab? The sun is just beating down on everything (including you!), and pretty much everything in sight has a funky shadow to it? On the other hand, think of being outside in the evening. The light filters beautifully through the trees, and makes everything look gorgeous and romantic. (Sigh… 🙂 So for good and for bad, whenever we take a photo (outdoors, anyway), we are pretty much a slave to whatever lighting is out there! Premium time for taking your outdoor party photos, is about an hour before sunset, and even 10 or so minutes afterward.
Another tip is to avoid taking photos with “hot spots.”
 The photo above has distracting spots from the sun in the background. All I had to do was wait about 30 minutes for the sun to sink a little lower, and you can see from the bottom photo, that those spots are now gone and it’s a much better photo!
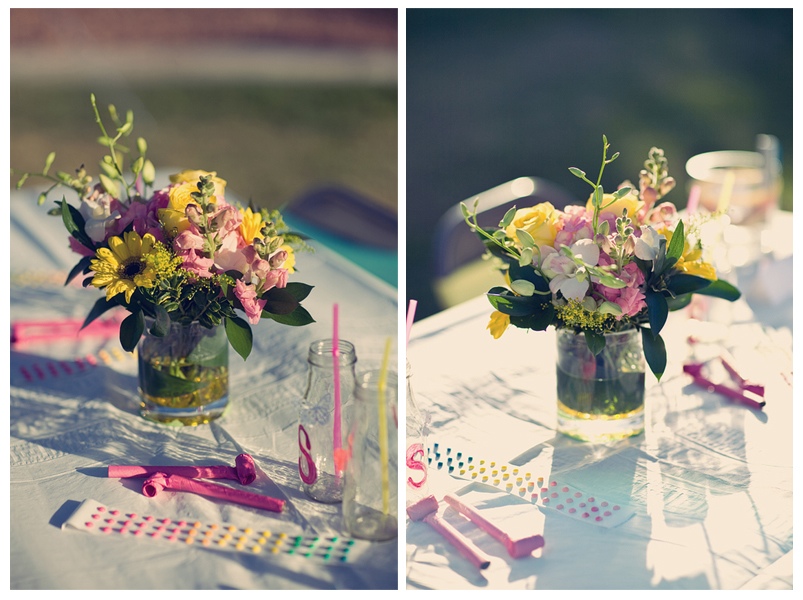 The above photos are the exact same floral arrangement, taken with 2 different approaches. The first is taken in direct sun. While it’s not a bad photo, I think the more “magical” photo is the second one, with the backlighting. All you have to do with this approach is make sure the subject is between you and the sun. If I can, I always try to get on that side of whatever I’m trying to photograph.
If you are having an indoor party, one more tip is to “bounce” your flash. If you happen to have a flash that can point different ways, point it toward a nearby wall or the ceiling. This will create more flattering light on everything (as opposed to pointing your flash right at your subject). If you don’t have a flash that will do that, you can try to crank up the lights in your home and not use your flash, or lower the power of your flash so it’s not overpowering.
2. Shoot Wide Open
See that little “M” on your camera’s dial? Many of you have that option on your camera. That scary thing means “manual” – yep, it’s pretty freaky. That means YOU decide what settings to use. Ahhh! Well, I’m here to tell you that it’s not as bad as you think. When YOU are in control, it means you know exactly what kind of photo you want to take. That’s a great thing! So when I say “shoot wide open,” I mean change your aperture. Put the number as low as it will go. This will let you get one thing in focus and everything else around it will have a beautiful blur.

 If you aren’t comfy with shooting in manual, then you can turn the knob to “Av” (on a Canon) and “A” (on a Nikon). That will let you change the aperture on your camera (once again, put the number as low as it will go), and then the camera will choose the other settings so you will get a decent exposure.
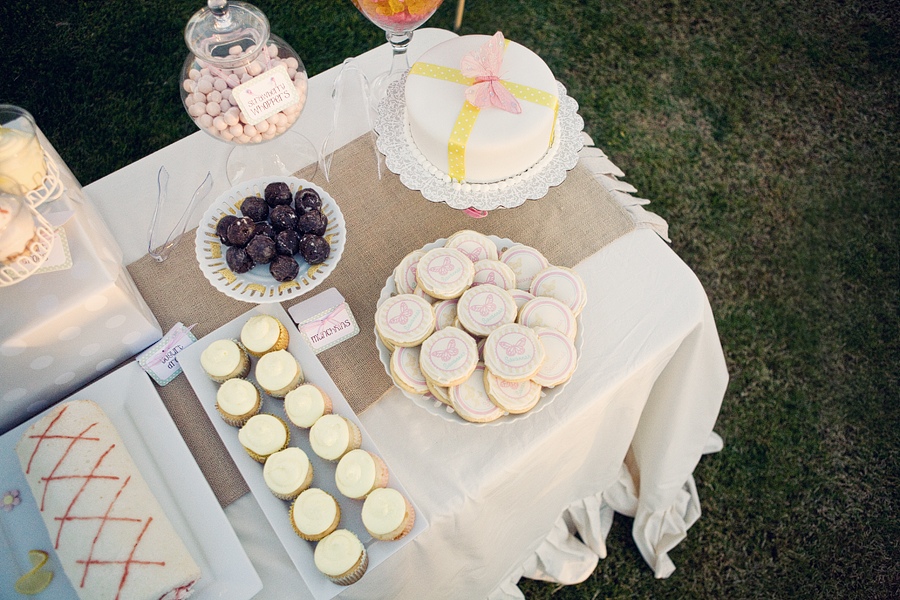
Just FYI, if you DON’T want that blurry look, like if you want to take a photo of your dessert table and want everything in focus, then make sure your aperture number is higher. Play around and see your results, but it will probably be around a 6 or so. But like I said… play around! What can it hurt?
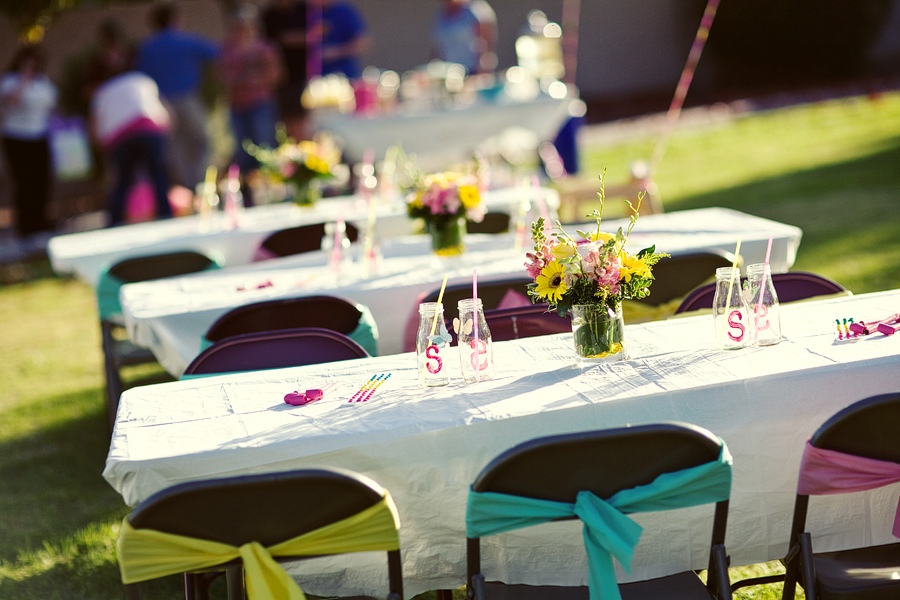
3. Change Your Angle
Isn’t it interesting that this simple concept can change anything?

 In these examples, there’s no “good” or “bad” photo, they are just different! It’s good to get a few varying angles of the same thing. You worked hard to put this party together, so why not?
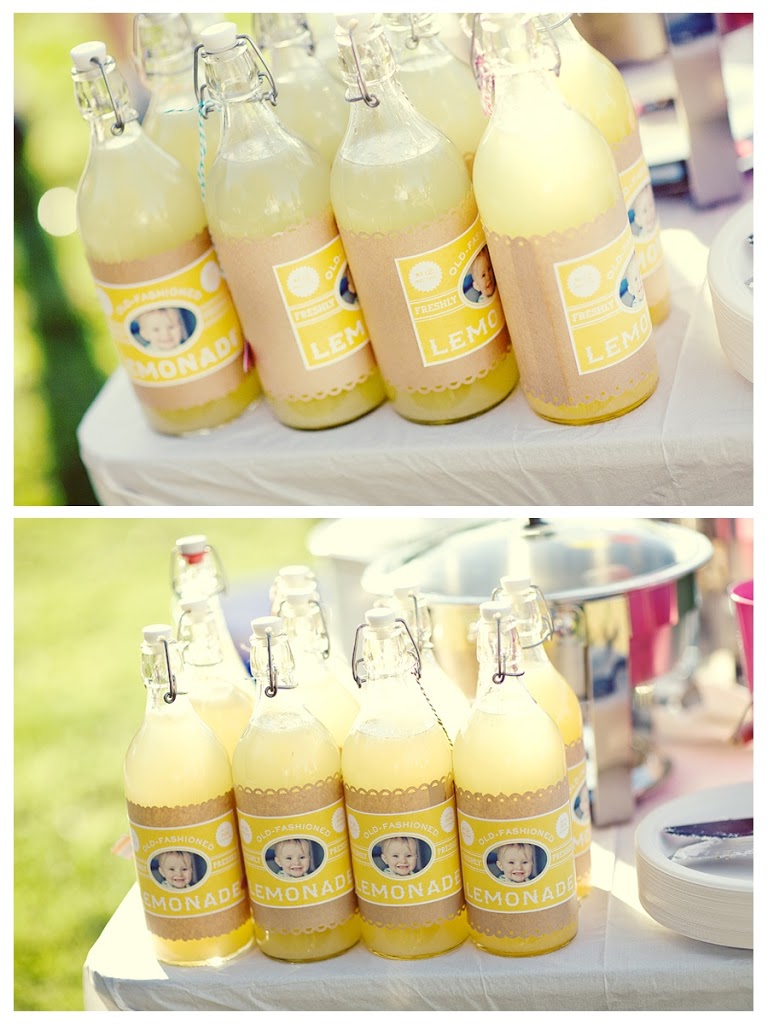
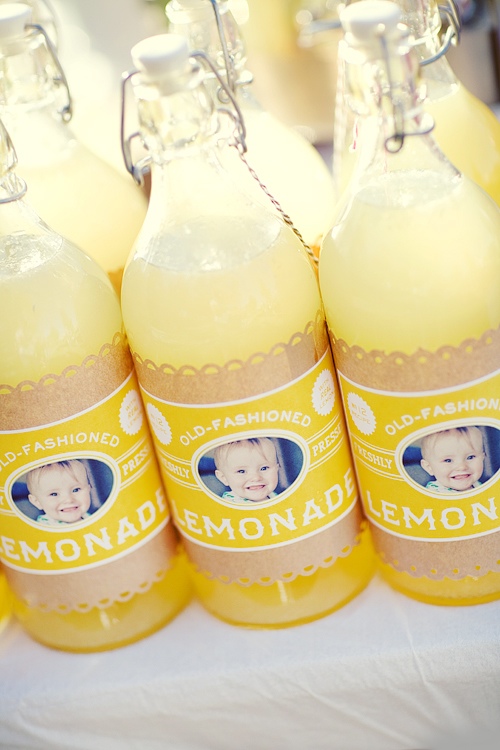 Another thing to think of, is how something is arranged. In very first photo, the oh-so-cute lemonade bottles were facing forward and you couldn’t see the adorable labels this mom worked so hard to put together. So all I did was twist them so you could see the labels from the side. The last photo is the best out of the three because it’s cropped in – this gives a closer view of the label, has a focal point because of the middle bottle, but also shows that it was part of a group of bottles.
4. Keep on Your Toes
Or in other words, think outside the box! Keep aware of great photo-taking opportunities.
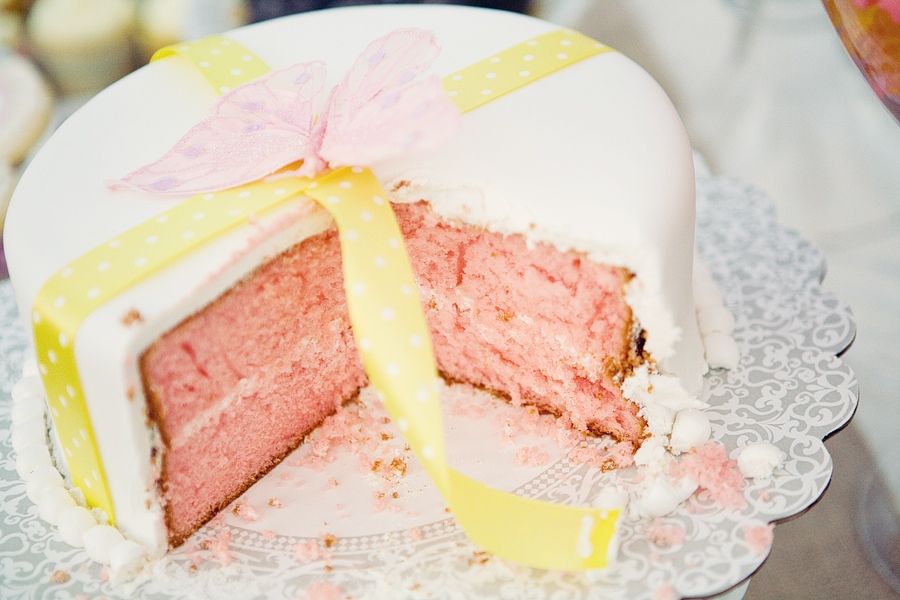
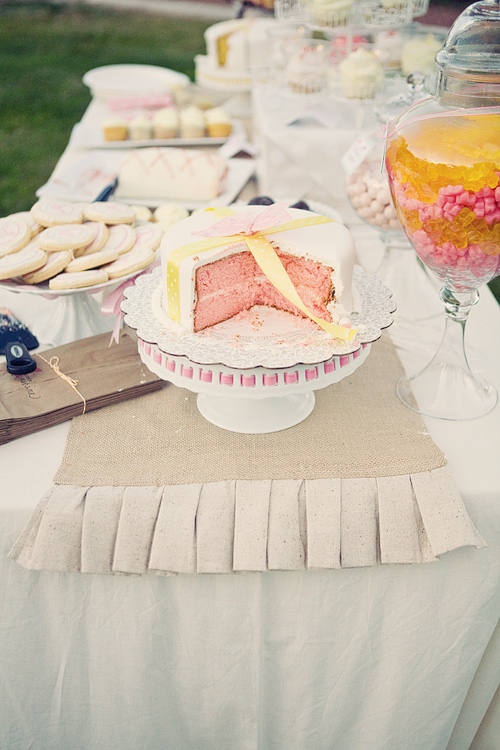 I was finished taking photos of the desserts at this particular party, but noticed how pretty the inside of this cake was! Just because it isn’t “perfect” (it’s been cut into! Ahhh!) :), doesn’t mean it’s not beautiful! In fact, I like this photo of the cake better than the one I took before it was cut into.
 This picture was just for pure fun. I decided to raise my camera up as far as I could above my head (pointing the lens toward the table and clearly having no clue what I was taking). It’s definitely a “different” photo, but I still like how it turned out! So don’t be afraid to do crazy things – they may turn out!
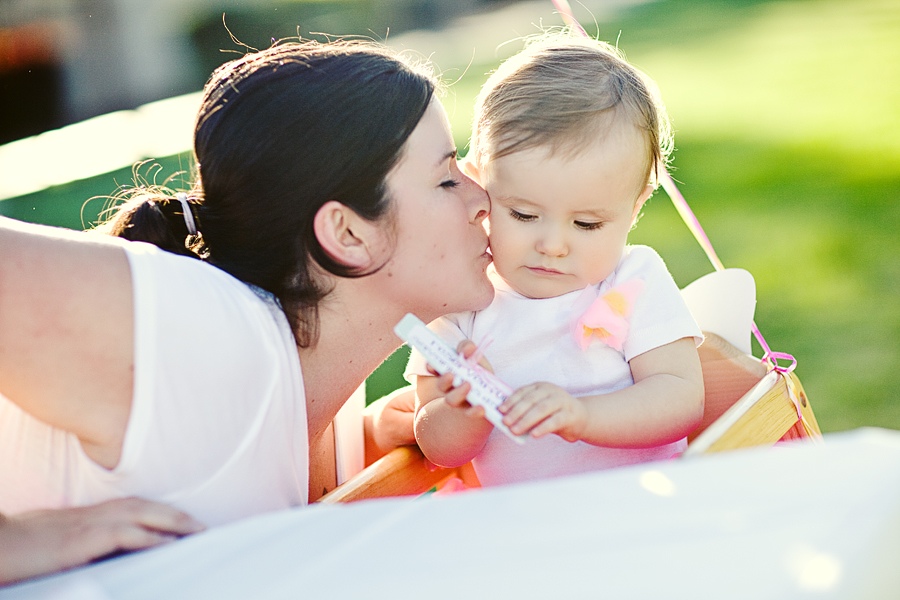
Last but certainly not least…. It is SO easy to get wrapped up with photographing details of a party and making sure everything is “perfect,” that sometimes we forget why we’re there! Don’t forget the reason you’re having the party in the first place – is it your son’s first birthday? Are your parent’s celebrating 30 years together? Is it your daughter’s princess party she’s begged you for? Don’t forget to take candids of the people who are there! These are the photographs you will cherish for years and years to come.


I really like the tips about photography. Thanks for sharing!
So fun to see TWO creative Jeana’s in one place! LOVE this Party 101 idea and the tips are just fabulous!
Great tips about photography- I have a question about the ‘wide open’ tip- is that just with an SLR camera?
Thanks for the kind words! And Kelly – the “wide open” means that if you can change the aperture on your camera, put it to the lowest number possible (the lower the number the more “open” the aperture is, making the background blurry – I know! It can be totally confusing!). And yes, it’s for SLR cameras. Your aperture will only go as low as your lens will allow. So for example, if you have a 24-70 mm 2.8 lens, your aperture will only go as low as 2.8. If you have a 50 mm 1.2 lens, your aperture will go as low as 1.2.
This won’t apply to everyone, but I know MANY people with Canon Rebels (and the Nikon equivalent) who can use this tip :).
Great tutorial! That looks like it was a fantastic party. Love your blog. Will definitely be following this one. 🙂
♥ sécia
http://www.petiteinsanities.blogspot.com