I love displaying candid photos in groupings around my home. I wanted a display that was easy to swap out old photos for new ones so I created this photo board tutorial. Check it out and let me know what you think.
 When I got my hands on these super cute frames by Heidi Swapp I knew I could come up with something fun. I hope you get inspired to hang photos around your home by using this display idea or coming up with your own…

Supplies
magnet board
paper polaroid frames
magnet strips
photos trimmed to 3” x 3”
decorative letters
Project Steps:
 Adhere magnet strip to the inside bottom of the frame
Adhere second magnet strip to back of frame
place photo inside frame, use photo adhesive to hold in place if necessary
arrange polaroid frames on magnet board
add letters
hang and enjoy!
Letter Supplies
decorative letters (I used glittered chipboard letters to spell people we)
favorite liquid adhesive (I used glossy accents from Ranger)
packing foam
thin cardboard
embellishment scraps
small sharp scissors
Instrucions:
hand cut chunky letters (or trace)
cut out two of each letter
adhere letter to top of foam
cut around letter
turn letter over and adhere second letter to back of foam
trim any messy edges
let dry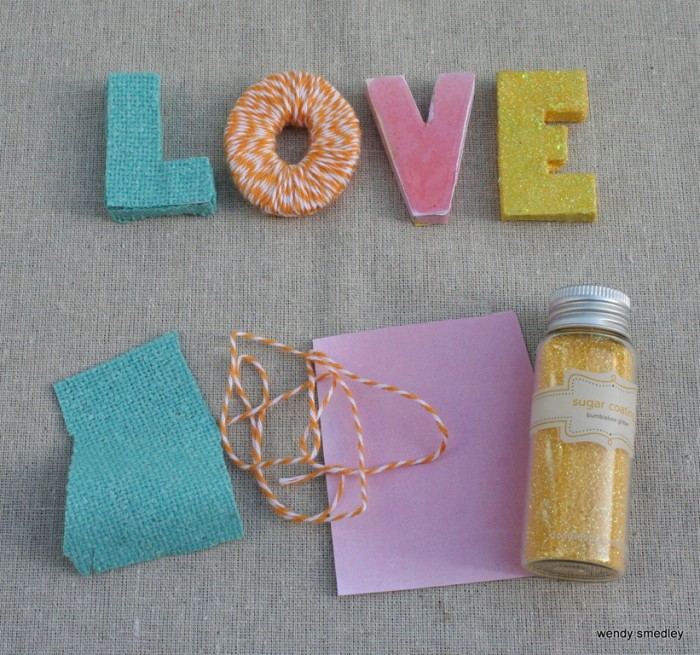 Decorate letters
Use what you have on your hand, your favorite products that you have been wanting to play with. I used twine, glitter, fabric, and paper.
(to get the glossy V is applied a thick coat of Glossy Accent dimensional adhesive)
adhere magnetic strips to back of letters Assemble all the pieces together and enjoy your creation!
Thank you for sharing such a priceless project, Wendy!!!
How do you guys display random snap shots…or do you only reserve wall time for professional shoots?

Love this! Cute display!!!
I LOVE the colorful polaroid look!!!
Cute! Great tutorial! Love this!
thanks, glad you like!
Love this project! So simple, but so awesome! I love that you can switch out the pictures! TFS!