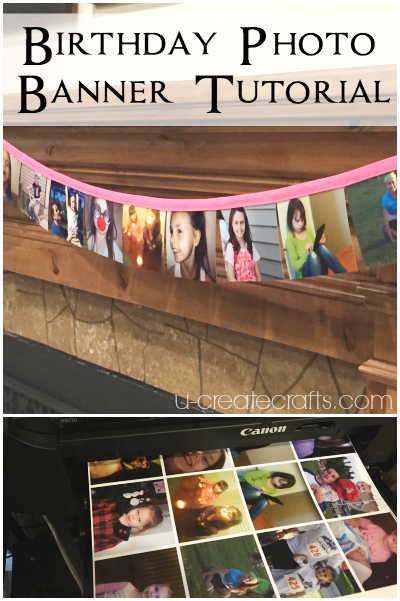
Here’s a little tutorial I came up with for my little niece’s birthday. She lives about 5 hours away from me so I wanted to make something I could send to her, but not have to pay loads of shipping. So I created something easy and super cute. I perused her parents’ Facebook pages and downloaded tons of pictures of her from toddlerhood to current age. I sewed them all together and made an adorable Birthday Photo Banner.
 Supplies Needed:
- Photos! The more the better.
- Print those photos. We recommend the Canon PIXMA iP8720 Crafting Printer and photo paper.
- Bias Tape (wide single fold)
- Sewing essentials (thread, scissors, machine, etc.)
 Step #1: Download and prepare to print.
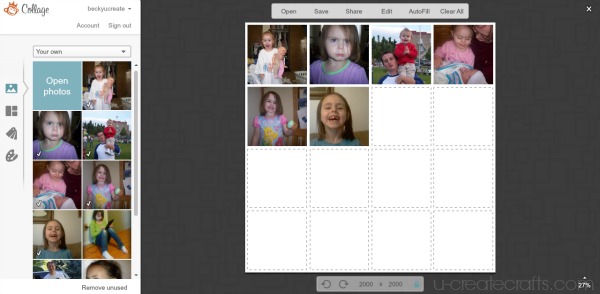
I downloaded all the pictures to my laptop and then created a large square photo collage in picmonkey.com. I actually had so many pictures, I created two of these collages.
 Step #2: Print your photos!
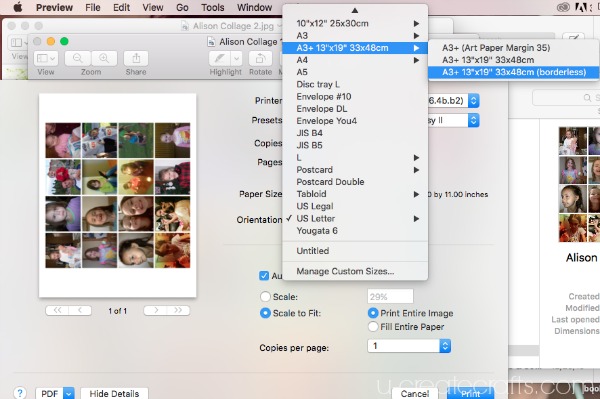
Using the Canon PIXMA iP8720 Crafting Printer and 13″ x 19″ Photo Paper, I printed both collages using the borderless setting. I took a screenshot of the settings I used for you.
 Step #3: Cut out and organize the photos.
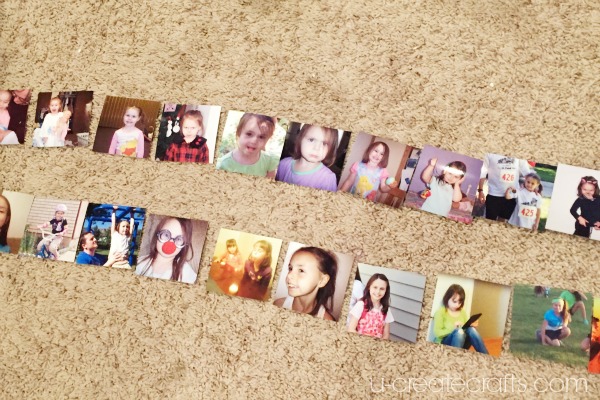
My little daughter and I sat and cut out all the photos…while singing some Kids Bop at the top of our lungs. {Make sure to add that part to the process; it’s hysterical and your kid thinks you’re cool!}
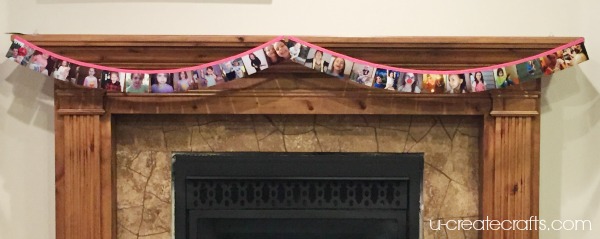
Then I put them in two lines in chronological order from baby girl to young tween girl. Then starting with the last picture in each line I stacked the photos in backward order. I planned to sew the last photo to the bias tape first and ending with the first photo in the line…don’t worry, it will make sense when you start sewing the banner. 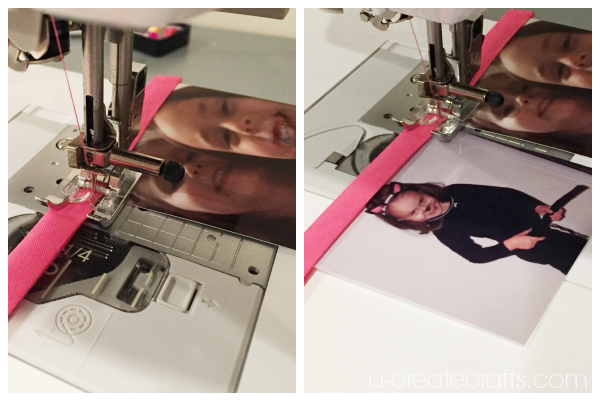 Step #4: Create the banner
Take the bias tape and fold it in half; iron it down with a hot iron.
Starting with the top picture in your pile, slide the top of the photo in between the bias tape. Sew the bias tape together with the photo and stop right when you get to the end of the photo. Next slide the next picture in and sew across the top of that one. Continue the process until your banner is complete.
I chose to do two rows, but you can sew all the photos into one long banner as well.
Wouldn’t this be an awesome thing to do for an “Over-the-Hill” birthday party with pictures from childhood or it would be a cool teacher gift with photos of all her students (with parental permission, of course). What other ideas do you have for this banner? I would love to hear them!
We would love to see your version of the Birthday Photo Banner. Post a picture to our Facebook page or tag us on Instagram (@ucreateblog).
Post by-
What a neat idea – I would never have thought of sewing photos, but it makes a beautiful banner! This would be great for an anniversary celebration, too – a 25 or 50 year one with pictures of the couple. How fun!