 Hello crafty peeps! I am excited to be here today! For those that don’t know me, I’m Ms. Apple (as the delivery guy calls me -ha ha ha) from Brassy Apple or you can call me Megan. I design sewing patterns for the modern seamstress that are simple to construct but contain that “wow! look at that” factor. At least I hope they do! Outside of designing patterns I am a passionate DIY-er. I love to create AND re-create items for my home, to wear or simple fun gifts! You can find my daily projects, photography, crafty ideas and musing on the Brassy Apple Blog!
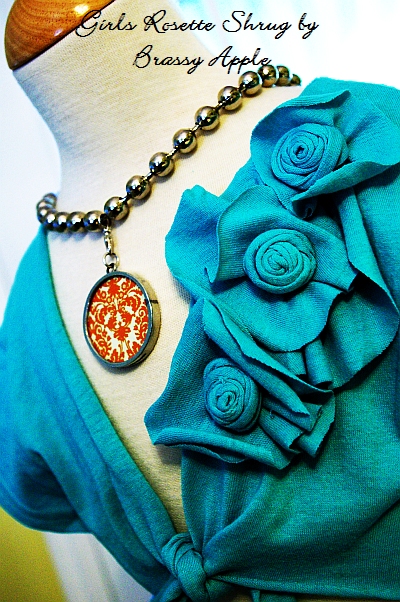
Materials needed:
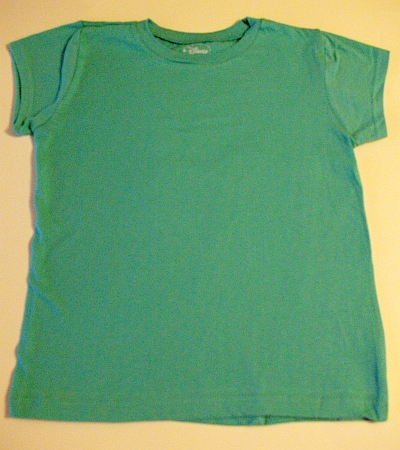
T-shirt (long or short sleeved)
Scissors
Fabric Marker (optional)
Measuring Tape
Needle & thread
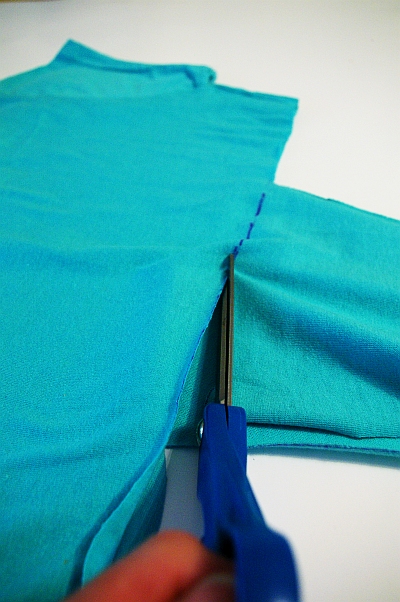
Step 1: Lay the tshirt flat. Cut up the center of the front only cutting through the top layer.

Step 2: Measure 3″ in from the center line you just cut, 2″ down from the bottom of the arm sleeve and 1″ in from the center line at the bottom hem. Connect from the markings to create lines as shown below.

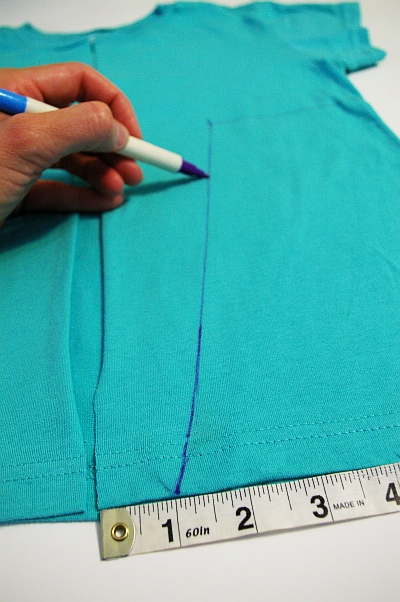
Repeat measurements and markings on the other side.
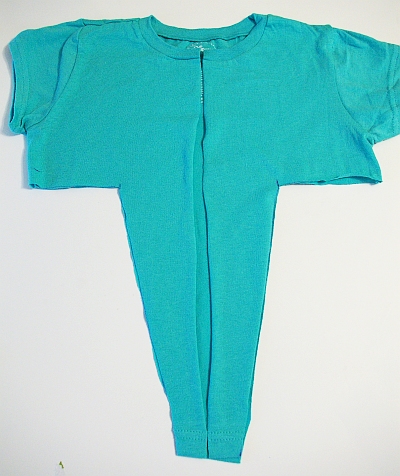

Step 6: Turn the tshirt back over to the front. Draw a diagonal line from the edge of the neckline to the center or middle about where the back hemline has been cut. See picture below.
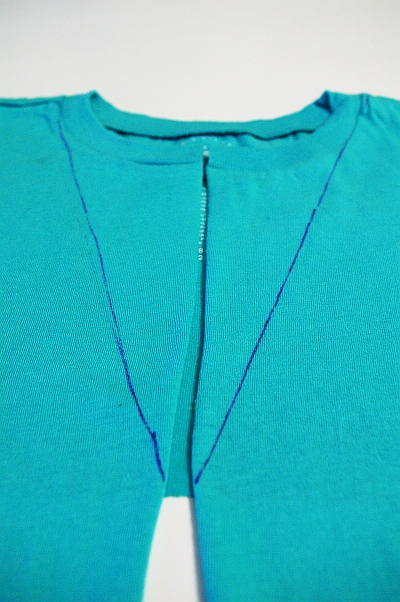
Repeat the opposite side. Cut along the line and around the back of the neckline hem. The basic shape of the shrug has now been created!
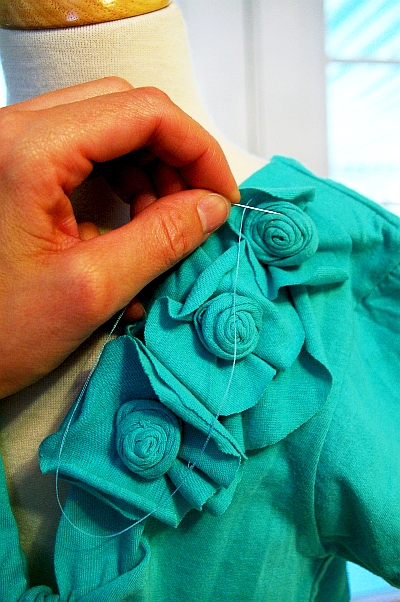
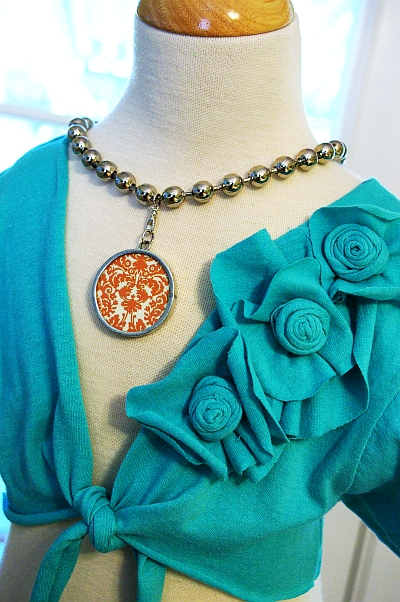
Step 7: Embellish!!! Using the extra tshirt fabric that was cut away, embellish the shrug by creating rosettes, layered flowers, etc. Handstitch onto the shrug in any pattern/design/quantity you like!
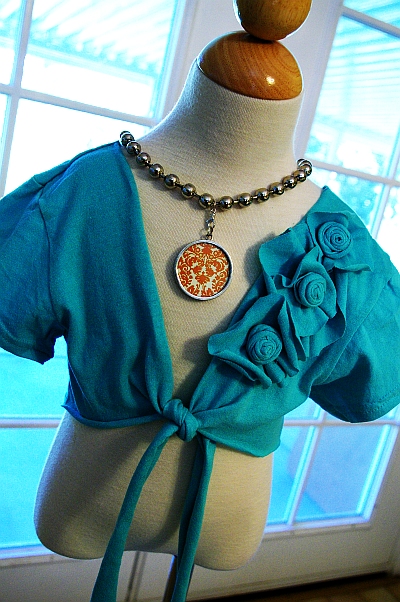
Slip it on your little cutie, tie it on the front and wear it out! (this design can easily be made in any size! Just increase the length of the measurement under the arm from step 2 as needed)
and if there are any scraps left over, why not create a matching hair accessory?


I can’t wait to get home. I am making this tonight! Thank you!!!
sooooo awesome! start right now with this awesome idea!!! Only I am gonna use an old wool sweater i think….
woow this is so simple and great!!!!
This is awesome! I must make this!
I bet you are glad he doesn’t call you “Brassy.”
You are very talented!
That’s SO pretty!!! I love the beautiful flower embellishments, but it would be nice just plain, too.
I linked to your tutorial over at Craft Gossip Sewing:
http://sewing.craftgossip.com/tutorial-girls-rosette-shrug/2010/10/06/
–Anne
Wow! This is amazing! I am going to have to try this one out! This would be a fun activity for young girls too!
Darling!! I’m going to have to head out to get a clearance T and get started. Thanks!
OOOOOhhhhhh this is beautiful, I’m making it right now…..!! I know how to do the rosettes, are the layered flowers underneath just material cut out and layered on top of each other??? Silly question I know 🙂 Thanks so much for this wonderful tutorial!!
thanks for all the positive comments! I hope you create some and then please share your photos with me! 🙂
Angie – to answer your question I create a rosette and then layered some different sized circles underneath! EAsy peasy but I love the look!
Genius! Thank you so much for a wonderful tutorial!
saffiertje – I would LOVE to see it done up in the wool sweater! 🙂
gorgeous – love the idea. Will sift through my wardrobe right now and start cutting and sewing!
Gorgeous! Love it! Thanks for the tut!
love it. But does any one have a link on how to make the roses??
You are the best! I love this shrug mainly because it is so easy cheesy I think I will make two this weekend. I would definitely like to know how to make the flowers too.
I have two little girls so this will be extremely useful to me. Thanks so much for the tute!
I love this! Looks so easy. Thanks for the tutorial.
perfect..
Absolutely gorgeous, thank you!
I don’t suppose there’s a tutorial for that great necklace? Love that, too!!
Blessings,
Erin
http://www.homeswheremyheartis.blogspot.com
Çok güzel olmuş.Harika bir fikir.
Oh my gosh I love this so, SO much! I can’t wait to make one! I’ll be linking as well, thanks tons!
Wonderful..
So cute and easy! I just made two (minus the flowers) and did a lettuce edge all the way around on my serger. I’ll let my girls pick out some fabric for me to make yo-yos with for decoration. I’ll be trying this with a long sleeve shirt for sure. Thanks for the tute!
LOVE the tute, but I L.O.V.E the necklace!! Tell us about that!!!!