
Hello everyone! I am Sachiko from Tea Rose Home. When Kari asked me to be a guest blogger, I was so excited I squealed with JOY.

Reversible Handbag Tutorial
I am going to share a tutorial to make a reversible handbag today, it is all straight cut, if you have rotary cutting tools, you can finish cutting all the necessary parts in the blink of an eye. If you don’t, you can measure it out directly on the fabric and cut by hand.
Sew using 1/4″ seam allowance, unless directed otherwise.
Supplies
Fabric 1 (your main fabric) 1/2 a yard.
Fabric 2 (inside fabric) 1 yard. (Includes extra for bias tape)
Canvas (this will go between the fabric 1 and 2 to give body to the bag) (1/2 yard)
matching thread
How to make
1. Cut all the necessary parts.
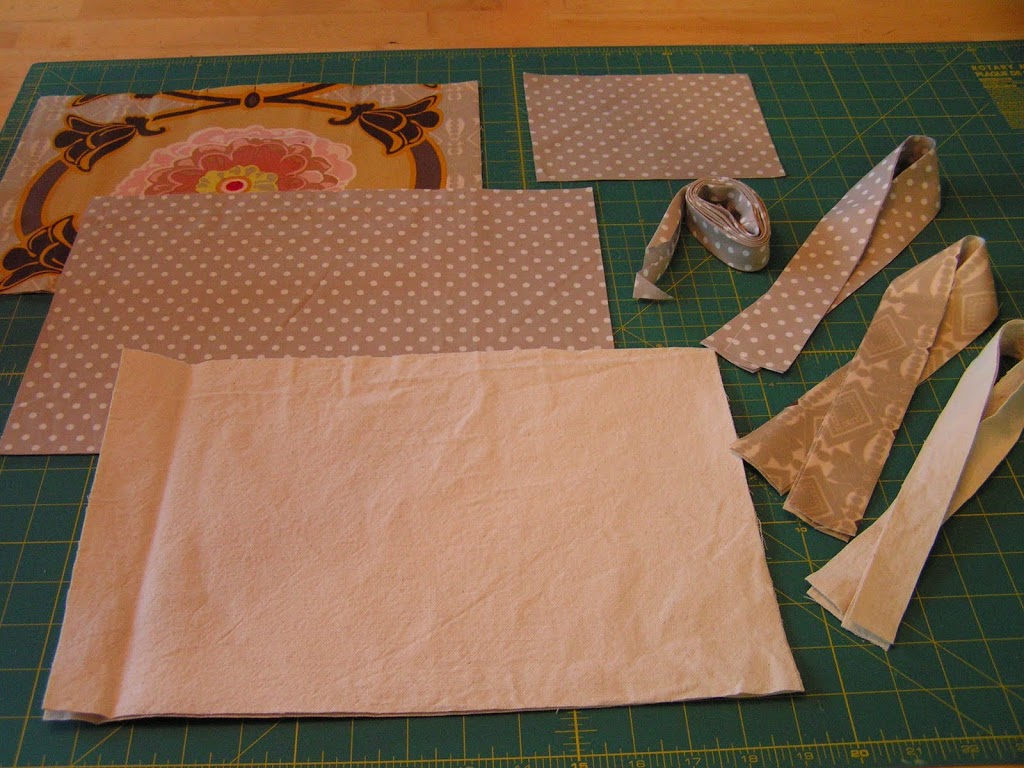
From fabric 1 you will cut out: 2- 9 1/2″T x 14″W pieces for the bag, 2- 1 1/2″W X 20″L pieces for the handles.
From fabric 2: same as fabric 1, plus 5 1/2″T X 7″W for the pocket. For the bias, if you are not familiar with making it, check here.
From canvas you will cut out: 2- 9 1/2″T X 14″W for the bag, 2- 3/4″ x 19″L pieces for the handles.
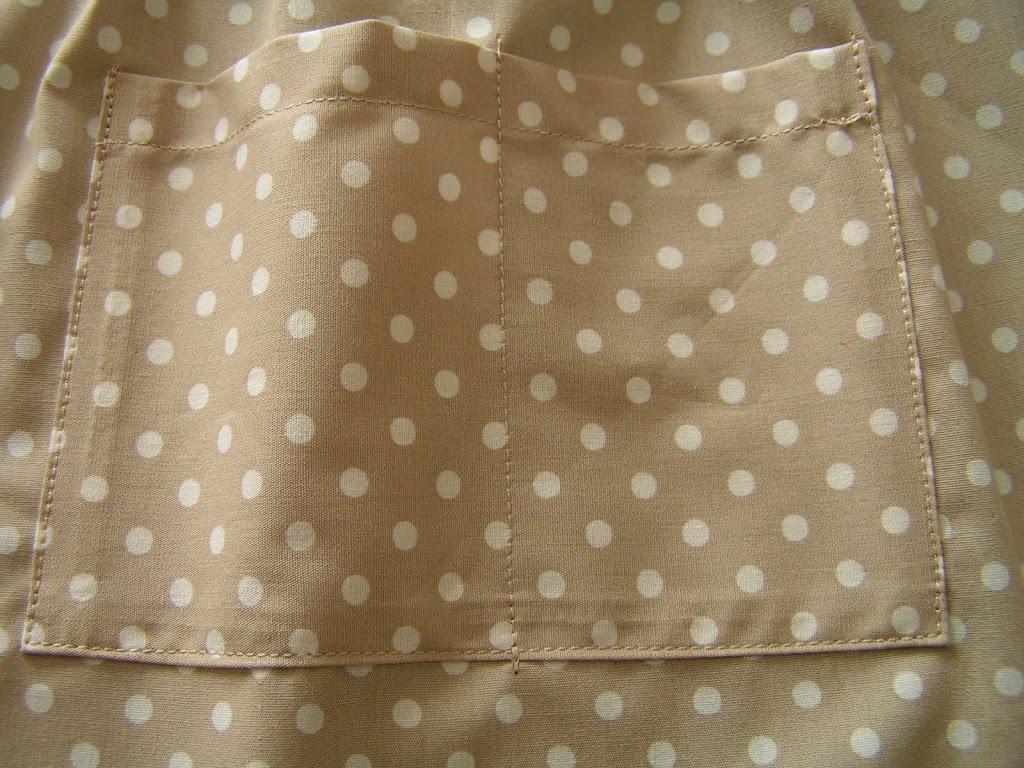
2. Make the pocket.
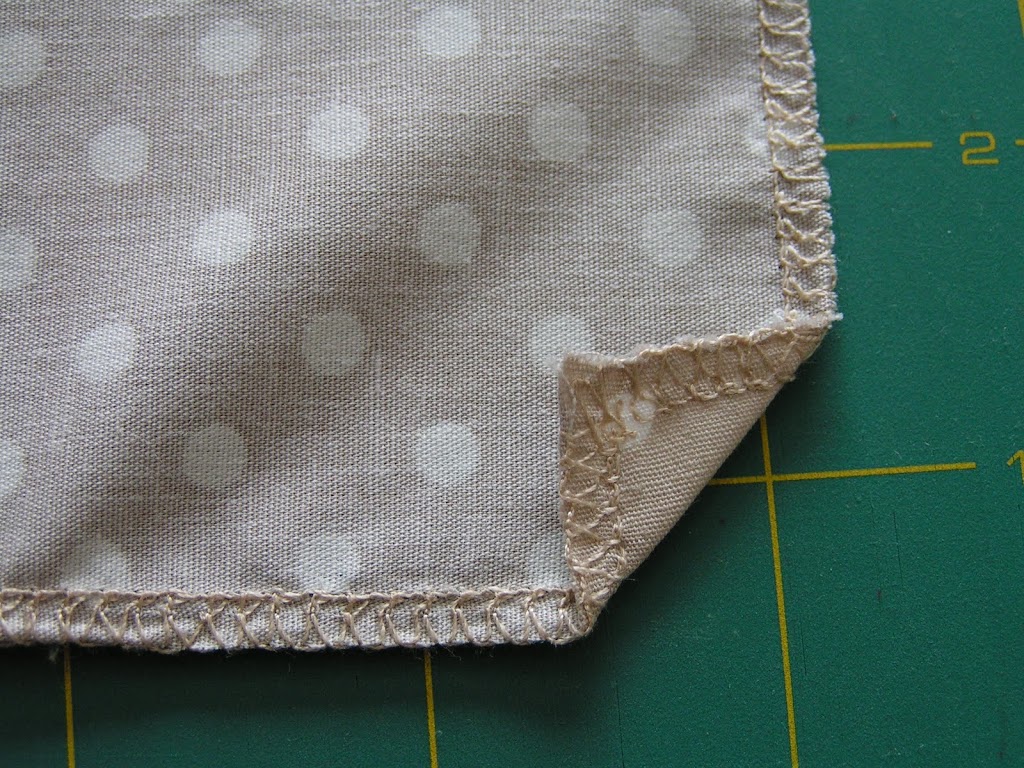
a. Use a zig-zag stitch around the edges of the fabric to prevent fraying.
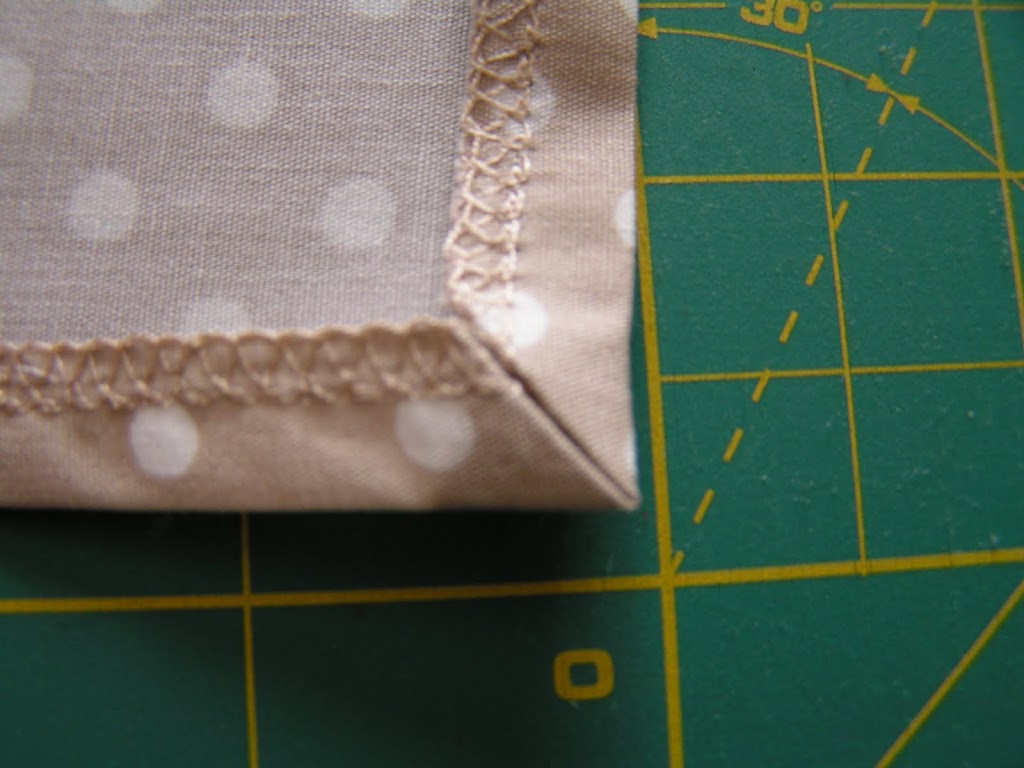
b. Fold the corners, then fold 1/4″of the sides and the bottom. This way the corner is mitered and doesn’t get too thick and is easier to sew.
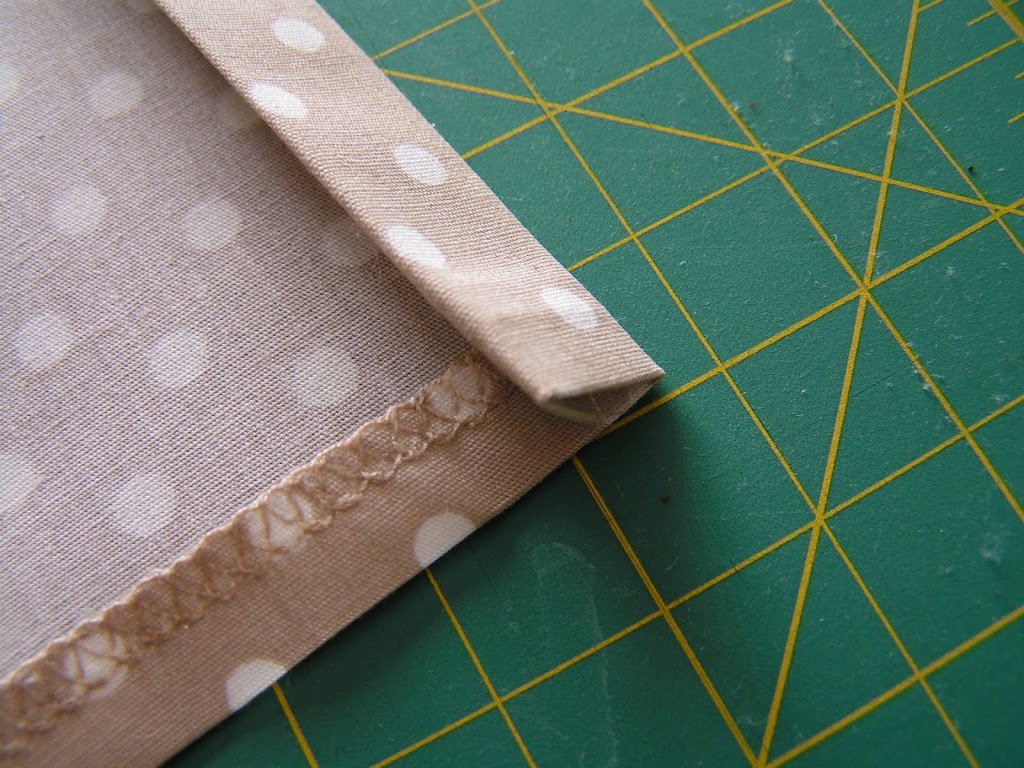
c. Fold the top edge twice, sew 1/8″ from the folded edge.
3. Sew the finished pocket onto fabric 2. Fold the bag fabric and the pocket in half and match up the folded line(so, the pocket is in the middle, and measure 2 1/2″ from the top. Line the pocket with the 2 1/2″ line pin. Then stitch the pocket to the bag. I sew a line on the pocket 2 3/4″ from the right to divide the pocket.
4. Lay down fabric 2, measure and mark to make pleats. The measurements are like this:
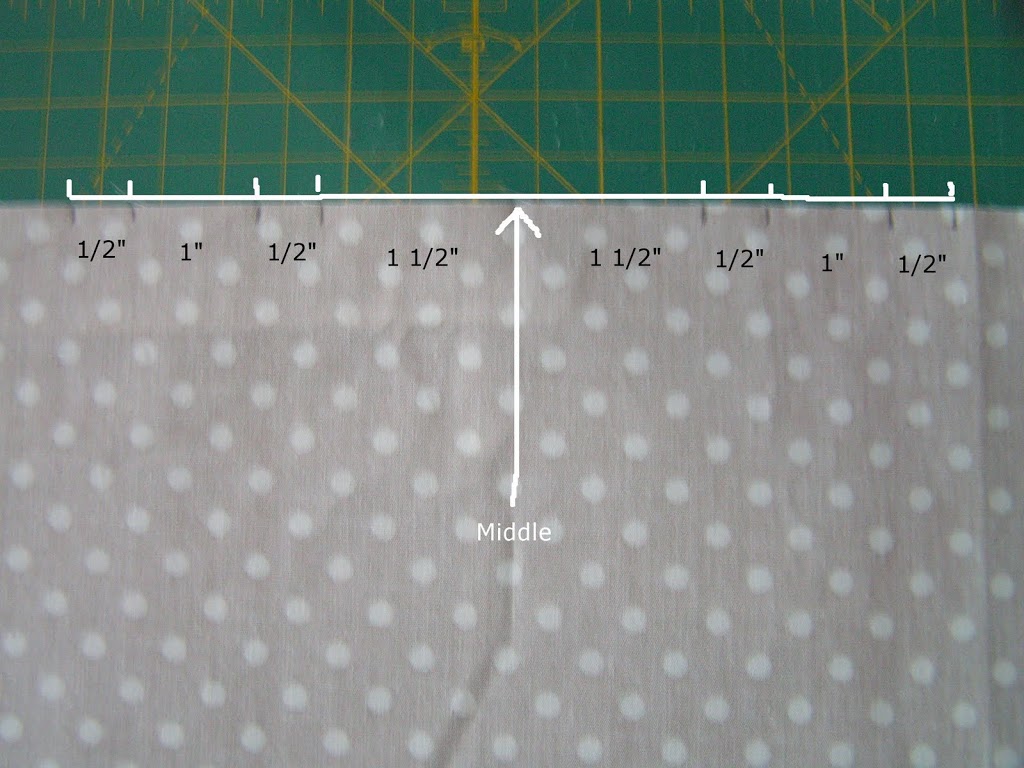
Lay canvas on top of fabric 1, and do the same.
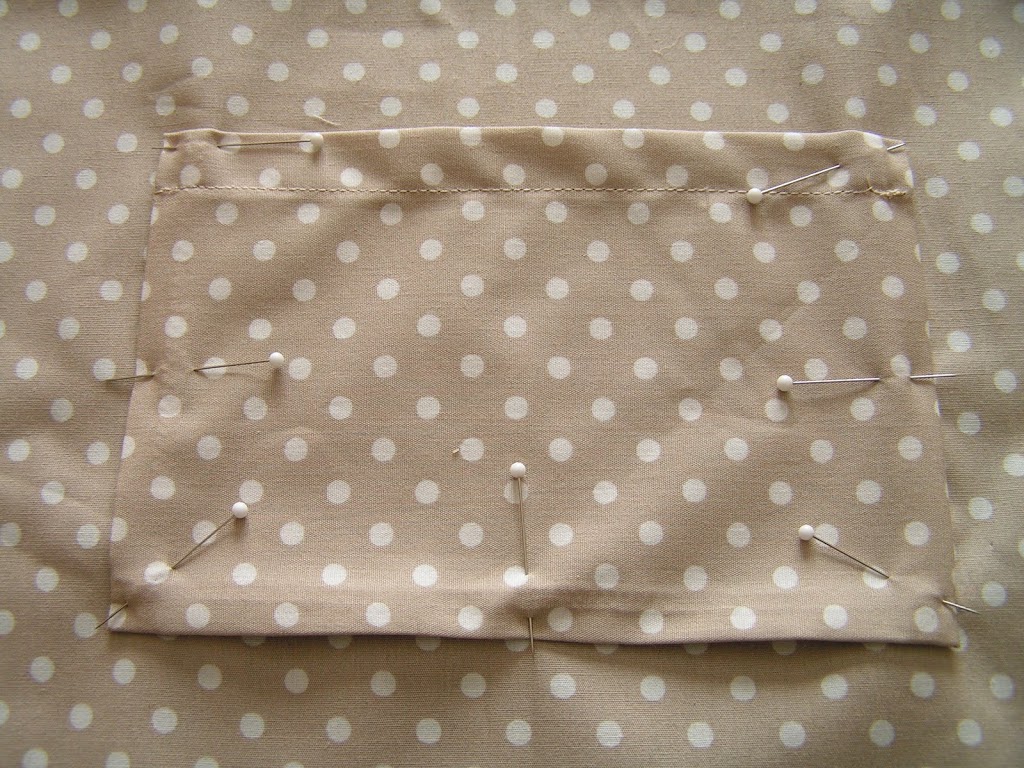
5. Using big hand stitches, sew the pleats to hold them in place. Do the same to the rest of the other pieces too.

6. Put the right sides together of fabric 2 and pin. Sew around the edge. Do the same to fabric 1 that has the canvas attached.

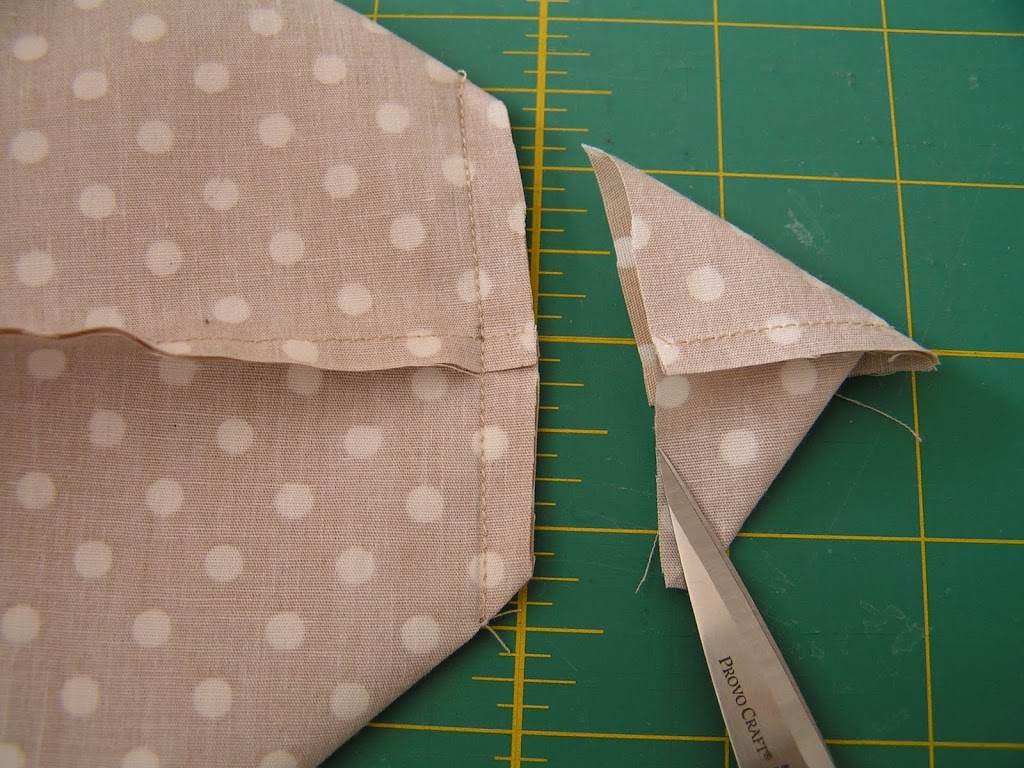
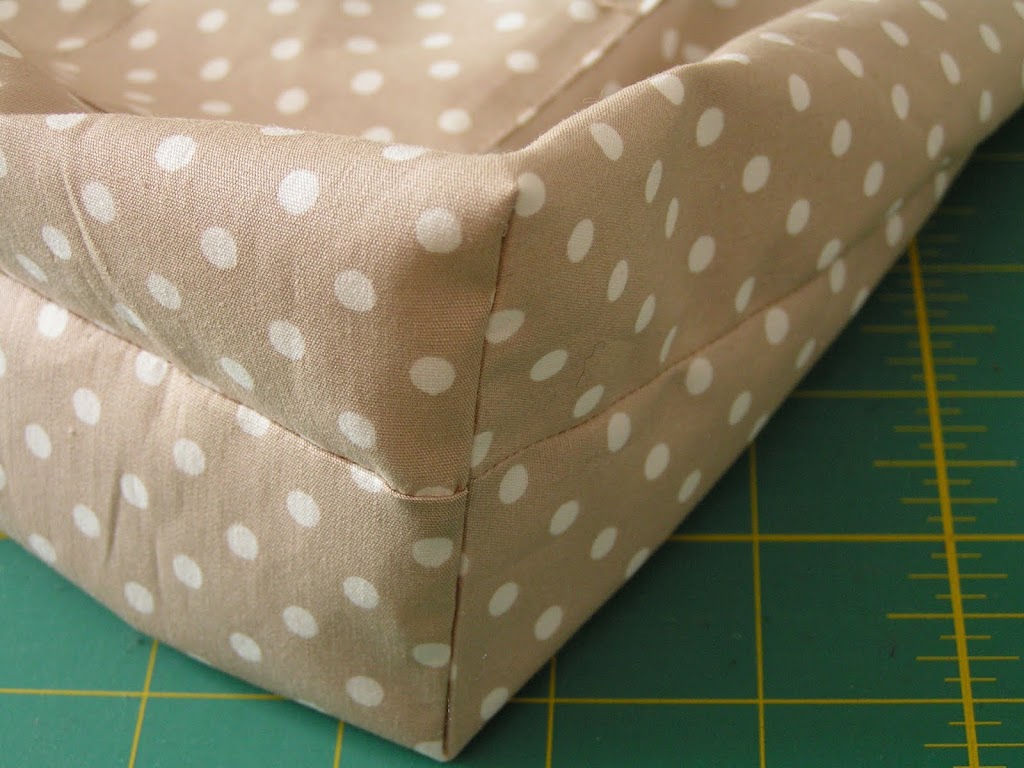
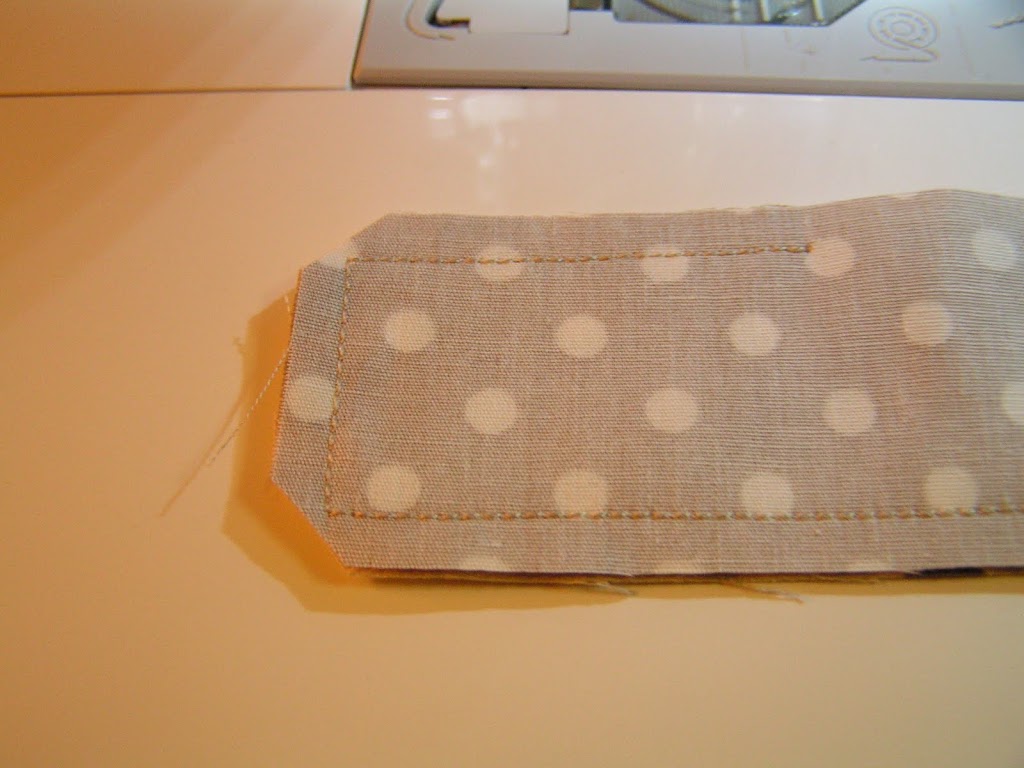
7. To square the bottom of the side, bring the seam together (The sure the seam lines up.) Fold and then as in the picture draw a 3″ line and sew on top of the line. Then cut off the fabric 1/4″ away from the line.

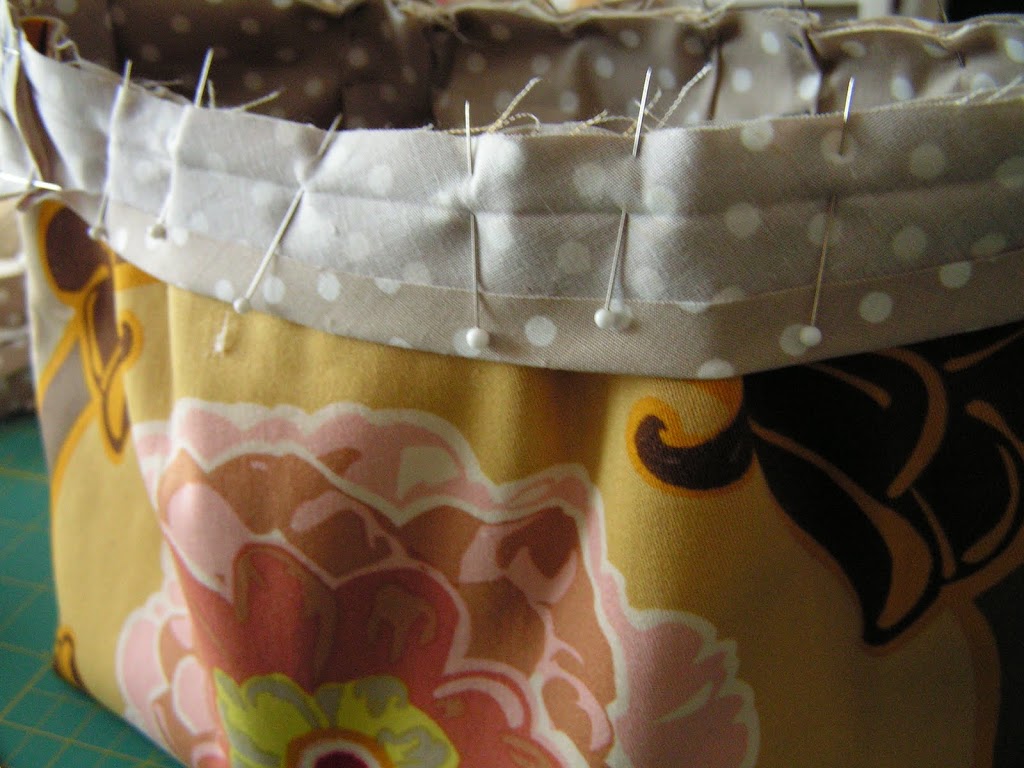
9. Turn fabric 2 inside-out. Insert into the the bag made out of fabric 1. Then pin the bias tape all around the edges of the top. Sew around the folded line.
10. Fold the bias tape around to the inside of the bag. Cover the raw edges, pin and sew. You can use a slip stitch too.

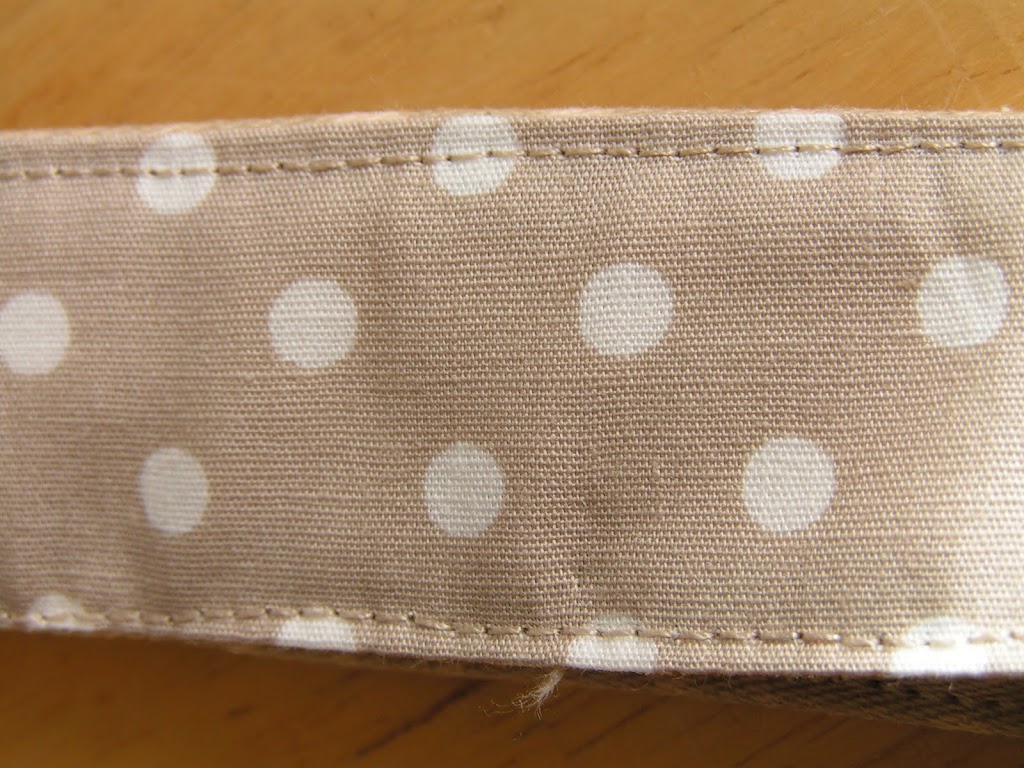
11. Make the handle.
a. Lay fabric 1 and 2 right sides together. Sew around the edges leaving a 16″ opening centered on one side.
b. Snip the corners.
c. Turn the handle inside out and fold the open edges about a 1/4″ inside and iron. This process will make it easier for later. Slip in the canvas strip. For the corners use a sharp object to push them in place and flatten.

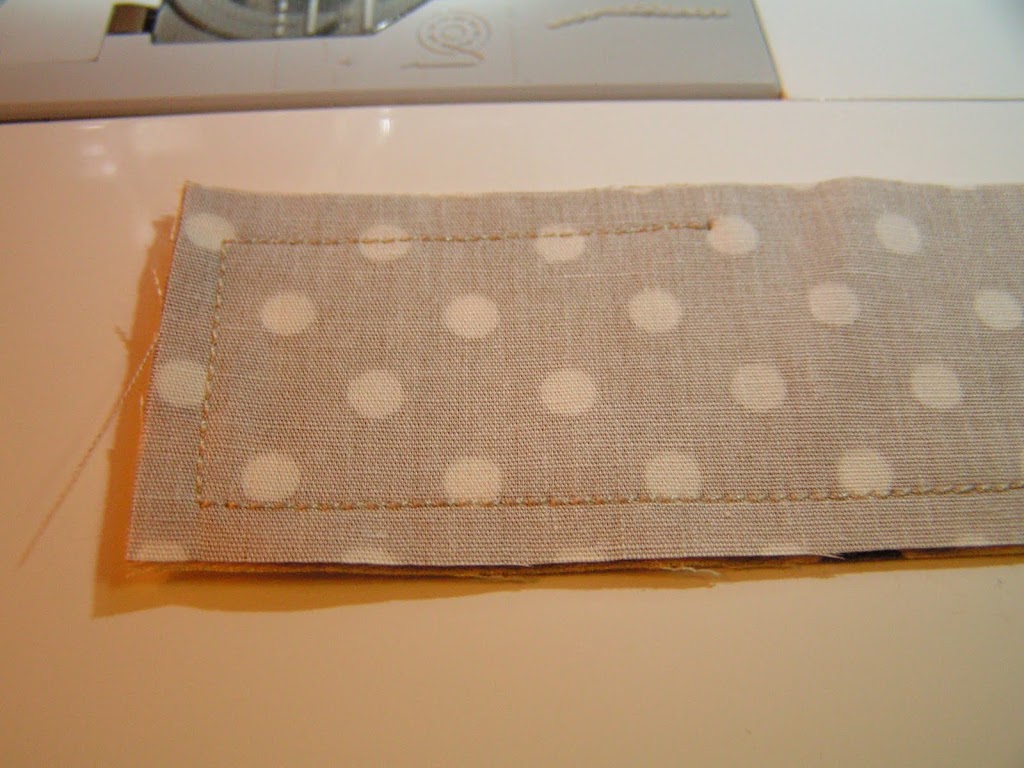
d. Pin the opening and sew 1/8″ from the edge all around the handle strap.
12. Attach handles to the bag approximately 2″ from the side.

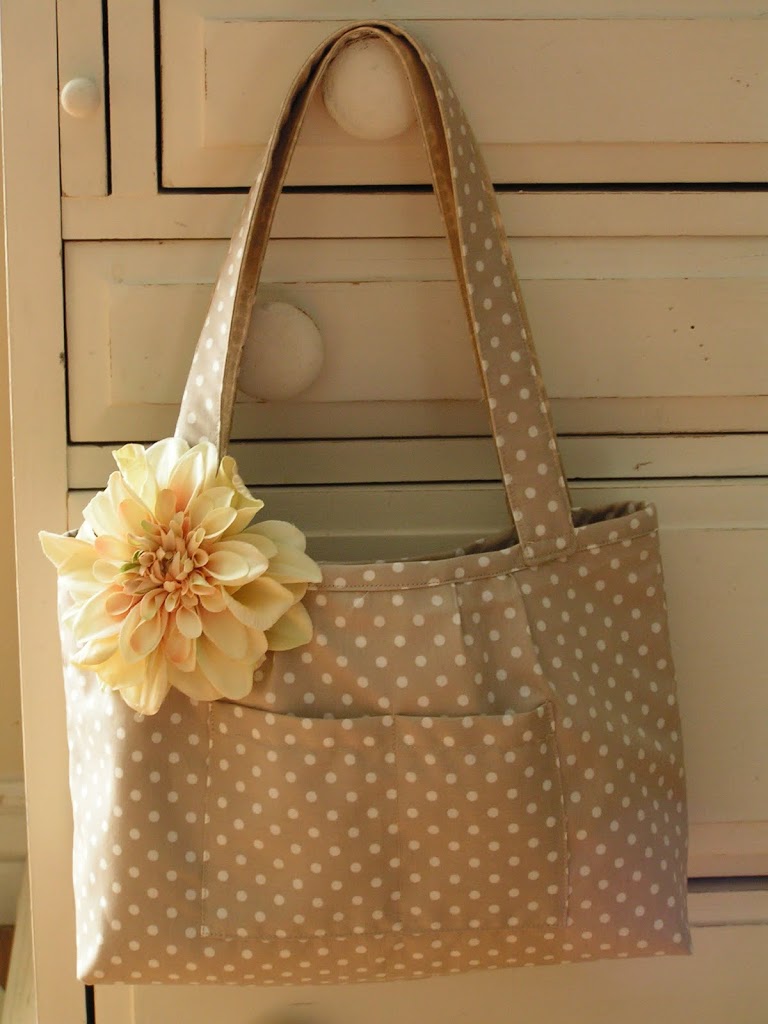
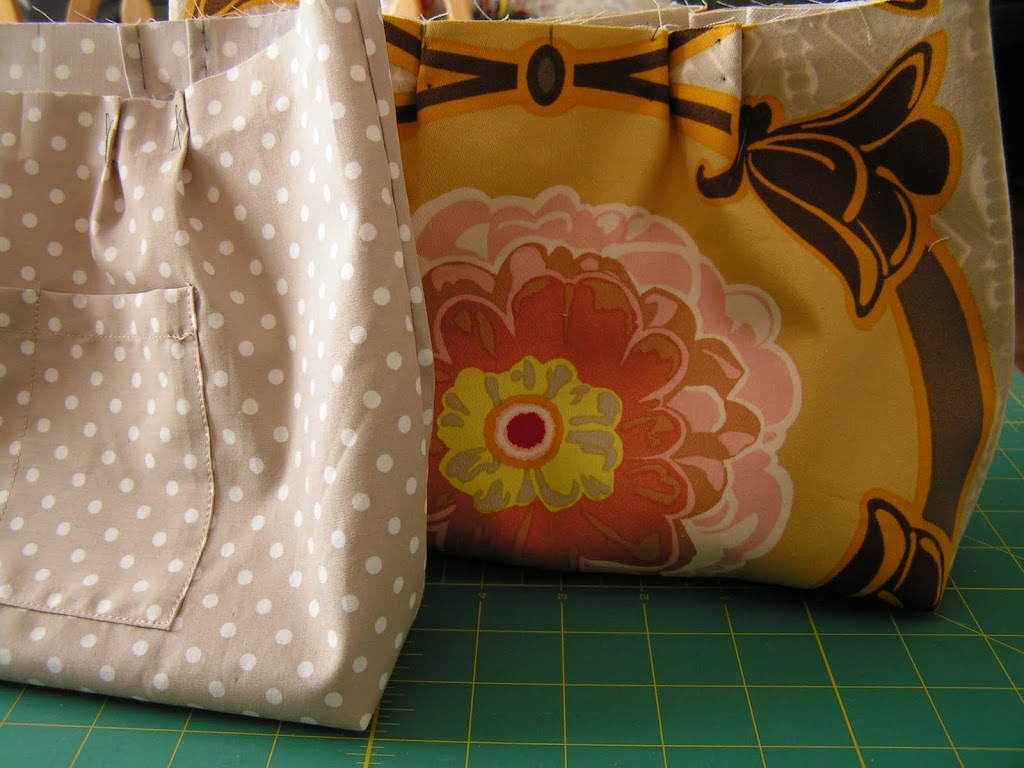
Now you have 2 beautiful handbags!

If you want a magnet closure, you can with this bag too. You just add the magnet before step 9. A little tip, to pick out fabrics to make this bag, quilt shops carry all sorts of pretty fabrics, also check out Jo Anne’s home decorating fabric section. When you combine larger patterns with smaller patterns you can recreate a similar look to this bag.
Sachiko thank you so much for sharing your amazing bag and sewing skills with us today!
Make sure to check out Tea Rose Home for many patterns!


Great tutorial, beautiful fabrics!
What a cute bag! I love Sachiko! She is so great.
Sashiko does it again!!!
Gorgeous!!
Very cute project, thanks Sachiko!
What a talented woman!
This is SO cute, Sachiko! You’ve done it again!! :o)
Wow, that is just beauritufl!! I love the print on the fabric, and how it goes w/the purse.
Love it! It is so darling. I want to make one now! Thanks!!
She is such a creative person, and I love everything she does! 🙂
~Kim
Oh wow! Fabulous tutorial. Darling project.
Great job, Sachiko!
Sachiko! I always enjoy your creative mind! This handbag is super cute and I love the fact that is reversible. The fabrics are beautiful. Thanks so much for sharing! I follow your blog faithfully but I have never been to U create before. I LIKE this site too!
AmAzInG!! Thanks again for sharing your genius ideas with us!!
Love the fabrics! Great choice. The flower compliments the polka dot side great! I love your blog, keep creating inspiring tutorials!!!!!!!!!!!!!!!!!!!!!!!!!!!!!
Wow! Very cute bag. The fabric possibilities are endless! Thanks for sharing.
Thanx for this awesome tutorial!!!!
Beautiful bag! And I love your fabric choice!!
I posted a link to your tutorial on Craft Gossip Sewing:
http://sewing.craftgossip.com/tutorial-sew-a-reversible-handbag/2010/02/13/
–Anne
Wow, this is almost an exact copy of the purse directions I posted in June 2009- just a quick change of the handles and a relocations of the pleats- this tutorial has much better directions then my post though!
This is super cute! Thanks so much, I’ll be linking. And hopefully making one for myself!
great idea, easy and beatiful, and tutorial es very clear
Sew gorgeous!
Thank you very much, this is just what I need. Such a beautiful bag. Wonderful photos and clear instructions. So again, thank you. Greetings from Germany
What a great tutorial and such an inspiration.
I cant wait to make this bag I LOVE it!
Lovely bag and a great tutorial. The directions are for a newbie like me.
Love your colors. Nice to be a new follower. Thank you.