Hello Ucreate readers! I am thrilled beyond belief that Kari let me guest post here today! I have a blog called Young and Crafty where I share my craft adventures and misadventures!
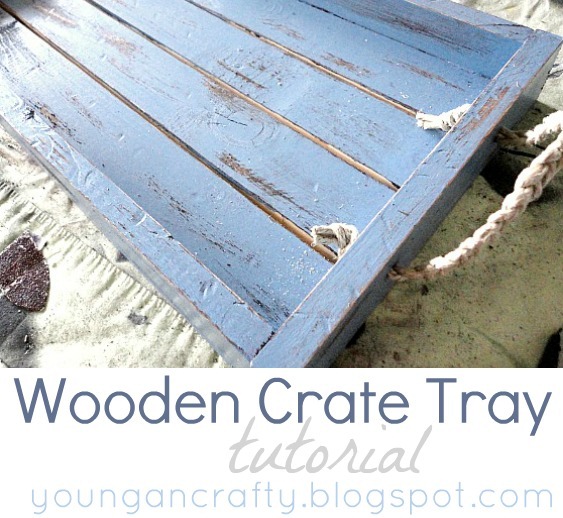
Today I would like to share a tutorial on how to make your very own wooden tray!

A few months back I decided I was over our current coffee table situation.
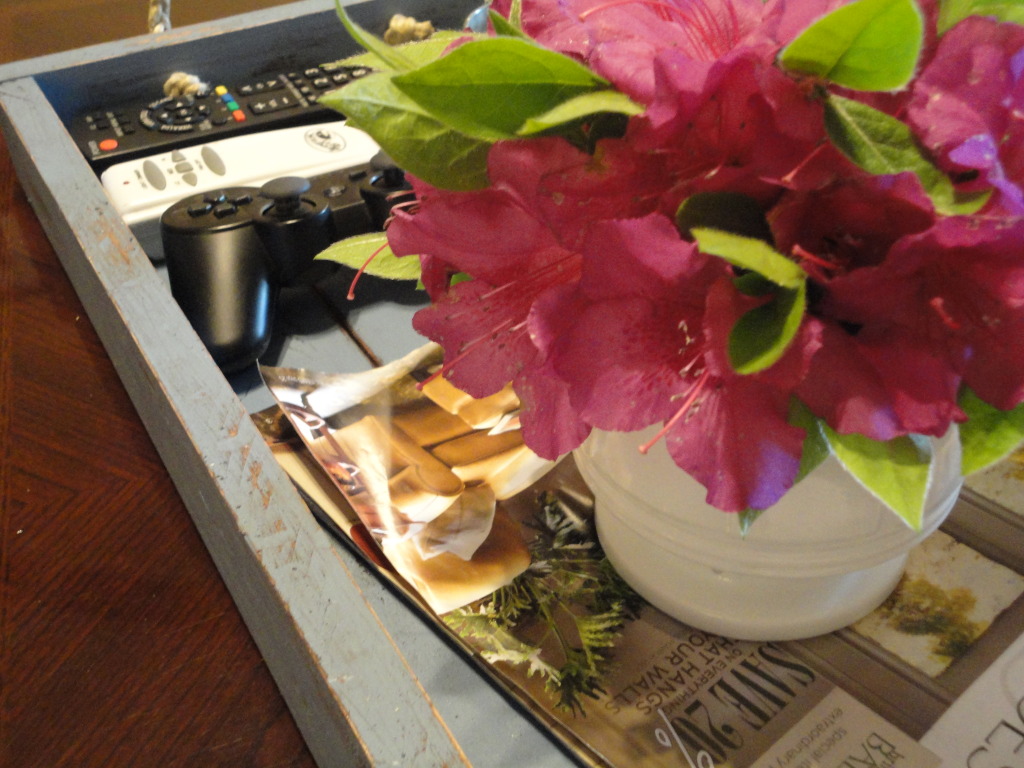
It looked a little something like this:
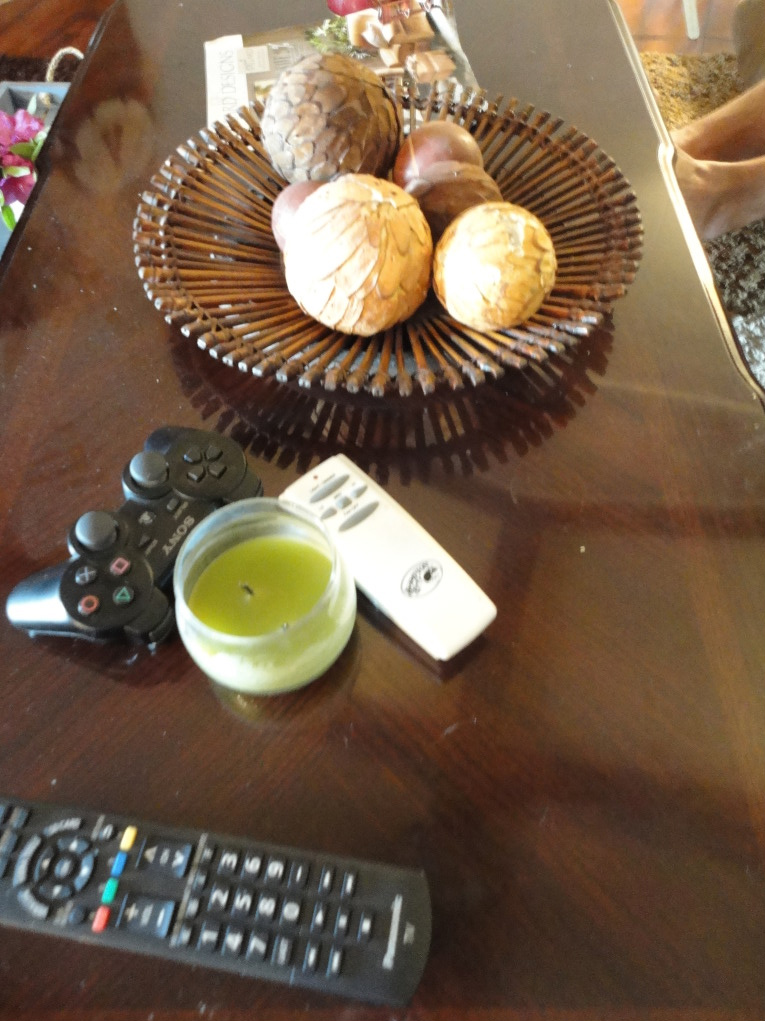
Remotes scattered everywhere and those decorative balls were in pretty bad shape. A certain little weenie dog had gotten a hold of one, oh, about 3 years ago.
So a month or so ago I was shopping around TJMaxx and found a blue crate looking tray that I absolutely loved. I picked it up, put it down, picked it up again, walked around with it for awhile and then put it down again. It was only $15 but I just KNEW I could make my own!
Supplies Needed:
2- 1×2 boards
Stain
Paint
Jute/Twine
(I used our miter saw and nail gun for this but you could easily use a miter box and hammer)
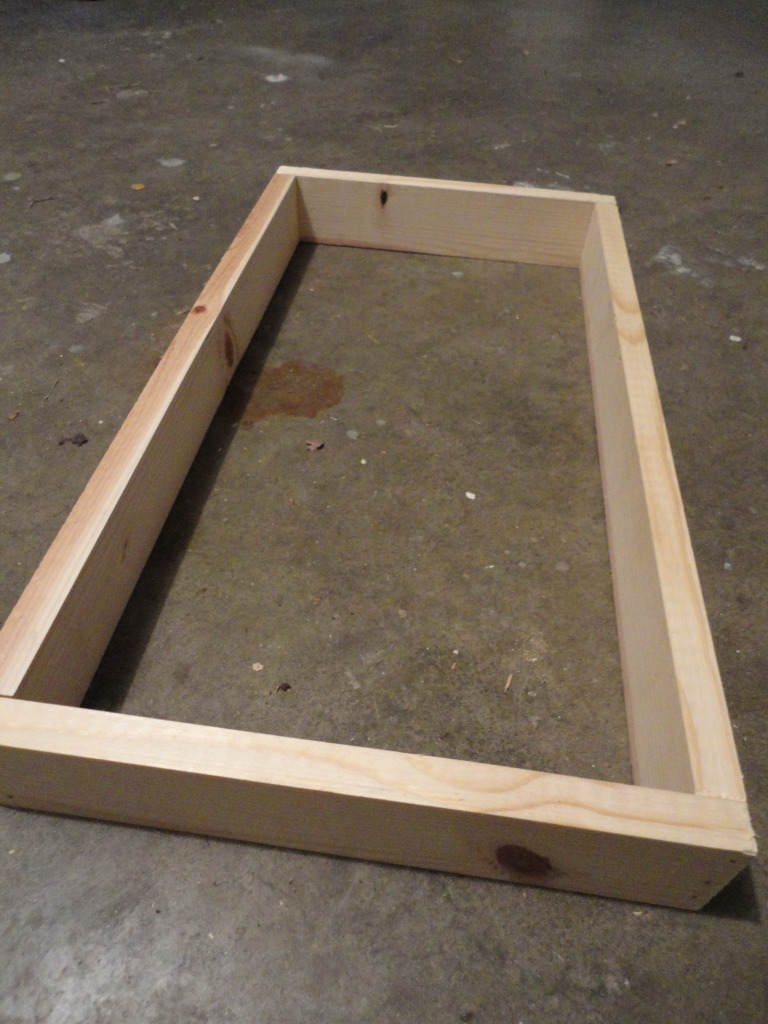
I cut the boards for the frame first. The outside is 24 in and the inside is 14 in. No I didn’t angle the corners, just butted them up against each other!
I then cut the 2 inside, outside pieces. They were right at 22 in. I nailed them in first.
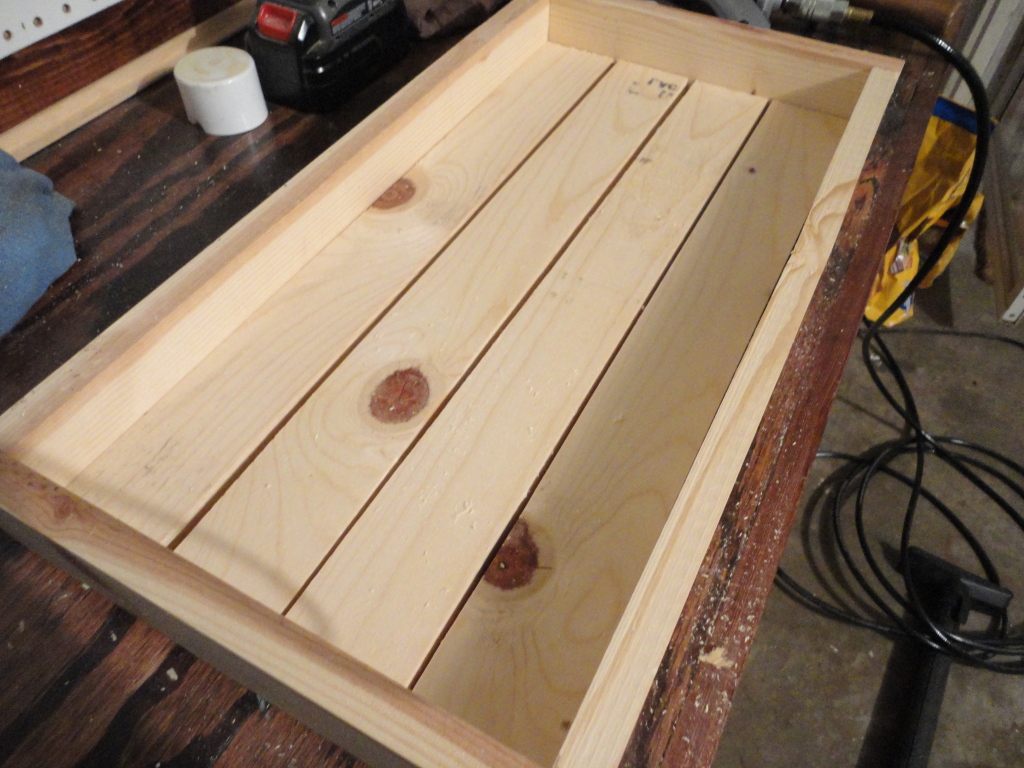
Then I took the inside, inside pieces and placed them where there was about the same space between them all. No measuring here, all eyeballing. My forte’!
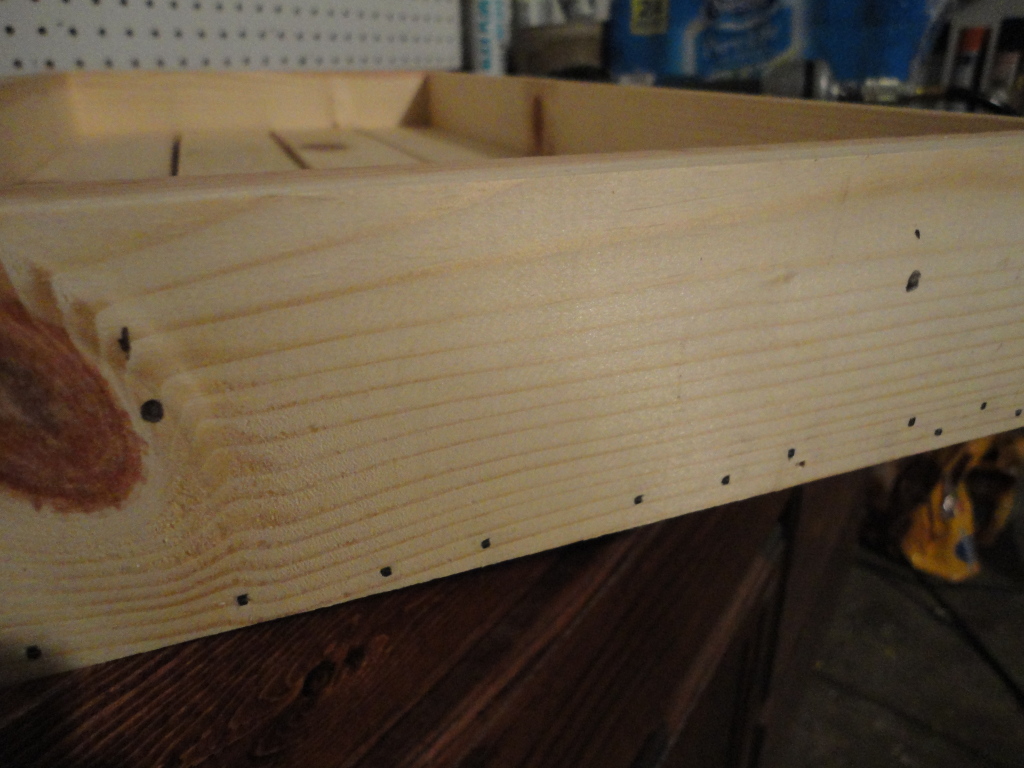
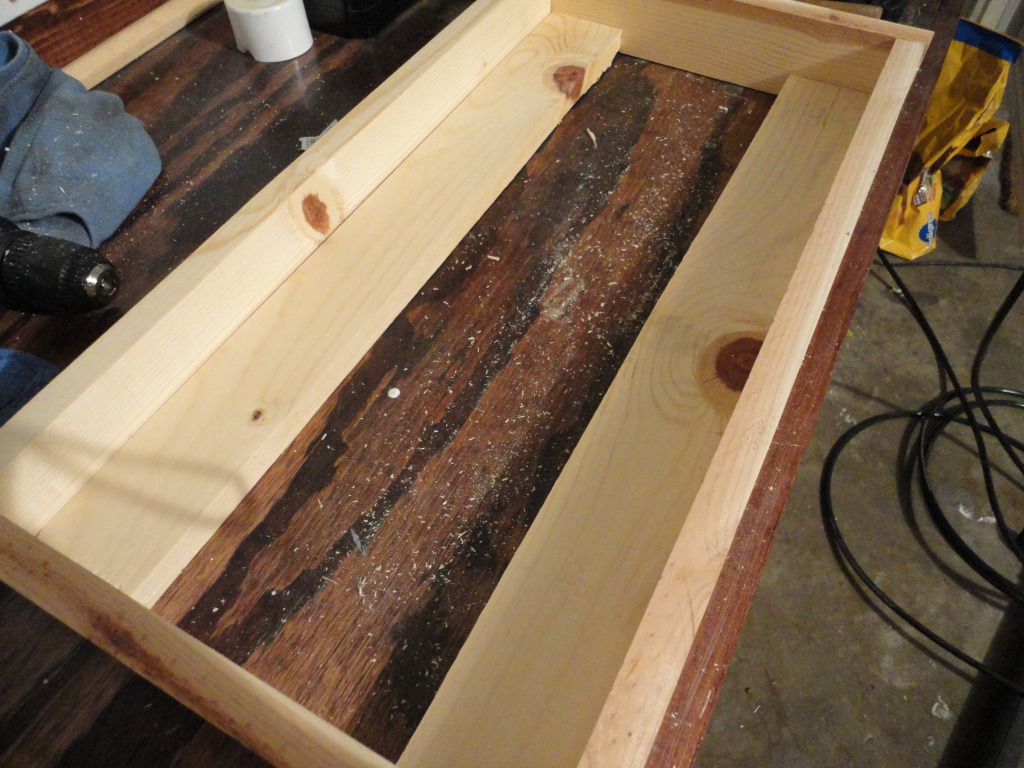
Here you can see all the nails. I didn’t worry about filling them in because I knew I would be painting. I also have to pencil marks to drill holes for the handles. Do this on both ends.
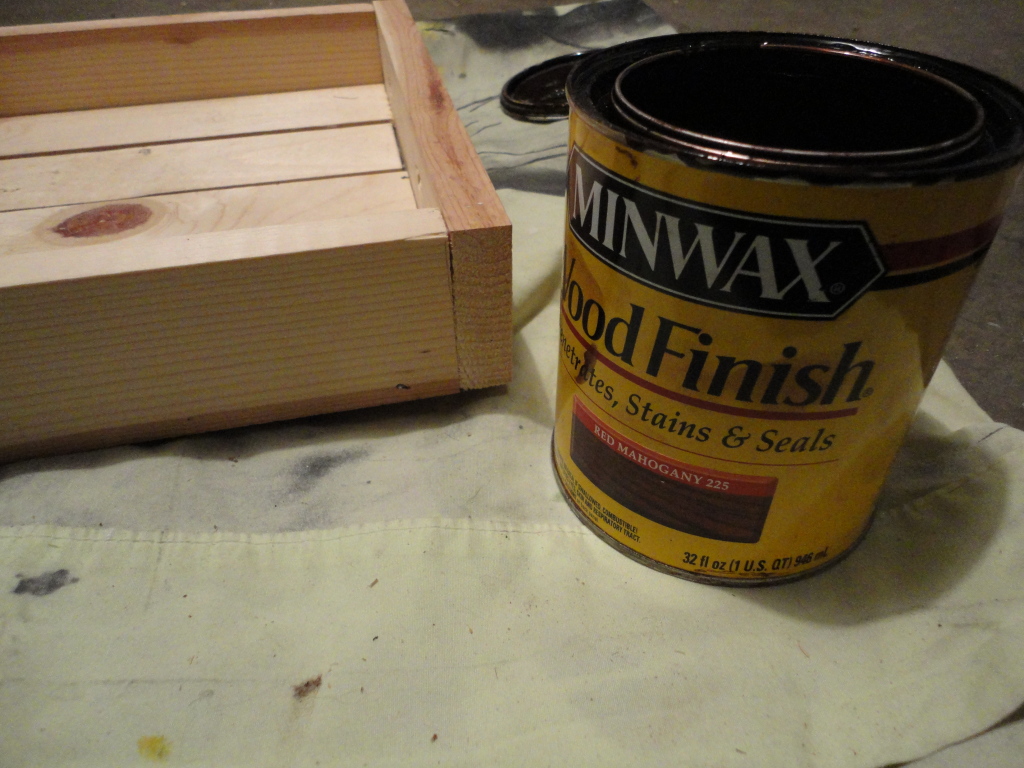
I then took my favorite color stain, Red Mahogany, and gave the whole tray one coat.

You’ll see the reason for doing this a little later!
It was looking a little too perfect. I wanted this tray to look old and weathered, not like I made it that day!

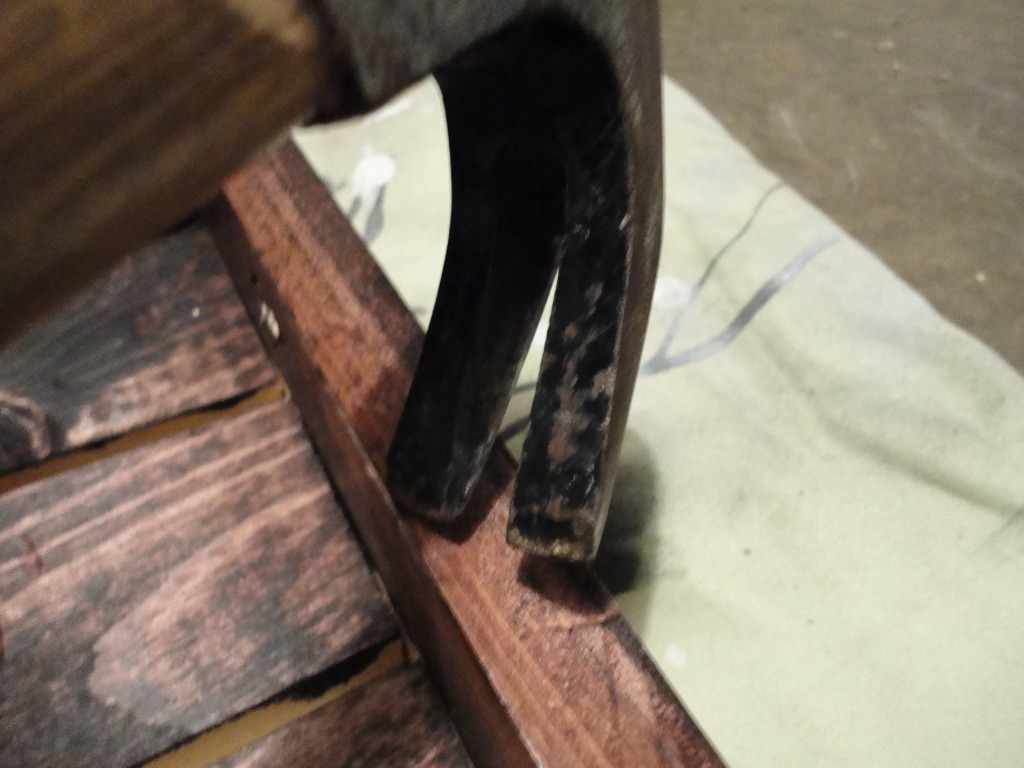
Take both sides of your hammer and start banging it up.
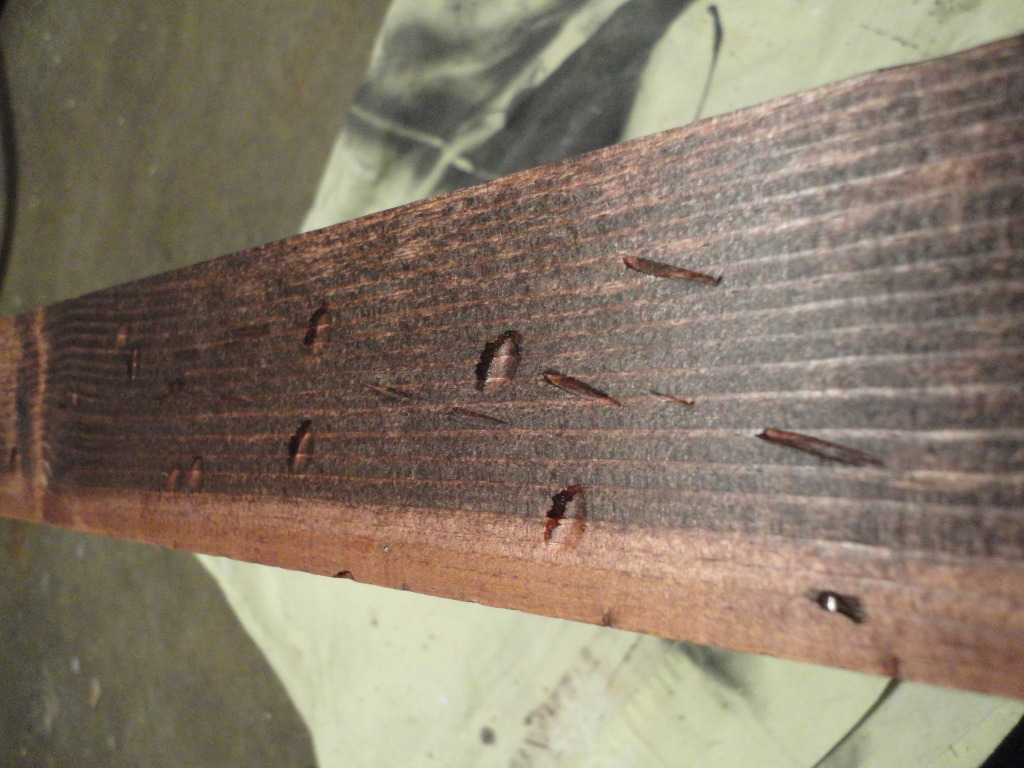
At this point, start questioning if you are doing this right and just hope you are.

I then painted the tray with Behr Winter Lake (the same color as this chair). I did NOT wait for the stain to dry. I wanted some of it to come through to make it look even more worn.
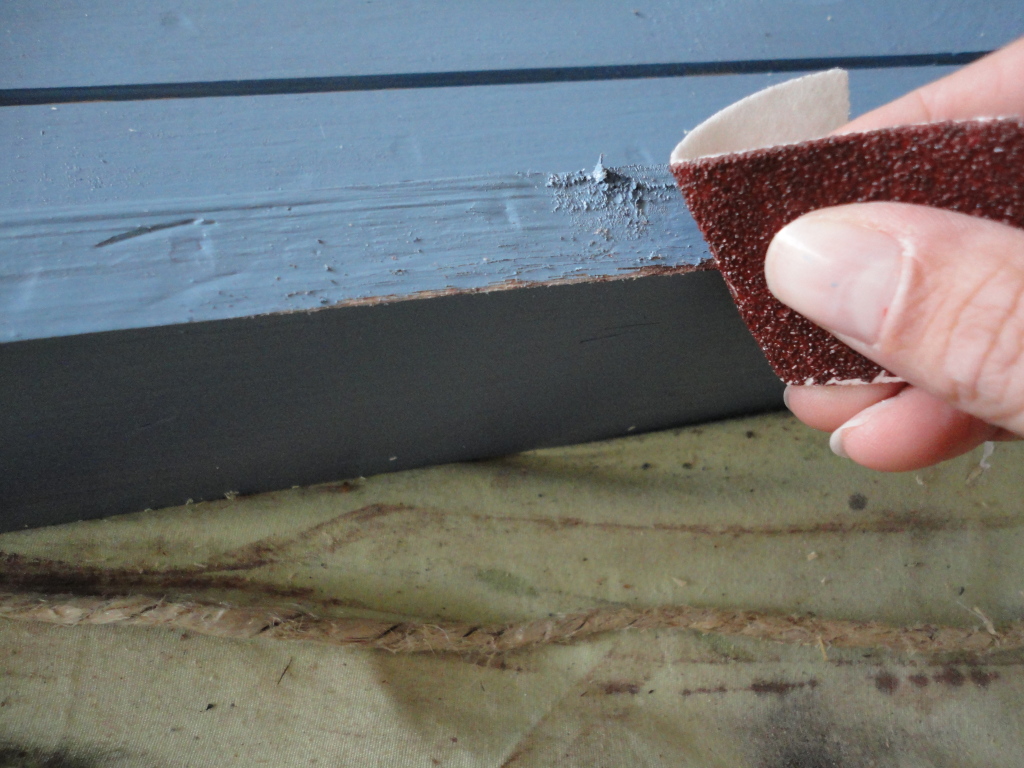
As bad as I wanted to start sanding right away, I did let the paint dry over night. I then started sanding the edges and just “roughing” it up some more. You can see here why I stained first. The dark stain will show through and if I hadn’t stained it would show through the light color of the wood.

Here it is after quite a bit of sanding.
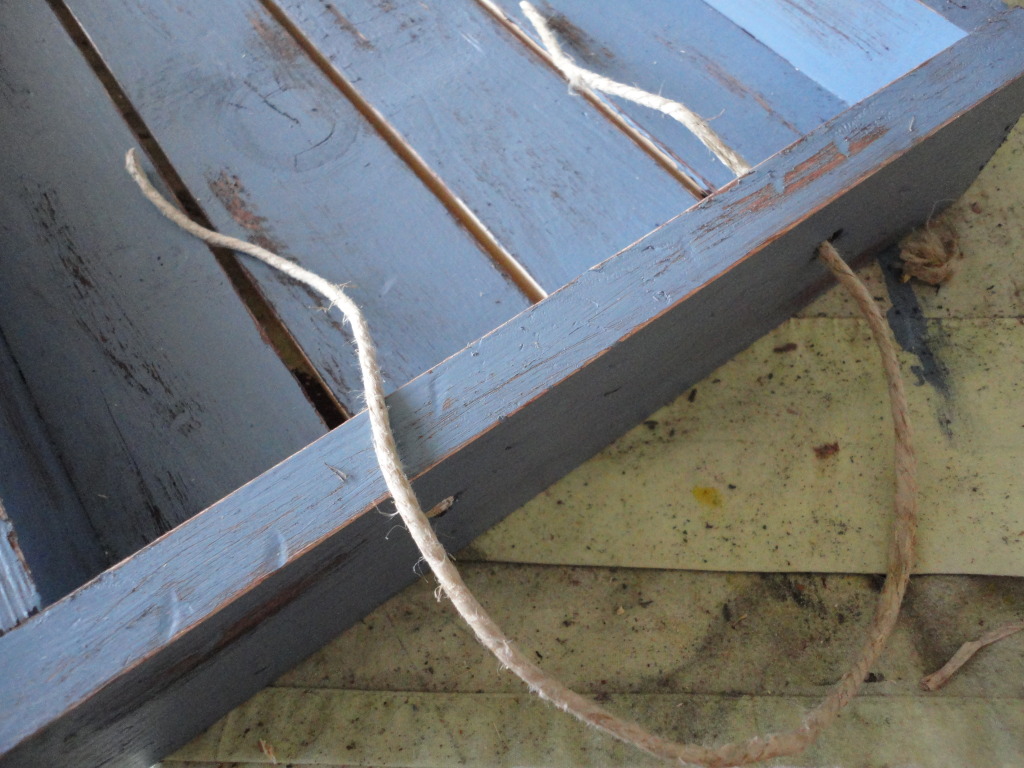
Now it’s time to attach the handle. I took one strand of jute and made sure I cut it plenty long so that I would have plenty of room to make a knot.
Then use that strand to cut 2 more strands the same length. Pull all 3 strands through one hole.
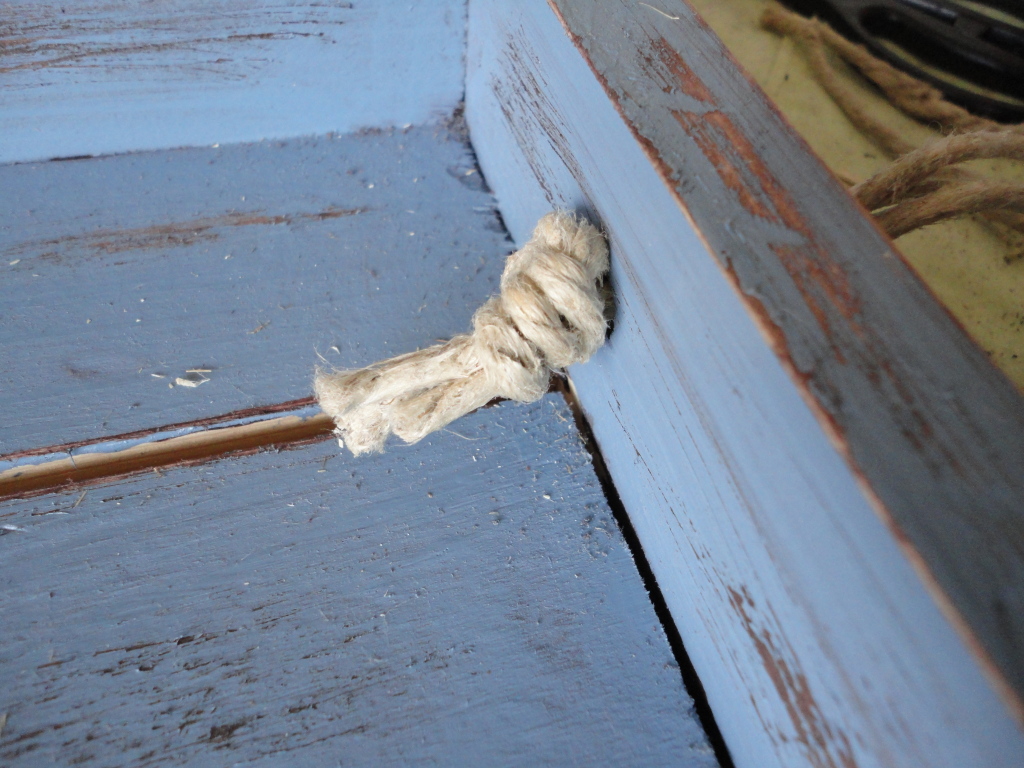
Tie your knot in that end.
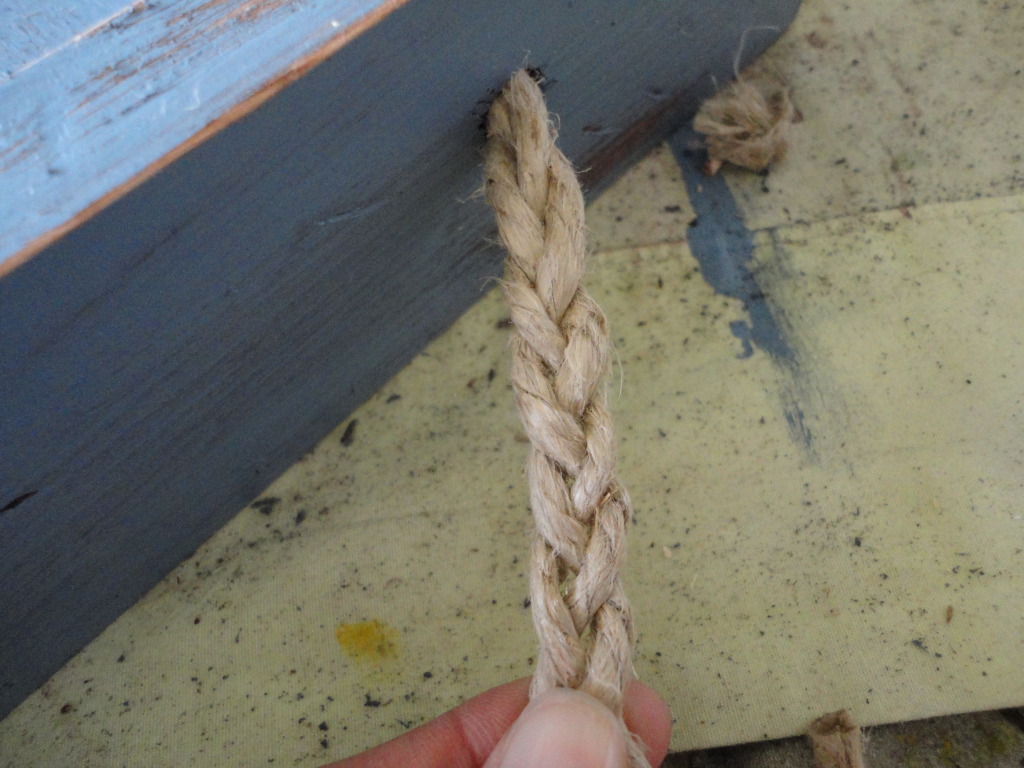
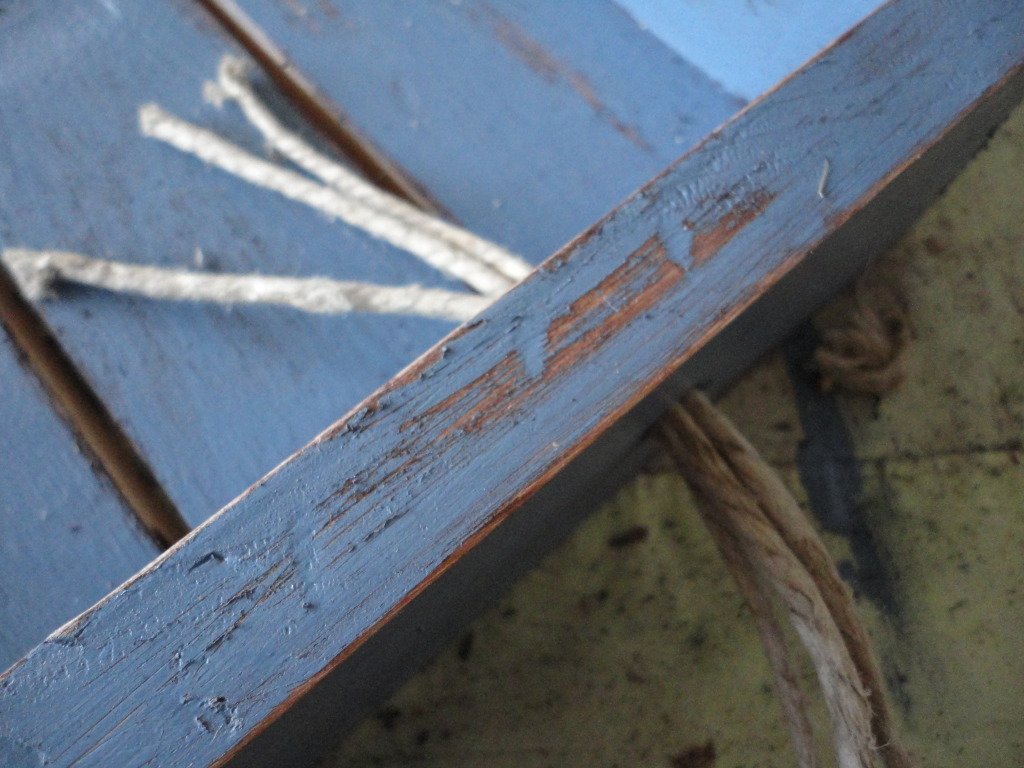
Take your 3 strands and braid them. Make sure you keep it tight so that the handle can stand up on it’s own.
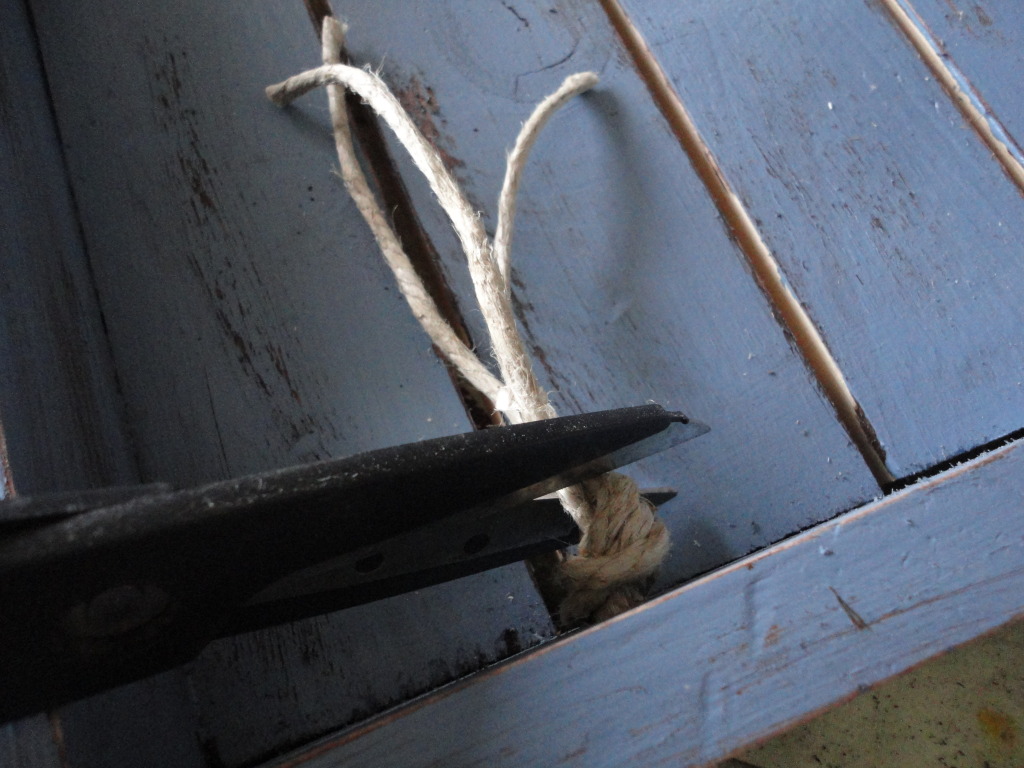
Braid until you get the length you want. Bring the 3 strands through the other hole along with a little bit of the braid. Tie a knot and cut close to the edge of it.
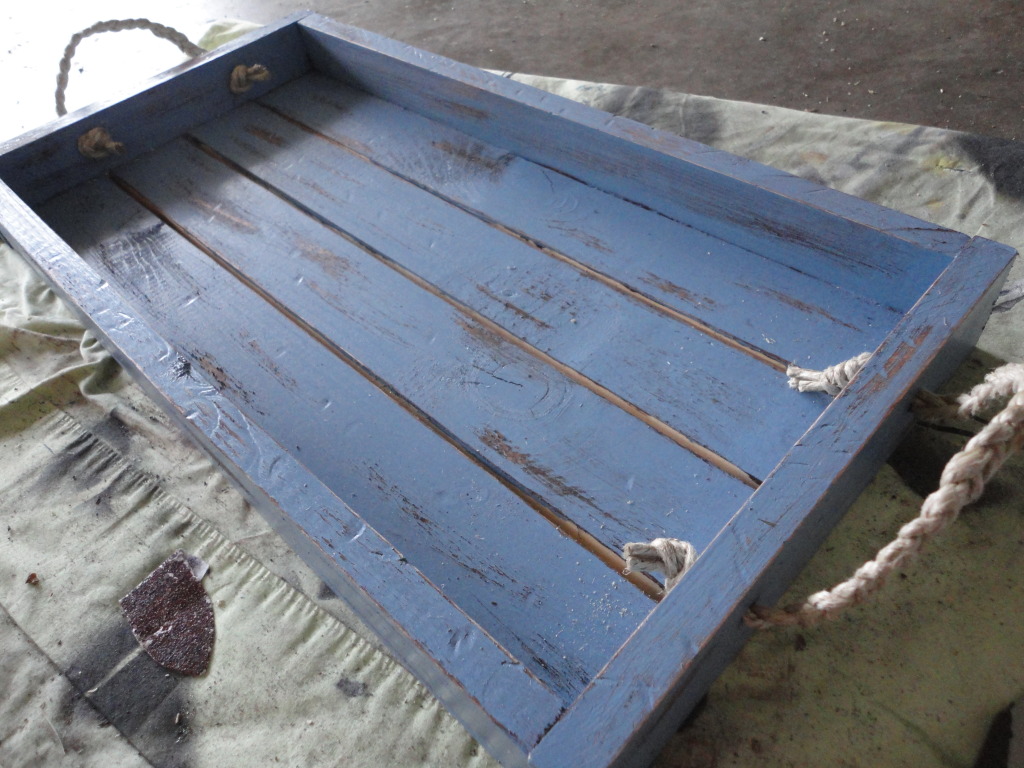
Make the handle for the other side. You can see here that they will stand up on their own and not flop over.
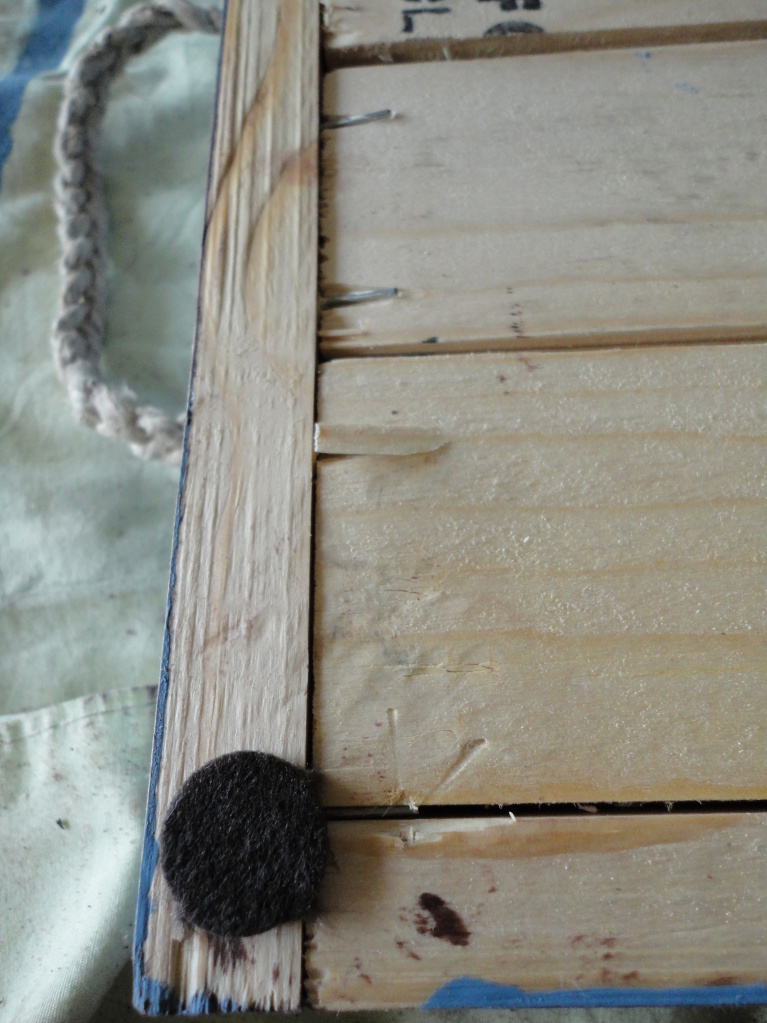
I put these little furniture pads on the bottom. I sort of missed the wood on a few of the boards (As seen in the picture above) and they went though the bottom. My coffee table would have scratched like crazy!
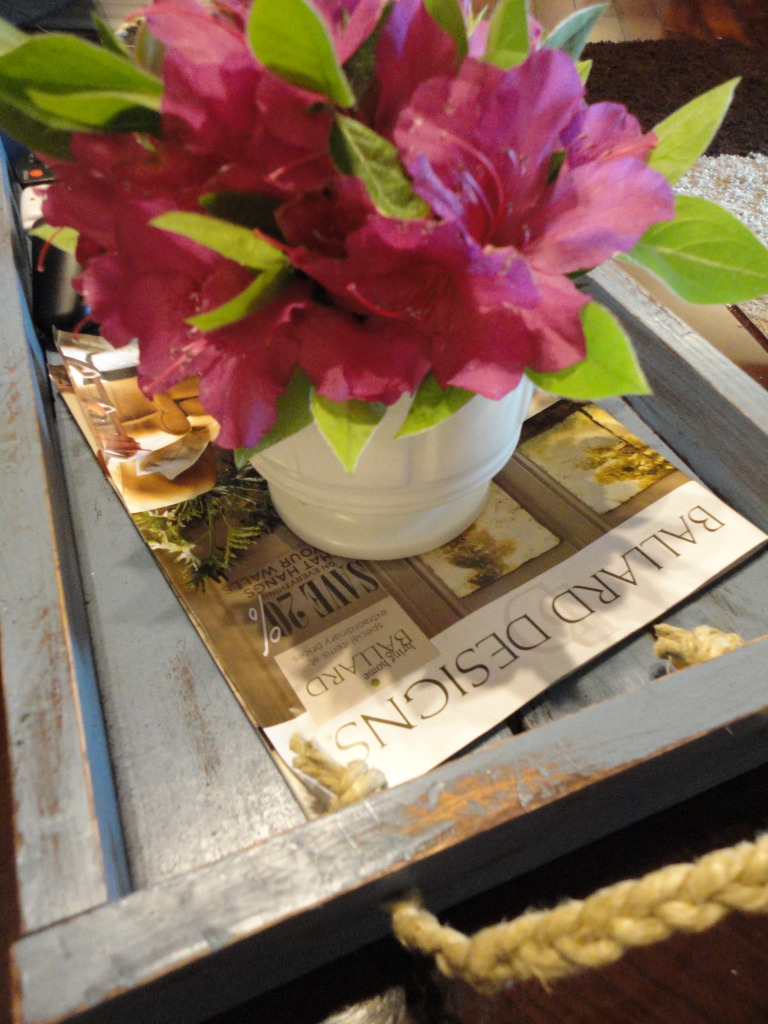
Bring it in, style it and take tons of pictures of your handiwork! Fresh azalea’s make it look even prettier!
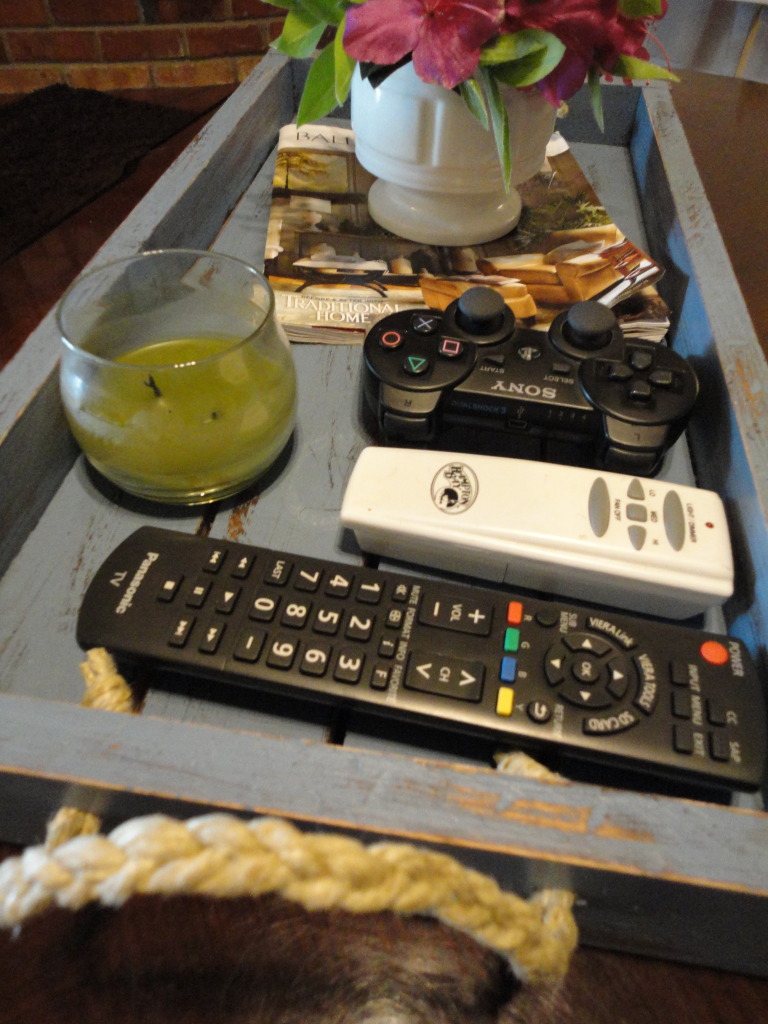
All of the remotes have a home now.
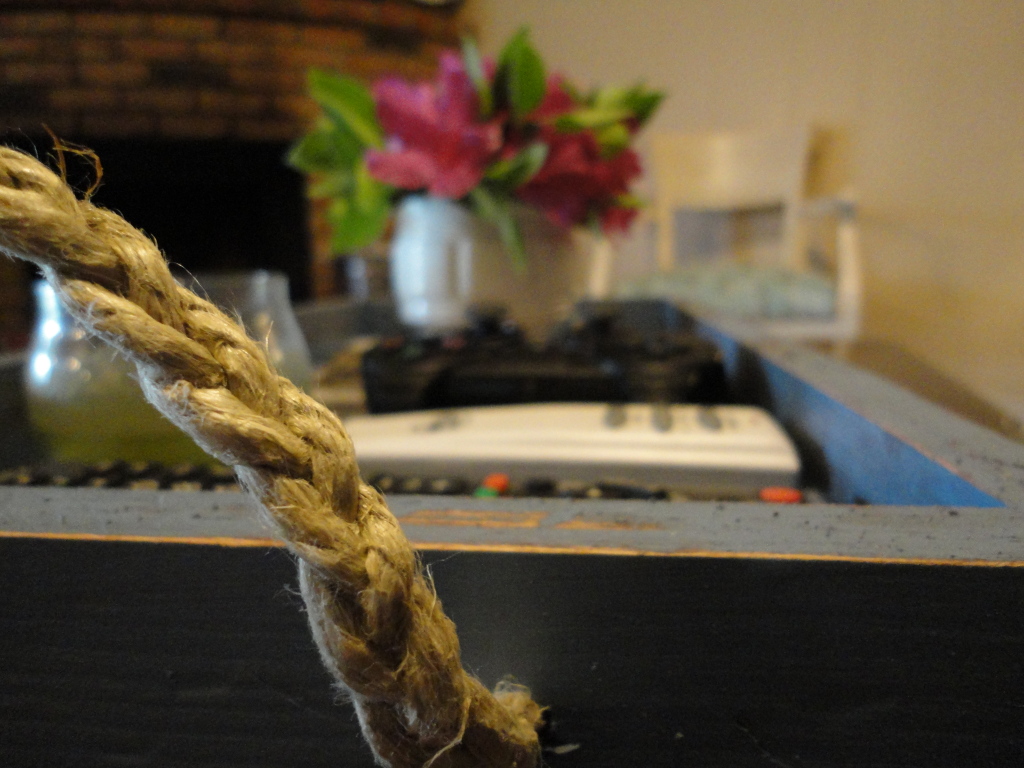
I love the braided rope detail.
Nothing like an organized coffee table!
Thanks so much for checking out my tutorial!
I would absolutely love for you to come visit my blog Young and Crafty!


I’m blown away! Can’t believe you just figured that out on your own, I’ve really got to stop relying on my husband for power tools/wood work. Thanks!
THATS ON THE LIST OF TO DO’S! Love it!
What a gorgeous tray. You did an awesome job.
This is great!
Oh what an adorable tray! I’m bookmarking this one 🙂
Beautiful! I love the color you chose, so fun!
xoxo-
Jamielyn
I ♥ Nap Time
Awesome! I have these wood contraptions (look kinda like trays) that I bought years ago at a yard sale. Using your technique I think I can finally officially make them into trays to use around the house – and cute trays at that. I love the handles especially. Thanks!
I love this! This is saved in my future projects list, and will probably get moved to the top of the list! Such an amazing job!
What a GREAT idea! And an easy tutorial! I definitely going to be making this one … with a bit of help from my husband ; )
Thanks!