Hi. I‘m Jessica from Finding Joy in the Journey and my mom is Linda, a cake artist from Vidalia, LA. Linda specializes in custom design wedding cakes at her shop, Deseret Designs.When Linda was on her way to Nebraska to celebrate the birth of my third son, Ethan, she saw a Cricut infomercial and immediately started to wonder if electronic paper cutters could be used to cut gum paste, her medium of choice. As she came in the door she said, “Jessica, don’t you have a Cricut? I promise to buy you a new one if I break yours. “Since then her skills and ideas have taken her from that cutter to the Silhouette, which was the fabulous Print and Cut feature and has allowed her a whole new rang of cake decorating. She and my dad then created DVD tutorials on all her great techniques and ideas. You can visit
Creative Design Cakes or her blog for more information. Today she is sharing some tips on how to bake a perfectly flat and fabulous cake &something we all dream about doing but somehow just come up short. Whether you are an amateur baker or just a mom wanting to bake a better cake for your child’s birthday, this tutorial is for you.
~*~
First off, turn down those ovens! Get an oven thermometer to check your ovens temperature. Just because you set it at 350* doesn’t mean it is actually baking at 350*. You may find that if you set your oven at 325* is actually 350*! You need to bake at a lower temperature, and I find the 310* is ideal for me. Find the setting on your oven to give you 310*.
Now that you are baking at a lower temperature, you will need to bake the cakes for a longer period of time. I find that 1 hour 10 minutes is just about right. Smaller cakes take a few minutes less time then a larger cake.
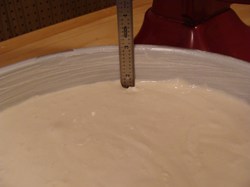
I like to bake in 3” tall pans. I like my cake layers to be at least 2” tall. In a 3” tall pan I can level the layer to be exactly 2 . With the frosting and fondant the finished cake tier will be close to 4” tall.
Do your cakes bake with a hump in the middle? This happens because the sides bake faster and quit rising before the middle. There are a couple of ways to even out the baking. I put baking strips around my pans.

You can buy even baking strips or you can make your own.I cut an old towel to the pans circumference and twice as tall as the pan. For example, if the pan measures 30” around, I will cut my towel to about 32” . If it is 3” tall I will cut the towel to 6” wide. I end up with a 32” x 6” piece of towel. I soak the strips of towel in cold water and wring out the excess water, then fold the towel in half lengthwise. Wrap the strip around the outside of the pan and secure it with a T pin or a corsage pin.

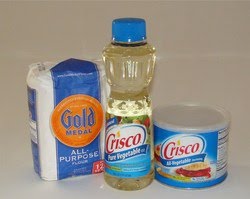
I coat the pans with pan grease. I make pan grease by mixing equal parts of white shortening, vegetable oil and flour. For example, 1 cup Crisco, 1 cup vegetable oil and 1 cup of all purpose flour.
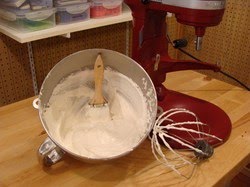
I will mix with my electric mixer and the wire whip until the mixture is light and fluffy. I use a pastry brush to paint the bottom and sides of the pan with the pan grease.
This is my basic cake recipe. I use Duncan Hines as my basic cake mix. This recipe is great for any flavor. One thing I found for a great chocolate cake is to use a white cake mix and a dark chocolate cake mix. This gives a great chocolate cake without being too chocolaty. I also like to use white chocolate pudding.
Deseret Designs
Basic Cake Recipe
1 1/3 cup water
1/2 cup sour cream
2 large eggs
1/4 cup instant pudding powder
1 cake mix
Mix for 3 minutes on high
Bake at 310* for 1 hour 10 minutes, or until done
One last hint to help bake a level cake. I decided to get a commercial convection oven so I could bake several cakes at once. It did a horrible job baking my cakes! I tried everything I could think of to get an even baked and level cake. I finally decided to get rid of the convection oven and go back to using my regular ovens. I did stumble on a baking technique for a French specialty bread. Basically, the pan had a lid on it. I tried this technique and it worked! My cake baked evenly and looked perfect. You prepare your cake just like I described. Fill the pan to just under 2/3 full.
You will grease the inside bottom of another pan that is just a bit larger. For example, if I am baking a 10” cake I will put an 11” or 12” pan on top. I bake the cake just like I would normally do. You will use the larger cake pan as a cover for the smaller pan.

Following these simple instructions will help you bake a perfectly level cake.
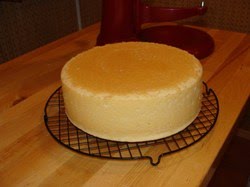
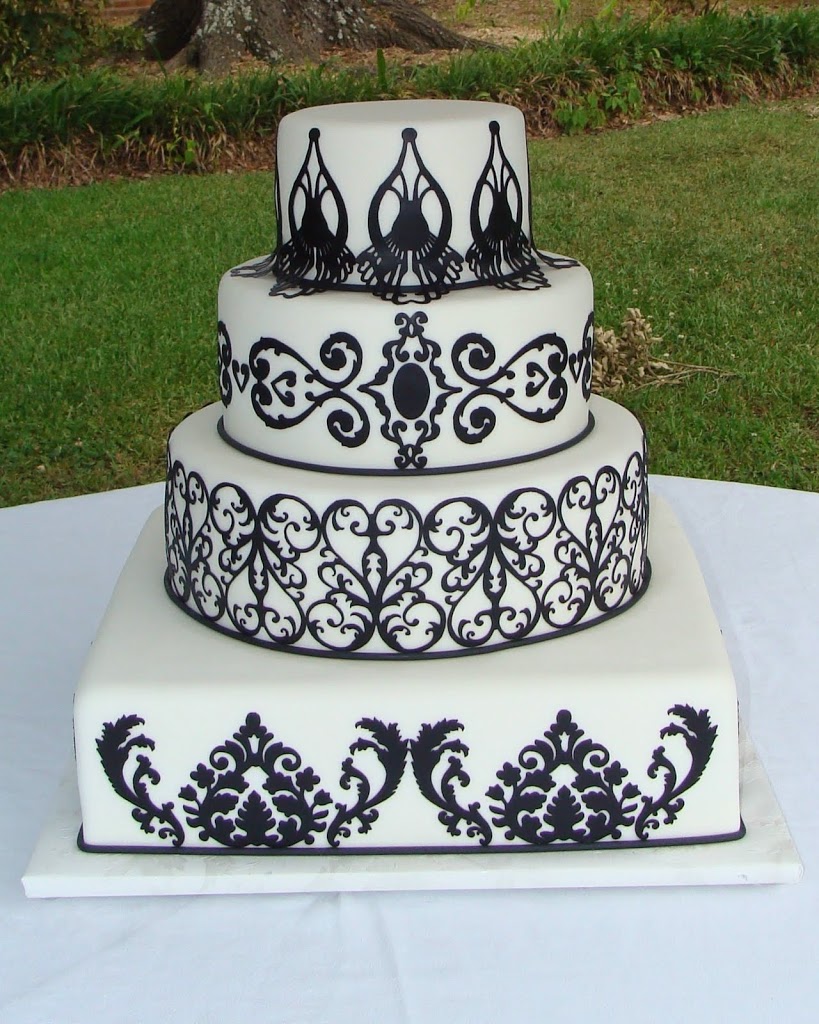
And here is a finished cake, baked using this method and decorated using the Silhouette.
Be sure to check out Linda’s blog for more tips and tutorials on baking, cake decorating, and more. If you are interested, Linda and her husband, Jeff, are traveling all over teaching the Creative Designs Method of cake decorating. Check and see if they will be in an area near you!
~*~
Isn’t that cake gorgeous?!
Thanks for visiting Jessica! 🙂


I can’t get over how amazing this cake is! Endless possibilites with the Silhouette cutter!
Ummmm….super cute! Love it!
wow thanks for the tip am so impressed. just a quick one, how long can the pan grease be stored?