
Hello Kari and Ucreator fans! I’m Robyn from the pink peony of le jardin (French for the garden).
I have a simple, inexpensive project to share with you today~ just in time for the holidays. I love to create, but like many of you, I don’t have a lot of time. Therefore, most of my projects are simple, nearly free, and have big impact. Such as my feature project of the day….
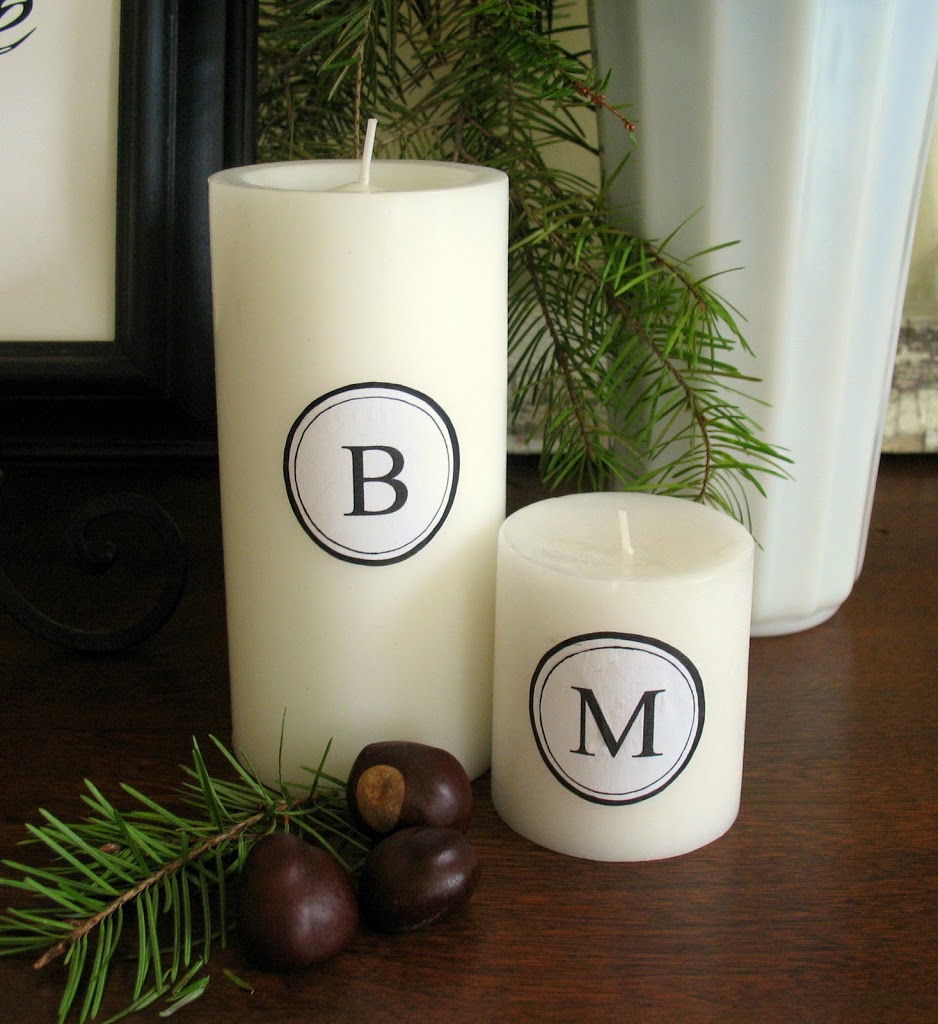
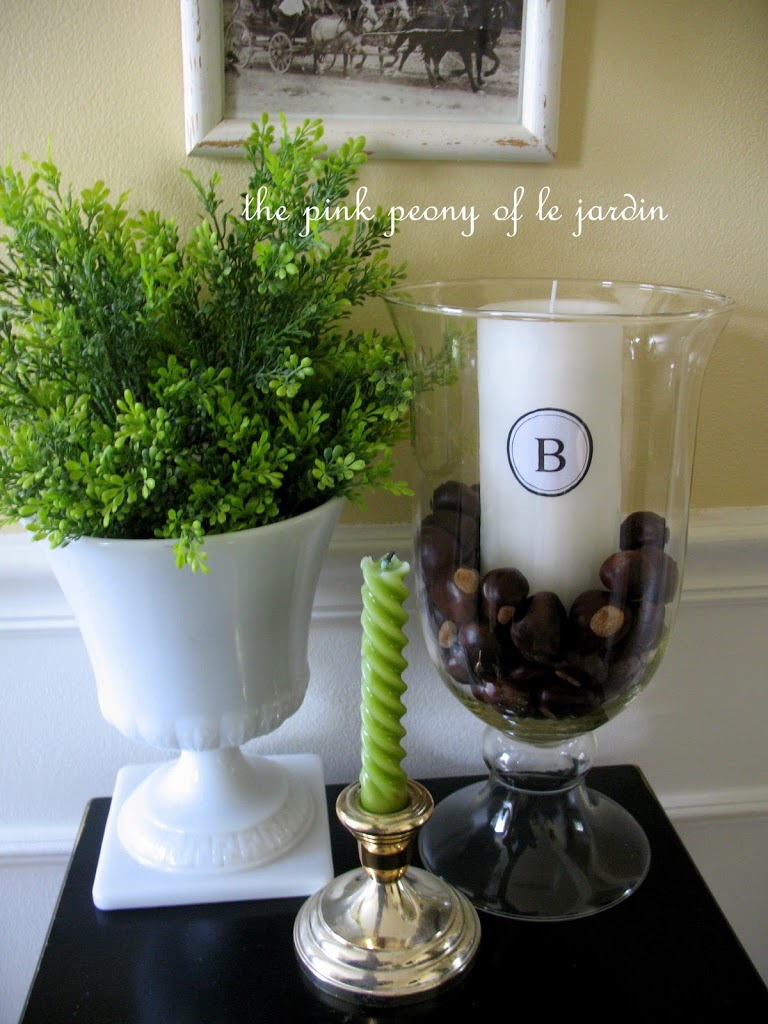
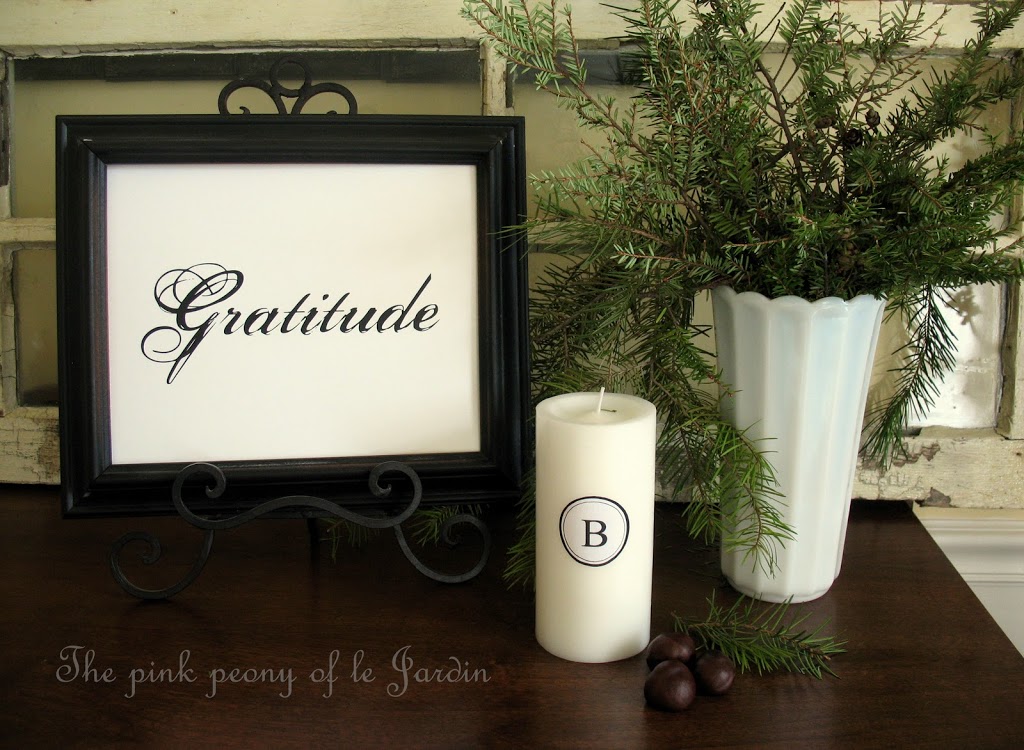
Monogrammed Candles
(Perfect to display in your home, your friends’ homes, and to give to your children’s teachers!)
More photos to follow the tutorial!
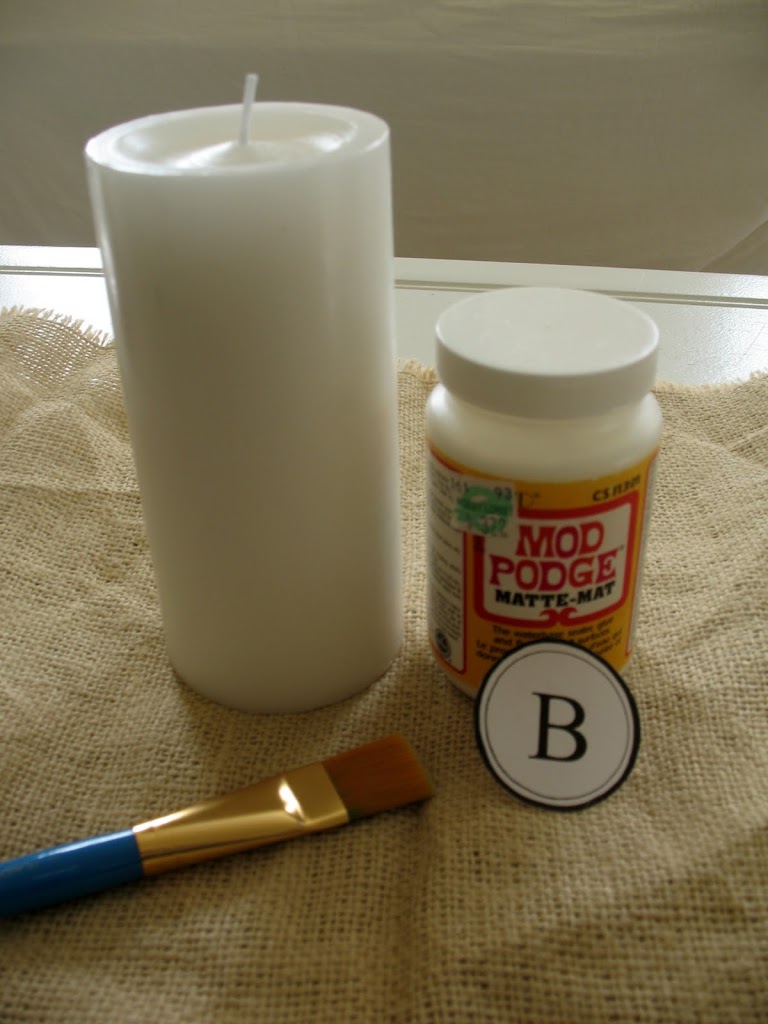
Materials:
mod podge paintbrush
candle* (my small one is from dollar tree!)
2 different size black sharpies*
2 different size lids*
1 piece of cardstock pencil
This project takes very little time to do, but I have included every single step!
1. In Microsoft Word, type the letter that you want to use as your monogram. I use basic Times New Roman font with a font size of 72. (make sure it has sufficient space around it~at least a couple of inches all around). In other words, don’t put it too close to the edge of the paper.
2. Print it on regular computer paper
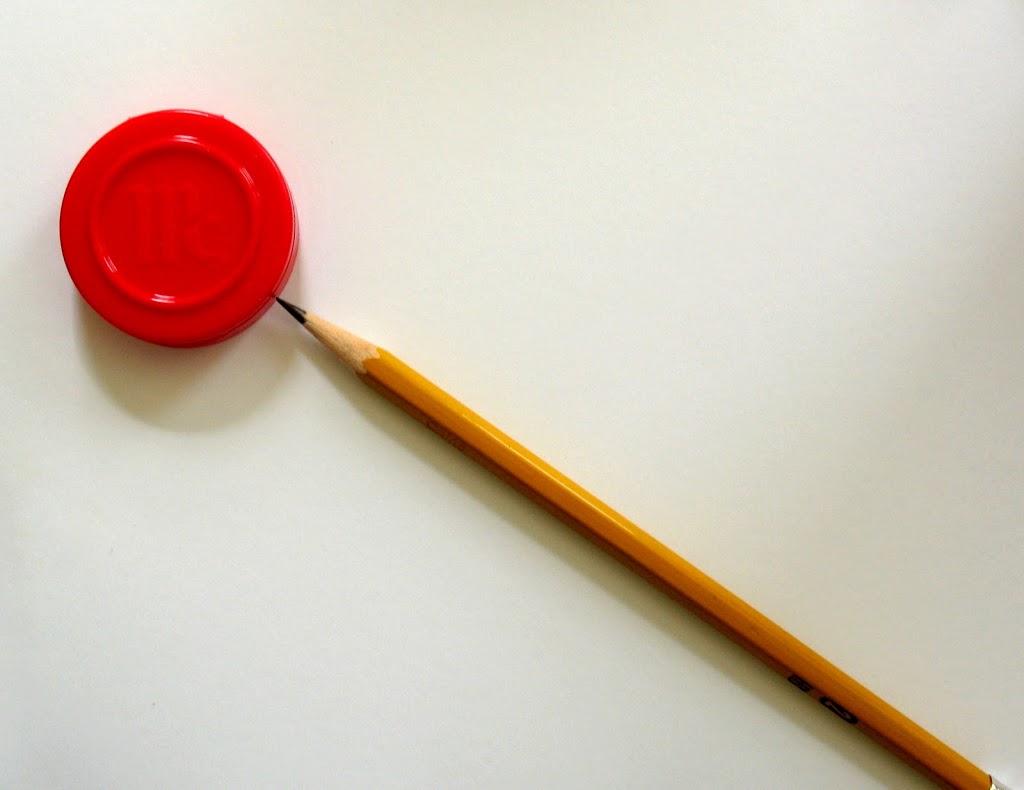
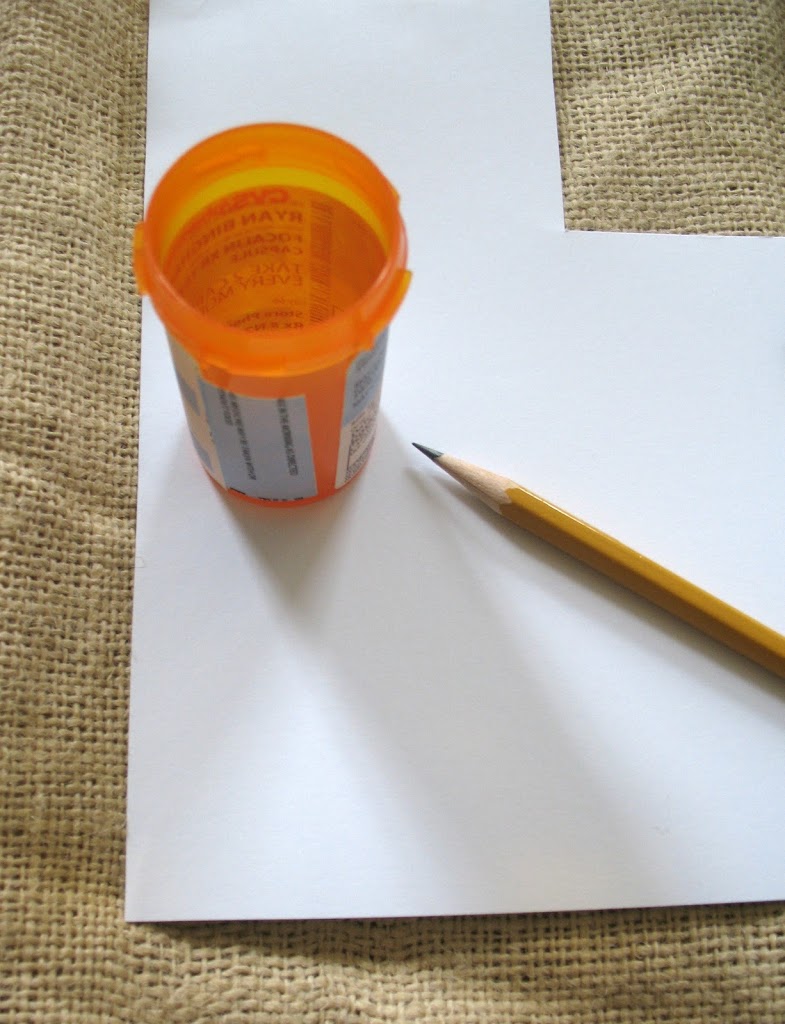
3. Find two small lids or circles to trace around (one just a little smaller than the other) *I used a McCormick brand cream of tartar lid and the bottom of a prescription pill bottle.
4.Trace around one of the lids onto cardstock or a heavy paper.
5. Cut out a square about 1/2 ” around the circle (doesn’t need to be perfect)
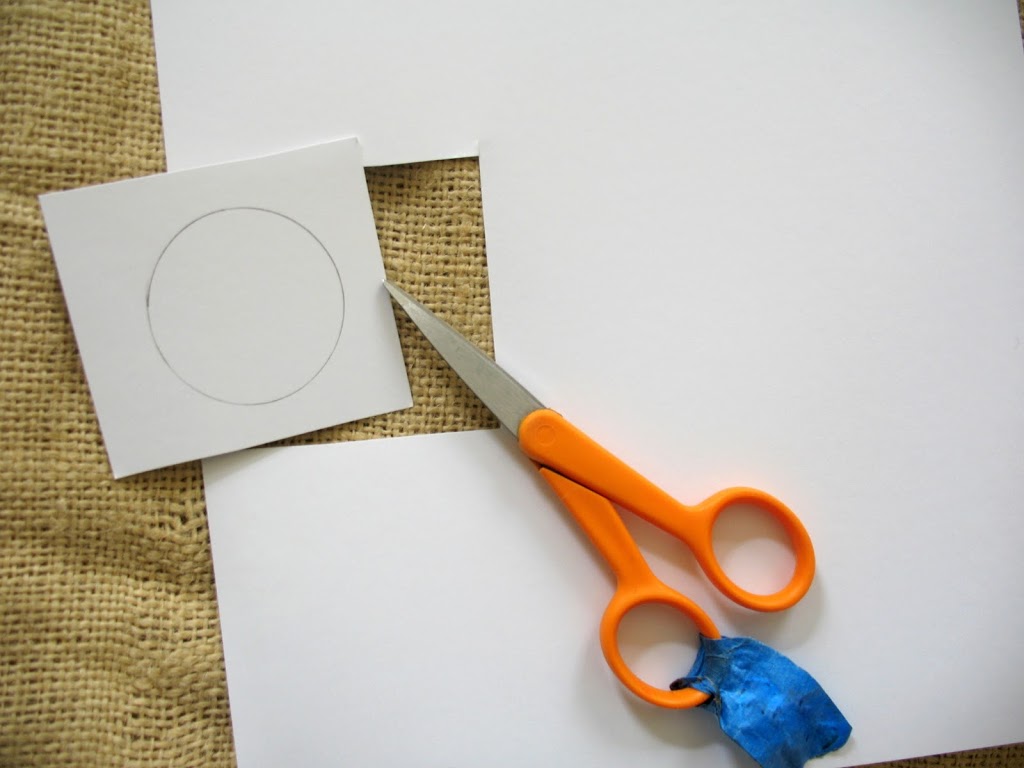
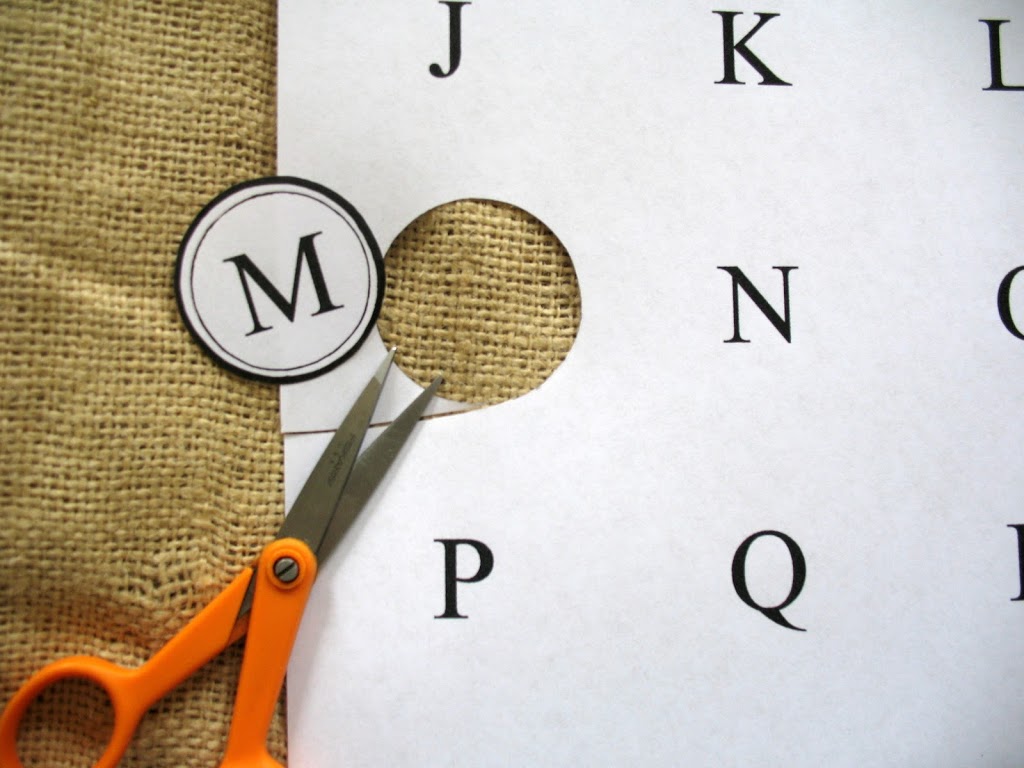
6. Using sharp scissors, carefully cut out the circle.

7. Do the exact same thing with the next lid/circle.
8. Place and center the smaller “pattern” that you just made around the letter. * For this next part I used a black marker that has two ends. One end has a thinner point, the other end has a thicker point. First, use your black marker with the thinner point to trace around the inside of your pattern.
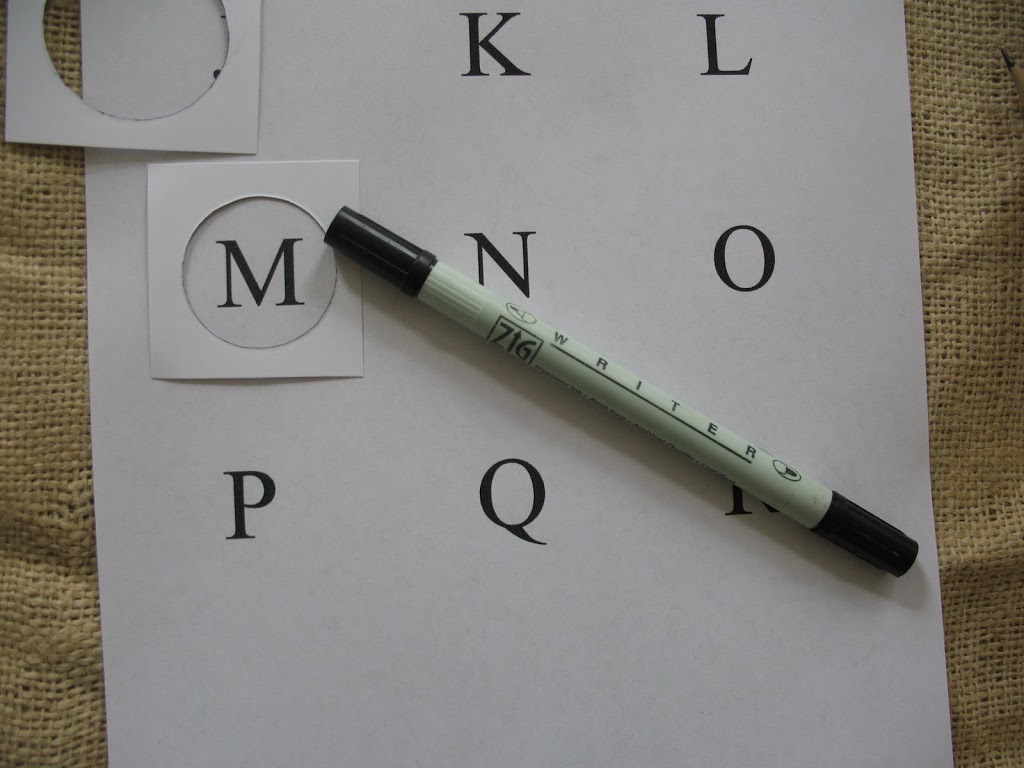

9. Next, center the bigger pattern evenly around the first circle that you made. Trace around it with a thicker black sharpie.

10. Cut it out.
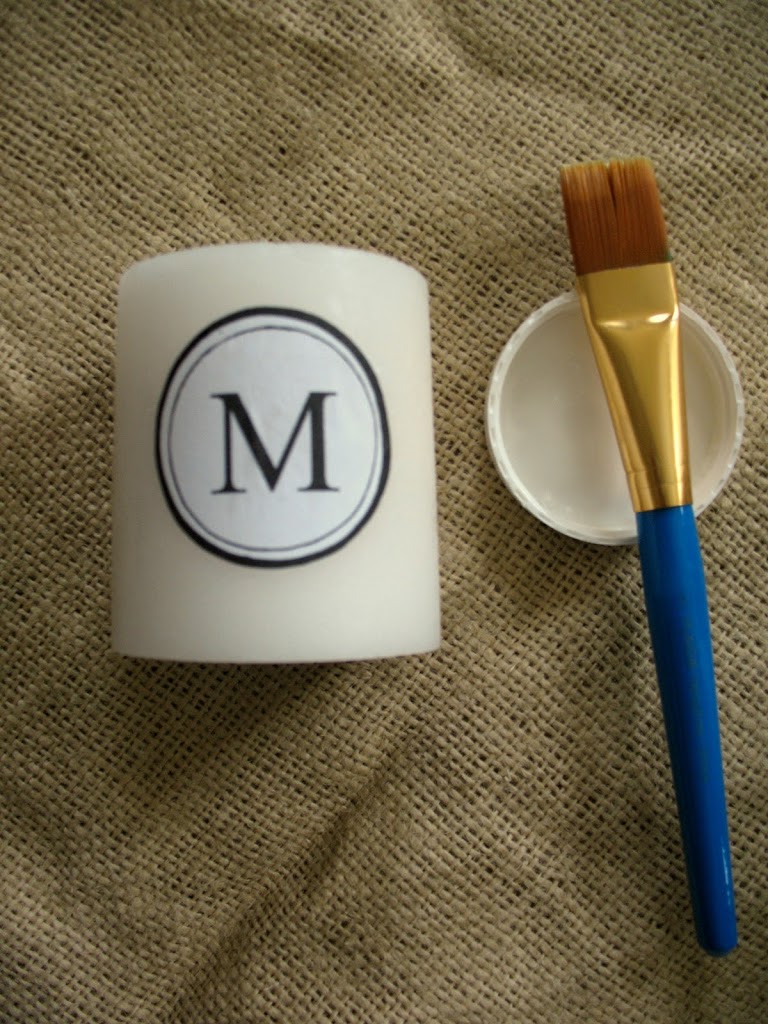
11. With a paintbrush “paint” a thin layer of mod podge in the center of the candle.

12. Center your monogram over the mod podge, and smooth it out from the center of the letter, pressing out any air bubbles.
.
13. Let dry and wrap as a gift or display in your home!
Gift idea: Put in a small brown gift bag and tie a holiday ribbon and tag to the handles, or sew a little burlap bag to put your gift in, and then tie it with holiday ribbon and a tag. You can print more than one on a page for multiple gifts. Just leave enough space around them to cut your square.
Ideas to display in your home: Leave your candle up all year and decorate around it for the holidays! I will use chestnuts, pinecones and greenery for Thanksgiving. Shiny dark red ball ornaments for Christmas would look beautiful also. Another idea is to spell out the word “noel” or “joy” with three or four small white dollar tree candles! *My small candle came from dollar tree~it was lavendar and lilac~but you can’t tell. The large one was only a couple dollars from the Christmas Tree Store. There are so many possiblities!

For more ideas go to the pink peony of le jardin!
Thanks Kari!

This is an elegant gift idea! Thank you for sharing your idea. I thought of so many people I could make this for just reading the tutorial!
Stunning… I think I know what the teachers are getting this year!
what a great idea. i can do some of these up that’s for sure. i see some family members getting candles.
I did something similar a long time ago, but with my kid’s photo. Print a black and white photo of your kid(s)/family on normal printer paper, cut out, but instead of using mod podge, just pull out the hair dryer and melt the photo into place on the side! Makes great gifts 🙂
Simple, elegant, inexpensive! The trifecta of gift giving and decorating. Thanks for sharing.
Those are so great, what a fabulous gift idea. Thanks so much, I’ll be linking.
Love the ideas on your blog… A good read… This one is definately on my reader 🙂 xo
Love this idea as a hostess gift 🙂 Especially for those parties where you don’t know the host/hostess very well…Simple, but personalized and elegant.
This is a great idea. I’d probably use my alphabet stamps and punches, but I may use this for my next stamp class. It’s simple and it does make a nice gift.