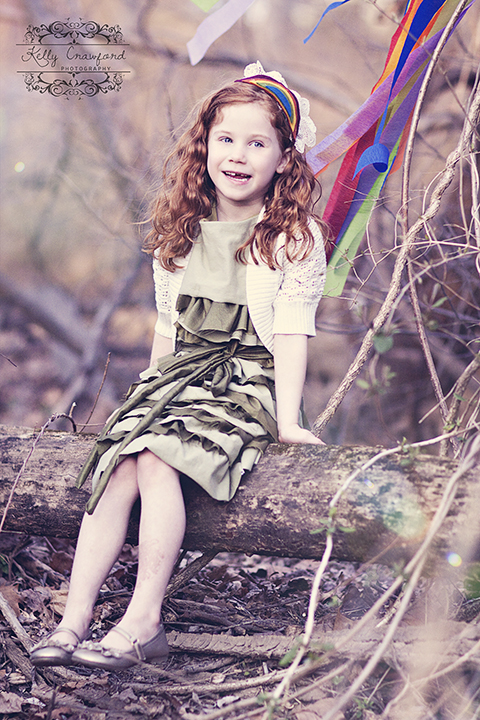
Hi friend! I am Kelly from Sewing In No Mans Land.
I am beyond thrilled to be here on Ucreate today! There is absolutely no way I would be where I am today without Kari and Ucreate. I had been wanting to start a sewing blog for a long time and Kari featuring one of my first projects on Ucreate was the kick in the bootie I needed 🙂 She is always so kind in emails and just an all around amazing lady. Us crafters owe ALOT to her and I am well aware of it. Um…. I think the Oscars has rubbed off on me ha! I hear the music playing so I will move on.
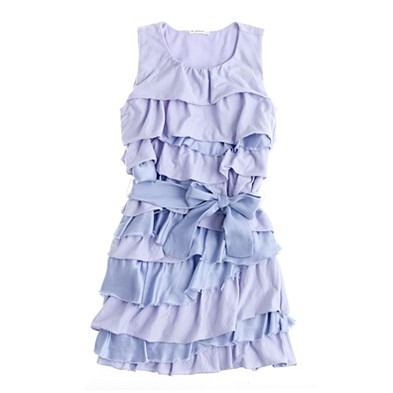
I am first generation American with my family hailing from Cork, Ireland. We spent every other summer there so I feel like it is a home away from home. I actually just recently obtained my dual Irish citizenship! Thus, St. Patricks day is a favorite holiday of mine! I wanted to pair that with my obsession with a JCrew dress I love:
Combining my love of Ireland and determination to make that dress I came up with the…
Lucky Penny Dress
It is made from a comfy jersey knit that was originally white but dyed a nice olive green, and a silky “special occasions” fabric.
What is so great about this dress is that NONE of the edges are hemmed!!!
The edges of the jersey won’t fray and the special occasion fabric is supposed to fray a bit giving it a rough textured finish. This also makes it pretty fast and totally easy!
Would you like to make your own? I promise you can do it! You don’t even need a printed pattern! And I promise if you just so happen to have family pictures coming up, if you make this dress for your cutie and show up to your session in it, you photographer will love you!
Of course it helps when you are an adorable red head who firmly believes in fairies and leprechauns 🙂
what you need:
1. One of your little girls tank tops and T’s to use as a sizing guide
2. 1 3/4 yard jersey knit fabric in color of your choice
3. Half a yard “silky” fabric in a complimenting color (either a shade darker or lighter then your jersey)
4. Sewing machine, scissors, pins etc.
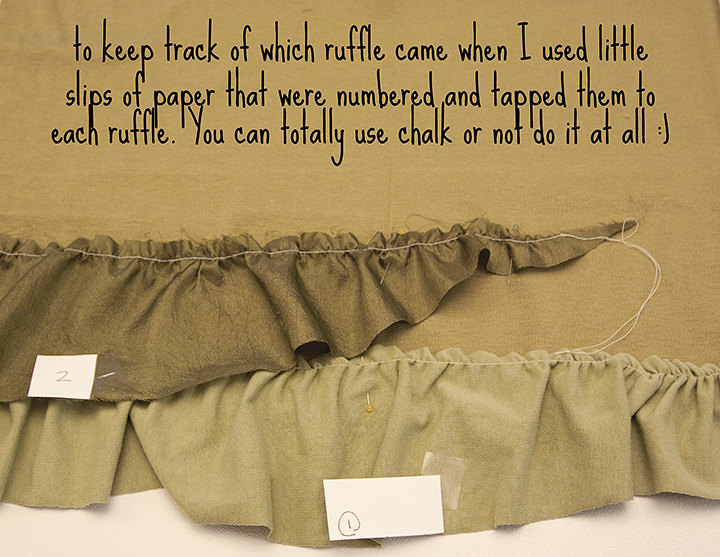
5. I used little squares of paper with numbers on them and tape to help me keep the ruffles in order but that is totally optional
6. Something I found amazingly helpful were pins you can sew over… I know! I didn’t know they existed either! They were given to me as a gift and I about died. You can find them at your local quilting store.
How to make your own pattern:
First we are going to make the front of the dress. Take the T or tank that you selected and grab a nice big sheet of paper (I use some of my children’s art paper on the huge roll from Ikea but you could absolutely just tape together some pieces of paper). Fold your top in half and lay it on the paper tucking in the back neck portion of the shirt so you have the steeper slope of the front visible
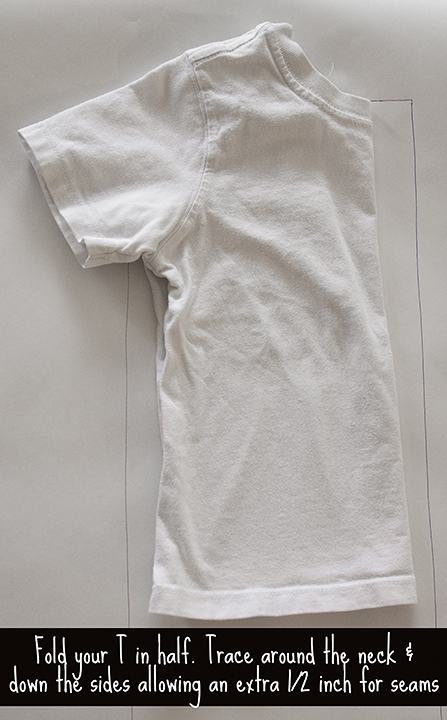
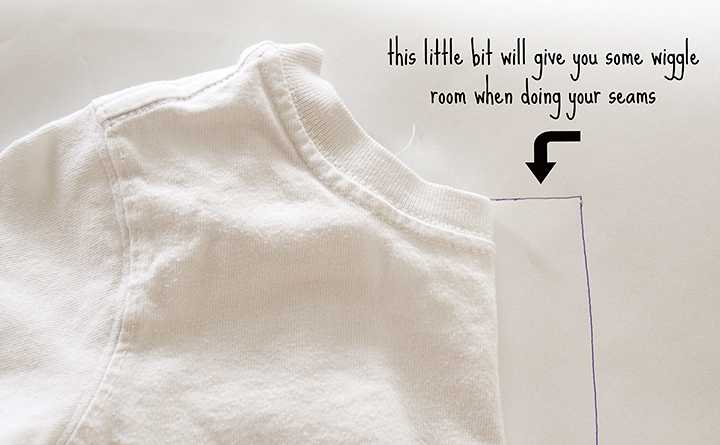
This center line will also be on the fold of your jersey fabric
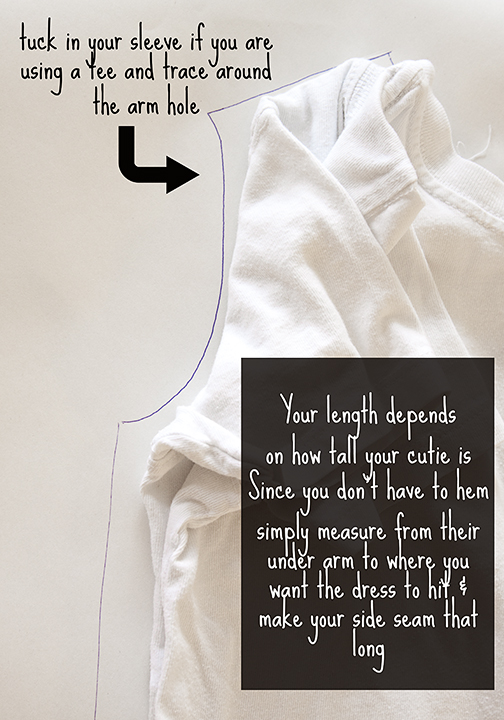
Once you have done this repeat the process with the back of your Tank or T which will become the back of your dress. Once you are done you can cut your two “pattern pieces” out.
Now you need to make two “top pieces” These are exactly the same as your front and back main piece but only come down to about a half an inch below the arm hole. These pieces are what will give us a nice finished neckline and armholes, with out hemming 🙂
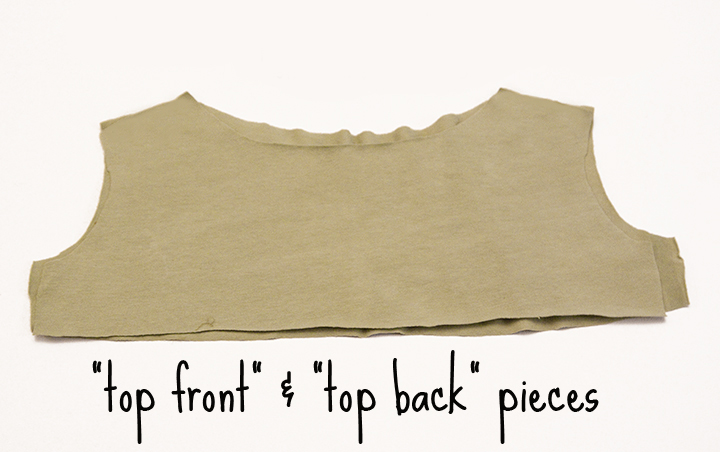
cut your fabric:
Once you have your pattern pieces ready you are going to cut one with your front pattern piece, on the fold, and one from your back pattern piece, on the fold. Now repeat and cut one of your front “top piece front” and one of your “top piece back”. Now all your remaining fabric will be cut into strips. Here is the thing that is fantastic about this dress, the more skiddywampus and crooked the strips are cut the cuter the dress ends up. You really can do it however you want. If you prefer to just have nice straight lines and alternate silky jersey silky jersey etc you can totally do that but I really think part of the charm is the “wild” look. (Now keep in mind anything you do to the front of the dress you will do the exact same thing to the back. It is your choice whether to do it simultaneously or one after the other.) What I decided to do was cut my jersey strips first. I cut mine to be about two inches wide though again you can do them as wide or small as you like! There are no wrong answers here friends! Then I laid them on the top of my front dress piece:
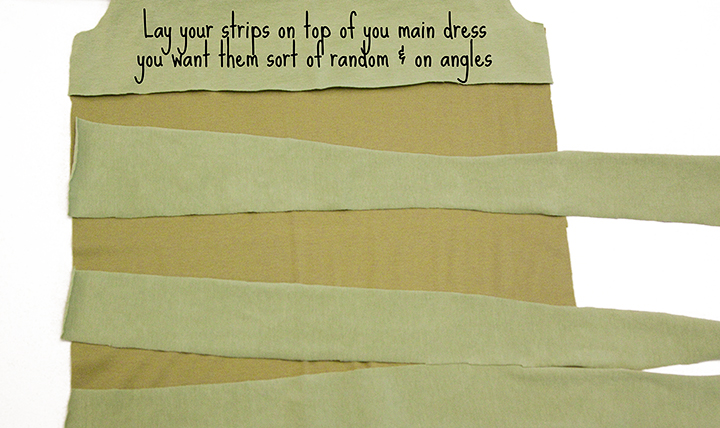
Once I was happy with how it looked I took my silky fabric and cut it so it filled in the gaps.
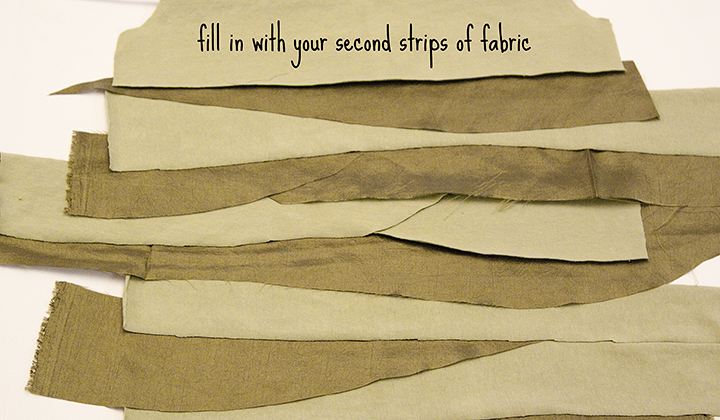
In the end your dress should sort of look like a mummy ha! Now, this next part is optionally but I personally think it REALLY helped and made the process go a lot faster and saved me massive frustration. I took little squares of paper and numbered each of the strips of fabric, taping the square to the strip. This way I knew exactly where they would go when I was ready to sew them down. Again this is optional but I swear it helps.
Sew Your Fabric:
Once I was done numbering I took my strips off the dress and ran a gathering stitch across the top of them. This is just means you do a straight stitch where your tension is loose and the length of your stitch is loooong. This makes it easy to ruffle up the top to the size you need.
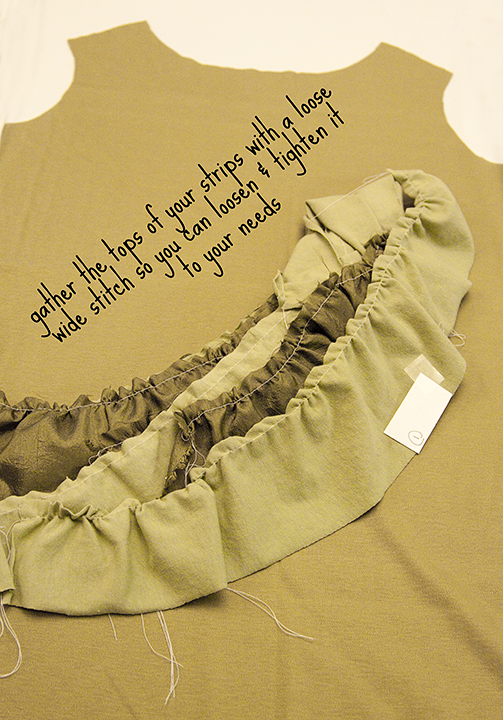
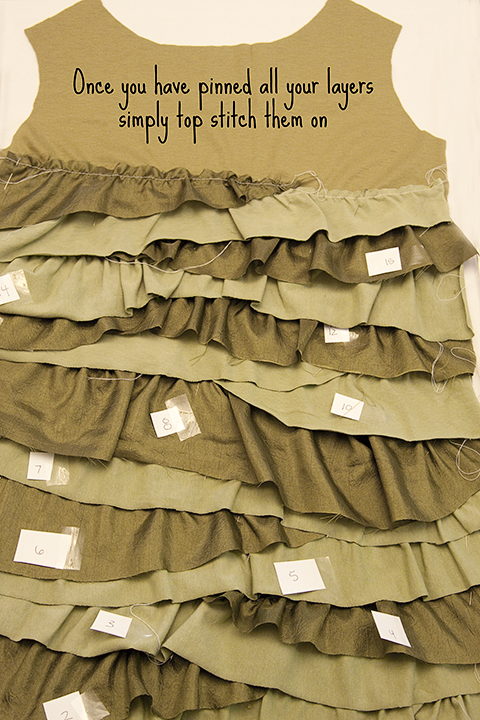
When I was done I returned them in the proper order on top of the right side of the dress front, pinning as I went
When the dress was all pinned I took it to the sewing machine and simply topstitched all the ruffles into place. Now you can do this one at a time if you prefer. I just like having it all pinned so I wasn’t getting up and down…. yeah I am that lazy ha!
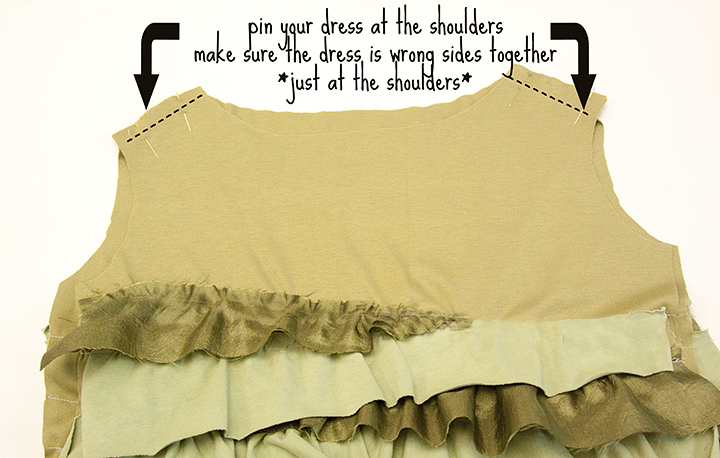
If you haven’t been dong the back piece simultaneously now you will repeat this process with the back piece 🙂 Once done we are going to connect the front to the back at the shoulders. JUST at the shoulders. This will go against the grain but pin your front to your back, wrong sides together. Then topstitch across the shoulders.
Once you are done I swear the hard part is over!!
Set aside your main dress and grab your two “top pieces”. Pin them at the shoulders so that right sides are together
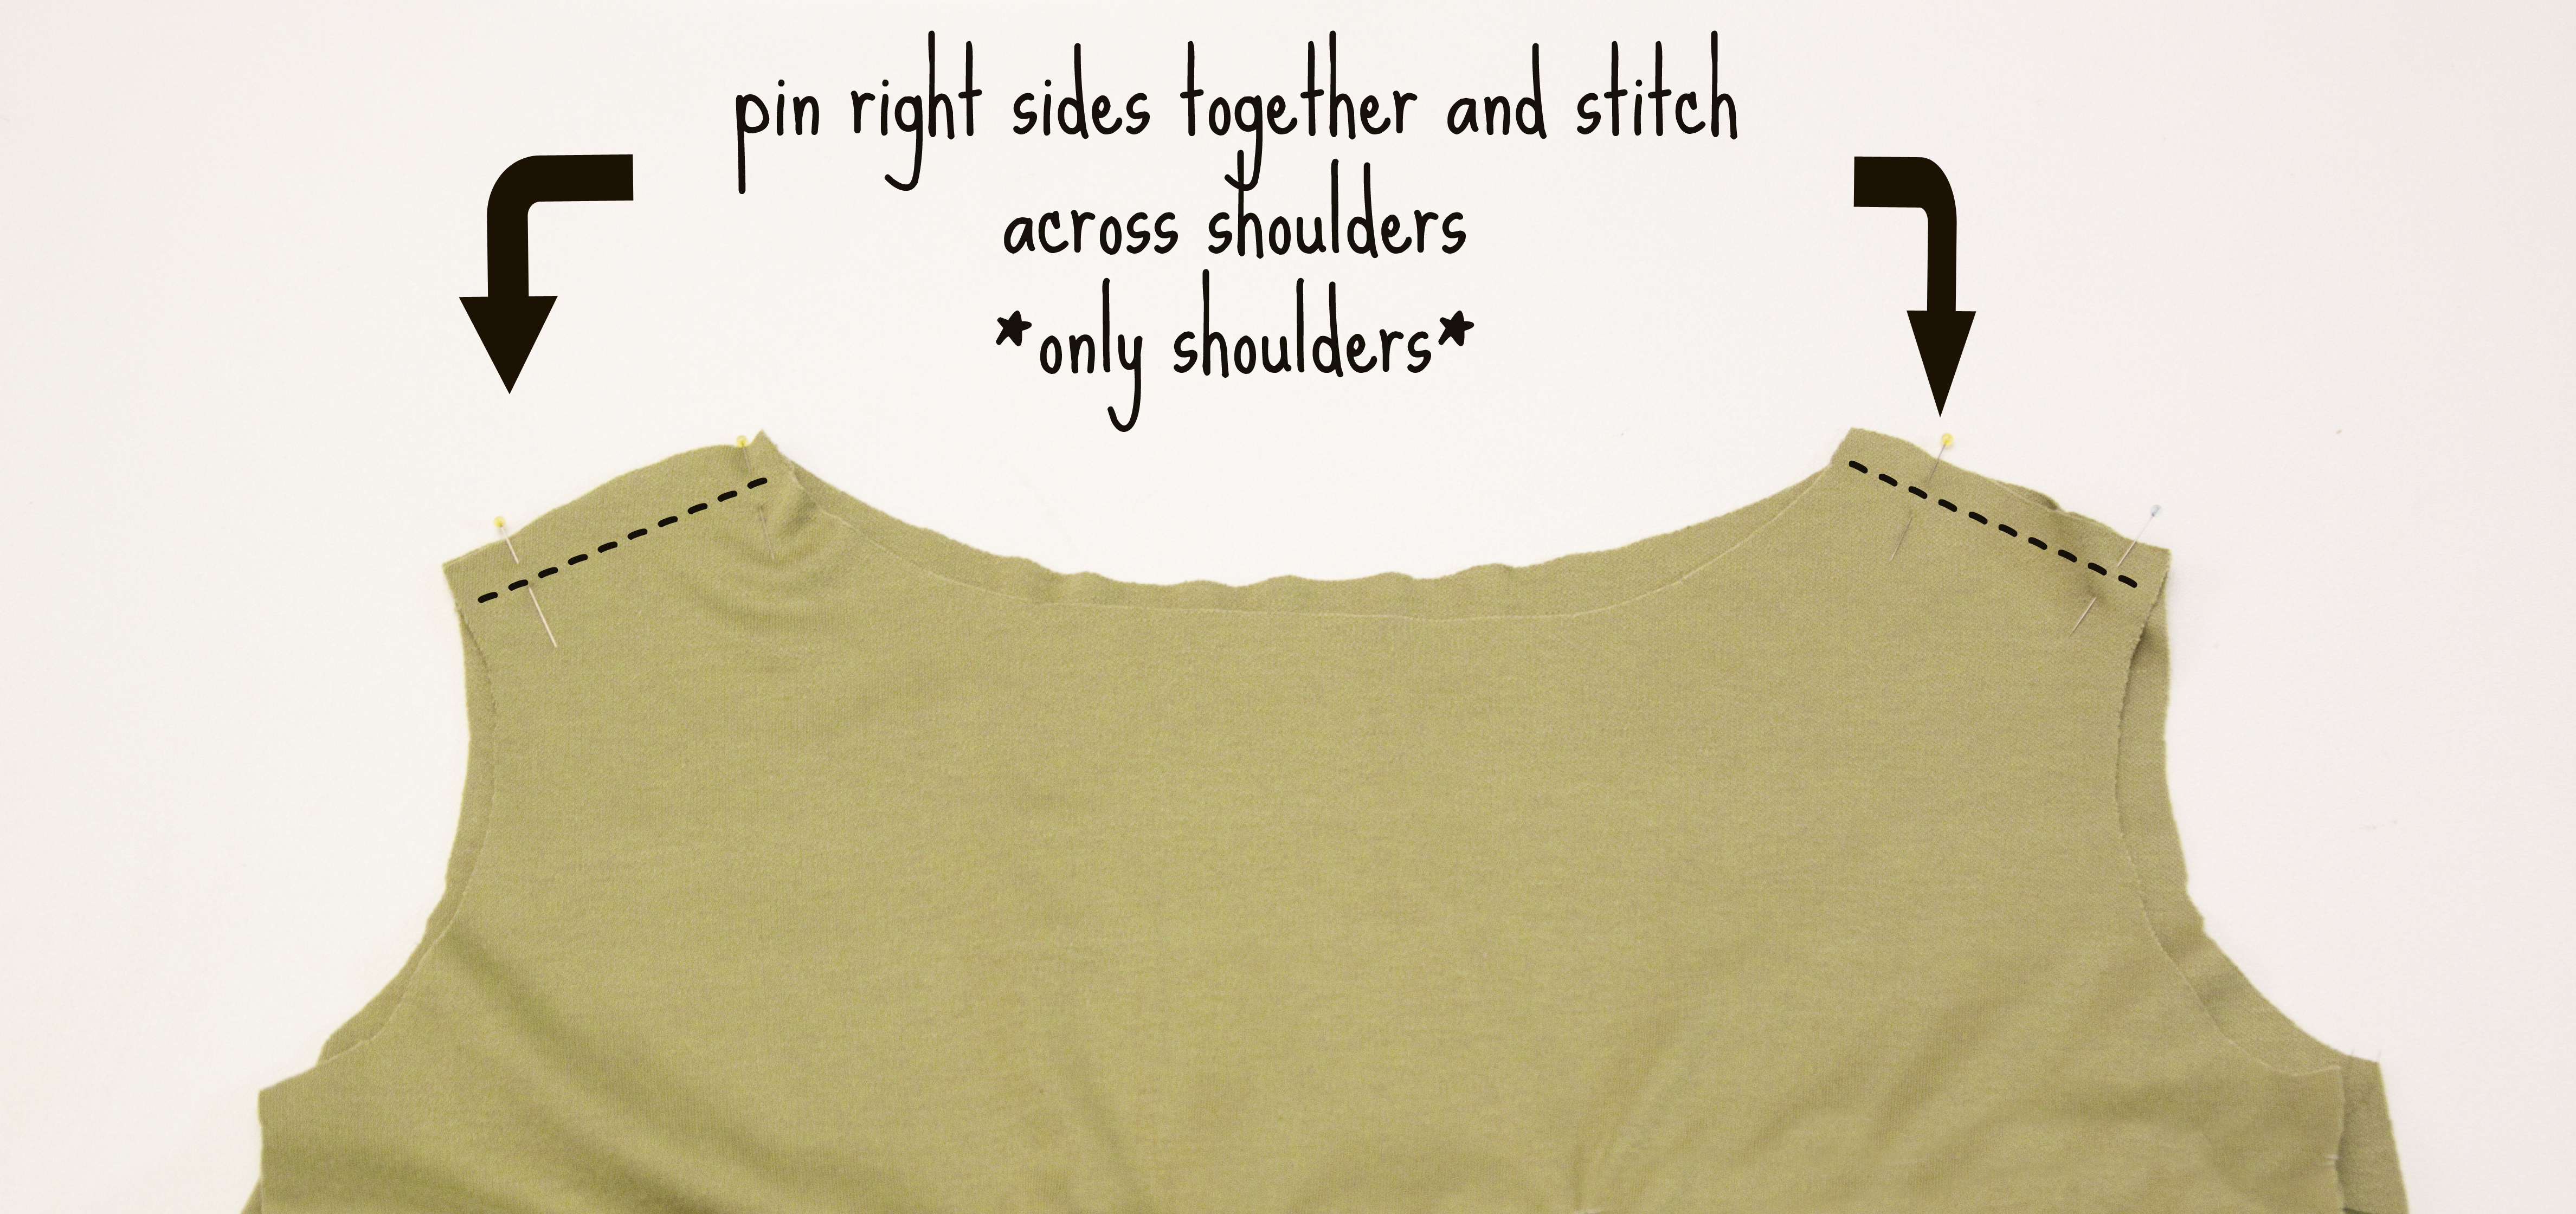
Now, take your main dress and turn it inside out
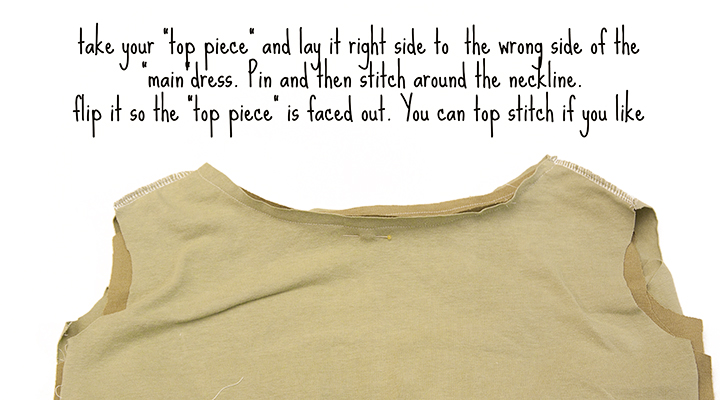
You should now have a nice finished neckline. I chose not to topstitch mine. I feel like it lays better if you don’t.
Next we finish the arm holes. If you are a beginning sewer I might suggest firing up the iron for this next step and ironing over the raw edges of your armholes. If you are more advanced you can just tuck and pin 🙂
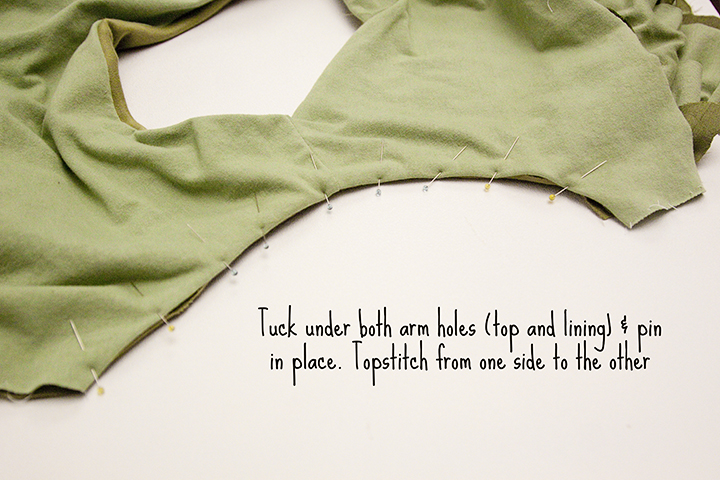
Ohhhh you are soooo almost done! Now all you have to do is turn the dress inside out and sew up the side seams!!! Woo hoo! You finished! I decided to take some of my extra silky fabric and made a belt to add some definition at the waist. (Just cut a long wide strip, fold in half right sides together, sew up side seam, turn right side out and topstitch ends closed)

Now go have some fun with your cutie finding fairies and leprechauns!
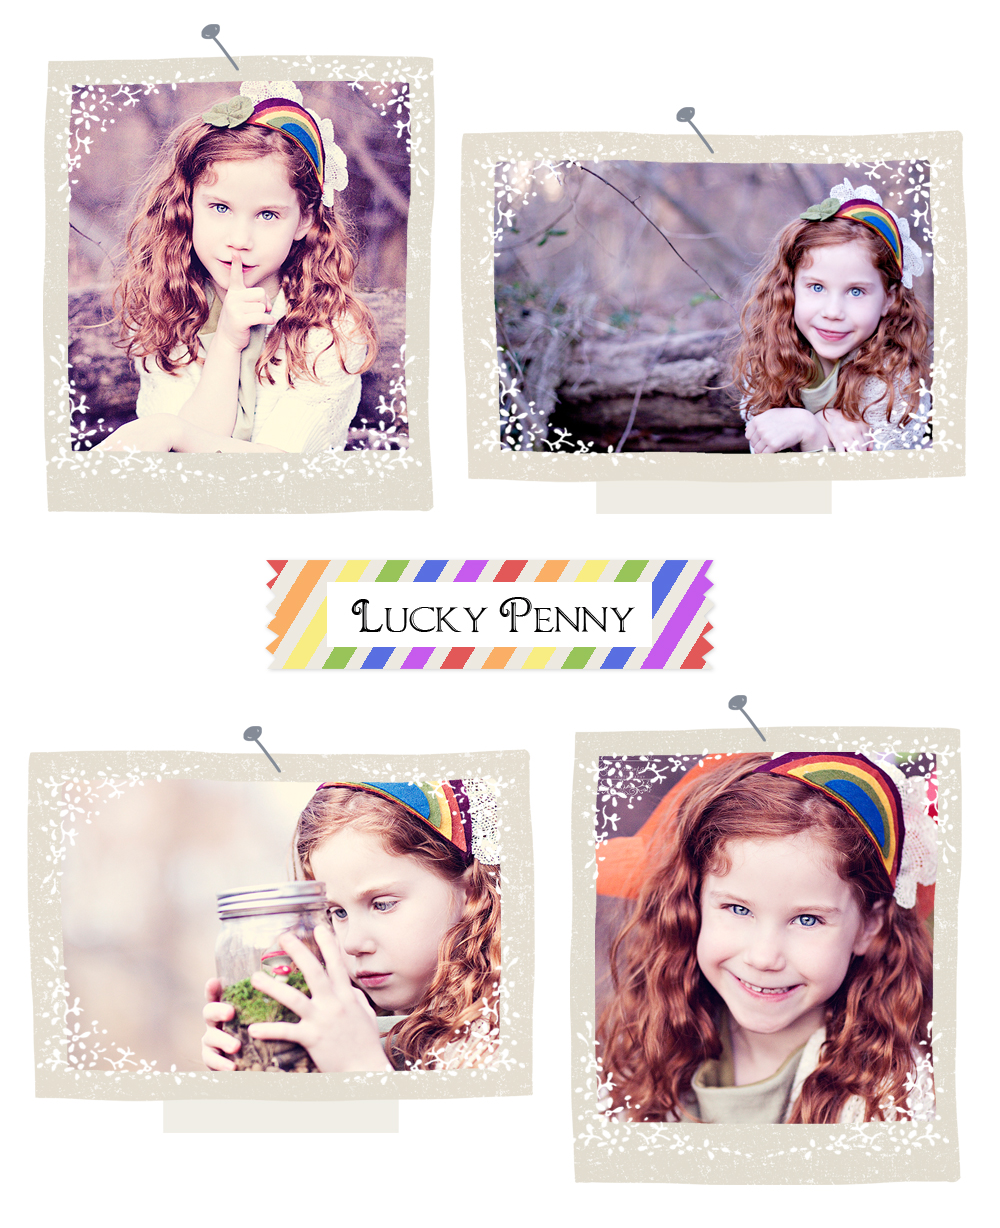
Because they really do exist!!! If you love St. Patricks day as well I would love for you to hop on over to Sewing In No Mans Land and join me for a fun week of St. Patricks themed tutorials and great inspiration for your St. Patricks day party (a lot cuter and yummier then corned beef and cabbage).
Thank you so much Kari for having me and may the luck of the Irish be with you!
Cheers!
Kelly
Make sure to visit her blog and check out her other fabulous patterns…







Thank you for your great ideas! So simple and so cute! Love this dress! 🙂
Wow, I love this! So adorable!
Kari thank you so much! I meant every word I said and more!
Love this one. My girls have the JCrew dress and they are adorable. Think of the color possibilities if I made my own.
Kelly, you are fabulous for dreaming this dress up. I see dresses like this in store and my draw drops at the expense :/ But its time I kick it into high gear and make one for my little girl.
Wow!! This is soooo pretty!! I love the dress, the tutorial and the photos!! I want one!! 🙂
Amazing dress…you make it seem so simple…I totally have to make one for my daughter! Thanks!!
Adorable! Thinking the overall ruffle idea would make a cute skirt also. Your tutorial was so easy to follow too.. hopping over to your blog!
This is so pretty! Love ruffles. Thanks for the great tutorial.
Hi Kelly, just stopping by to say how delightful your blog is. Thanks so much for sharing. I have recently found your blog and am now following you, and will visit often. Please stop by my blog and perhaps you would like to follow me also. Have a wonderful day. Hugs, Chris
http://chelencarter-retiredandlovingit.blogspot.com/
I absolutely love the olive green. You did a great job designing! I can’t wait to have a little girl of my own to make this with. Is that your daughter in the photographs?
Im excited to try this dress pattern for my girls!! When you have time check out my head/foot board bench transfermation
http://dejavucrafts.blogspot.com/2012/03/headfoot-board-bench.html
Don’t hate on corned beef Miss Kelly (HA!) Wish you were coming to our St Patty’s party! PS – on Kevin’s last trip to Moscow he was diverted to Shannon, Ireland because of the bad weather in London and had to spend the a whole day wondering around Limerick! Now we HAVE to go together! Want to come?
I absolutely LOVED this tutorial and had plans to make the dress in purple for my daughter, who’s 2 1/2. However, being the sewing newbie, I made a couple mistakes early on and had to go off in another direction and make something else. Still I think it came out pretty well in the end, and even though it’s not the same dress, I wanted to share the final product with you, since you were my inspiration:
http://distilleryimage0.s3.amazonaws.com/1c709bae818811e1b10e123138105d6b_7.jpg
Sorry for the weird link. I have only posted a picture to Instagram so far. :/
Thanks for the great tutorial!