
Hi there! I’m Natalia Bonner from Piece N Quilt.
I am so excited to be able to be a guest blogger on Ucreate! Today I am going to share with you a tutorial for a Snuggle Snowmen quilt. I love how this one turned out!
Stop by and say hi, ask me questions or let me know what you think!
Stop by and say hi, ask me questions or let me know what you think!
Snuggle Snowmen
by: Natalia Bonner & Kathleen Whiting
by: Natalia Bonner & Kathleen Whiting
Finished quilt size: 44″x64″
Materials needed;
1/2yrd Authentic Simple Spot Natural
1/2yrd Authentic Simple Spot Sprout
1/8yrd Simple Spot Black
1/4yrd Authentic In Bloom Sprout
1/4yrd Authentic Spot On Black
1/4yrd Authentic Word Play Black
1 1/2yrds Authentic In Bloom Black
1 1/2yrds Authentic Spot On Natural
1/4yrd Essence Sandy’s Solids Red
1/16yrd Essence Sandy’s Solids Gold
*This does not include backing & binding materials.
We used 2yrds Authentic Dot to Dot Natural for backing & 1/2yrd Authentic In Bloom Black for binding.

Start out by cutting from your Authentic Spot on Natural 88-4.5″squares.
Then from your Authentic In Bloom Black you will cut 352-1.5″ squares.
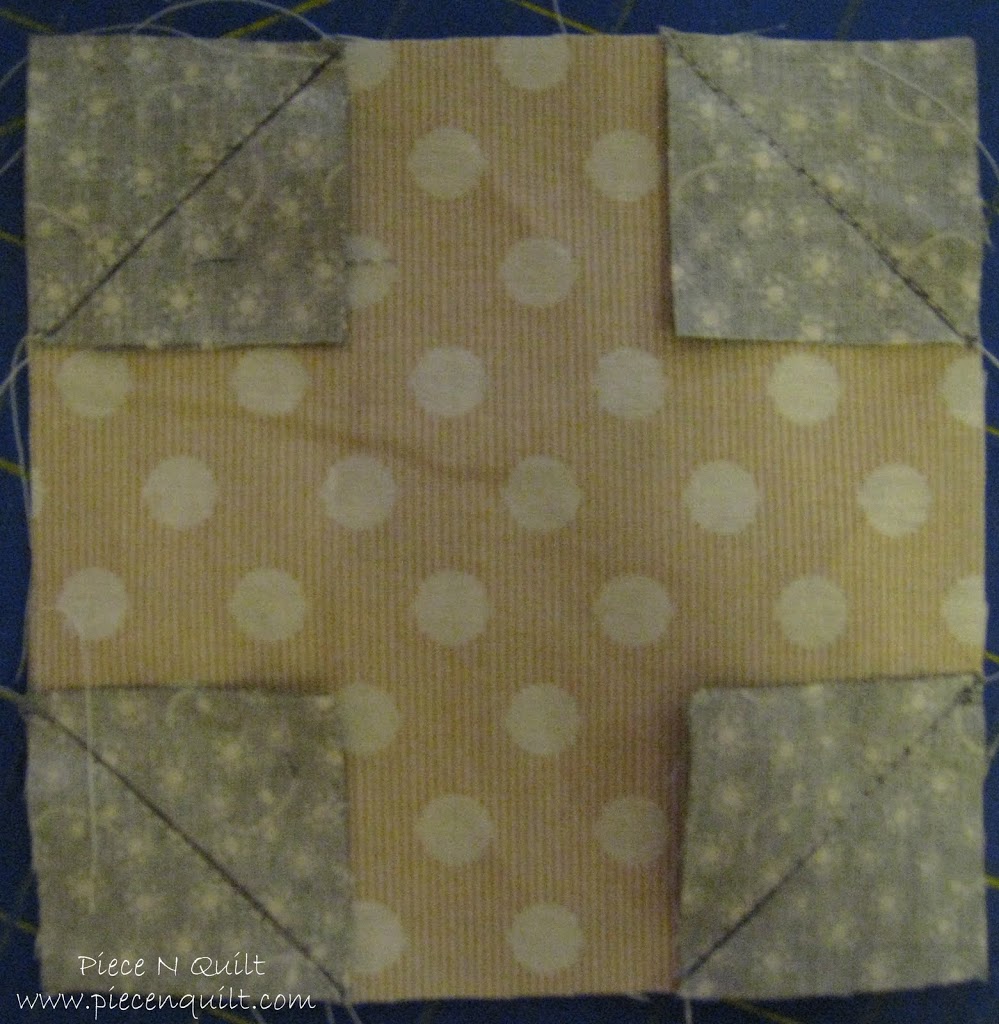
With your squares you will attach them to all four corners of the 4.5″ squares to create 88 snowball blocks.
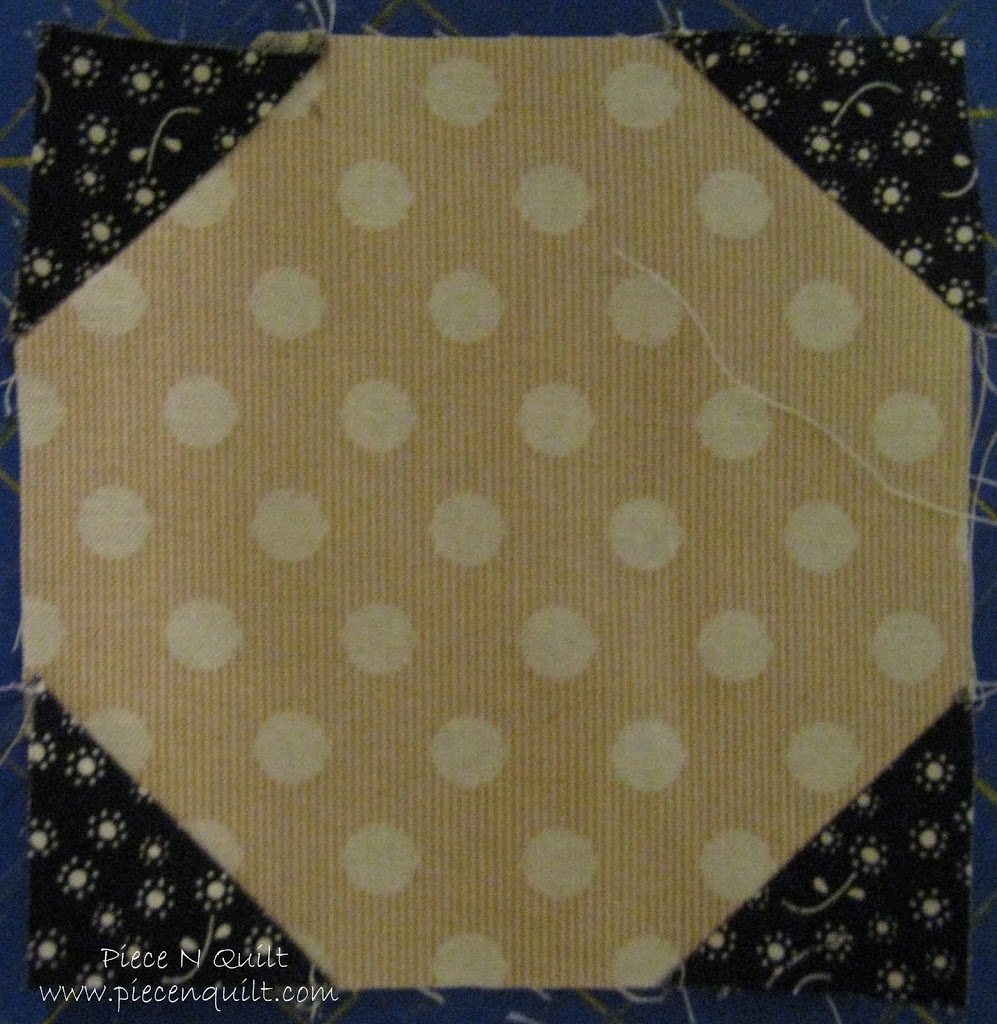
Finished blocks should look like this.
Now sew those snowball blocks together to create the blanket in 8 rows of 11 blocks. Set that aside for now.

From your Authentic Word Play Black you will cut an 8″x width piece.
From your Authentic In Bloom Black you will cut an 18″x width piece for the top background and a 8″x width piece for the bottom.
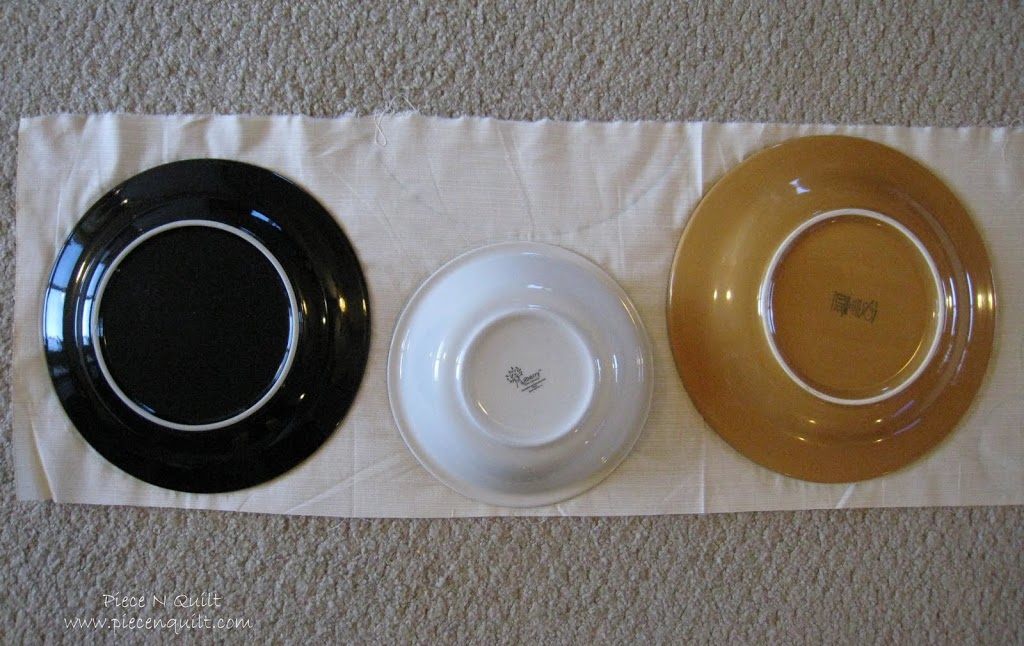
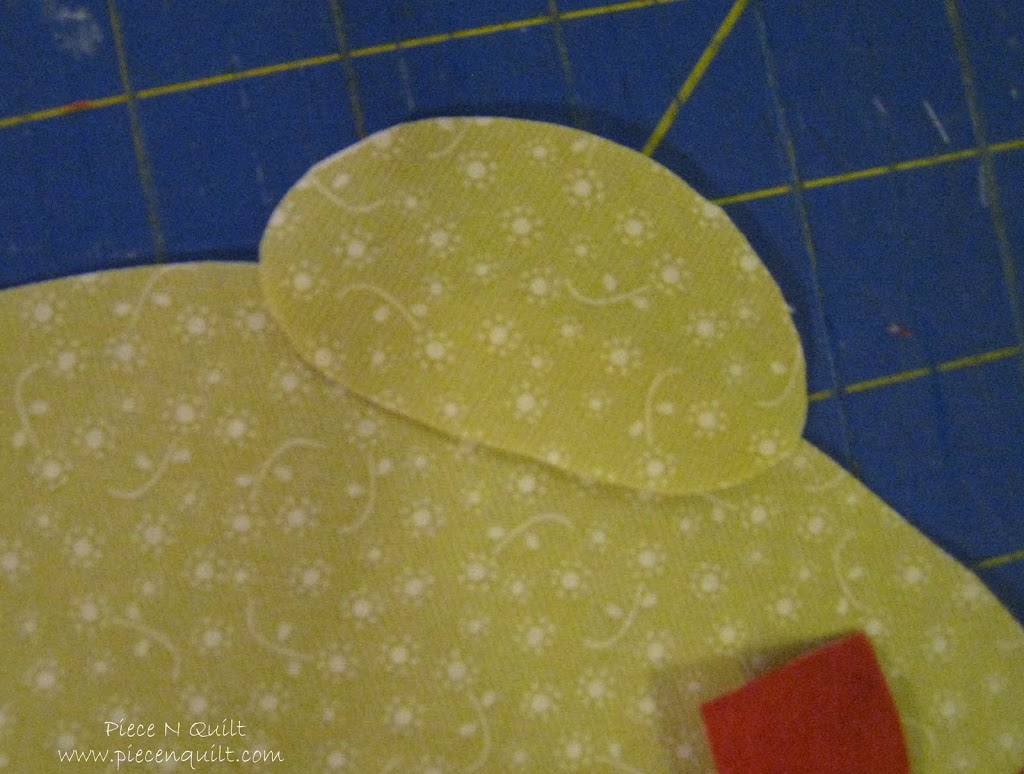
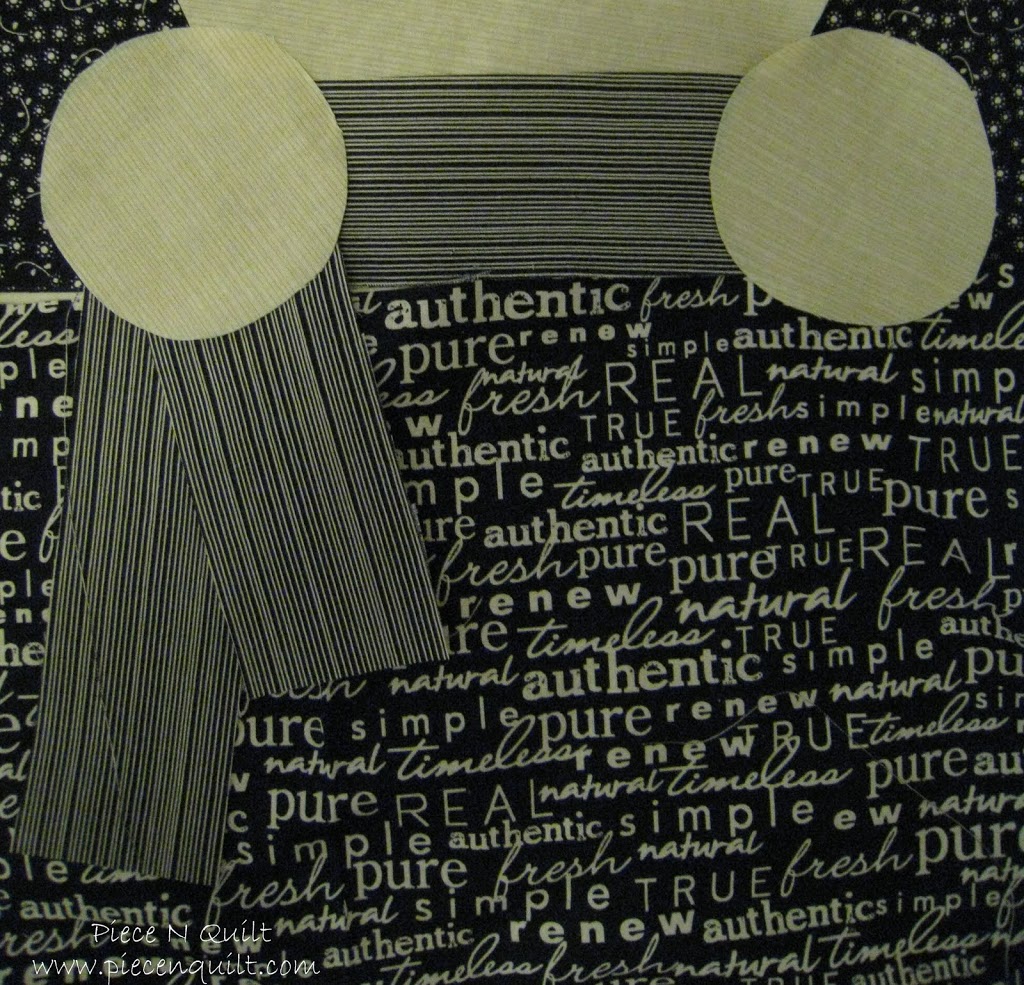
From your Authentic Simple Spot Natural material you will cut out the snowmen body parts. For the dad’s head you will cut 1-11″ circle. For the baby’s head you will cut 1-8″ circle. For the mom’s head you will cut 1-10″ circle. As you can tell from the image above I prefer to use things from my kitchen and templates like plates.
You will cut the dad and mom circles in 1/2. Placing one half for the head and one for the top of the body.
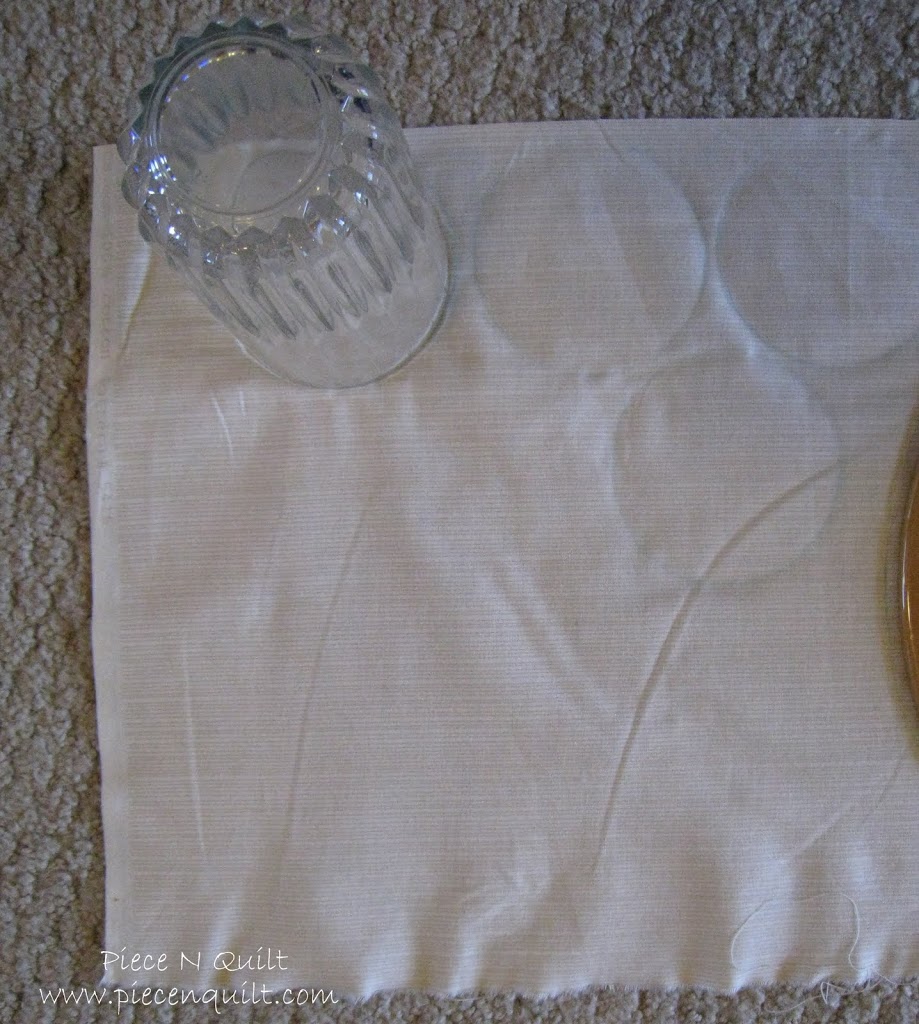
For the baby’s hands you will cut 2-3.25″ circles. Kitchen cups work great for a template.

Cut two large 1/2 circles for the snowmen feet.
Now you will create the hats.
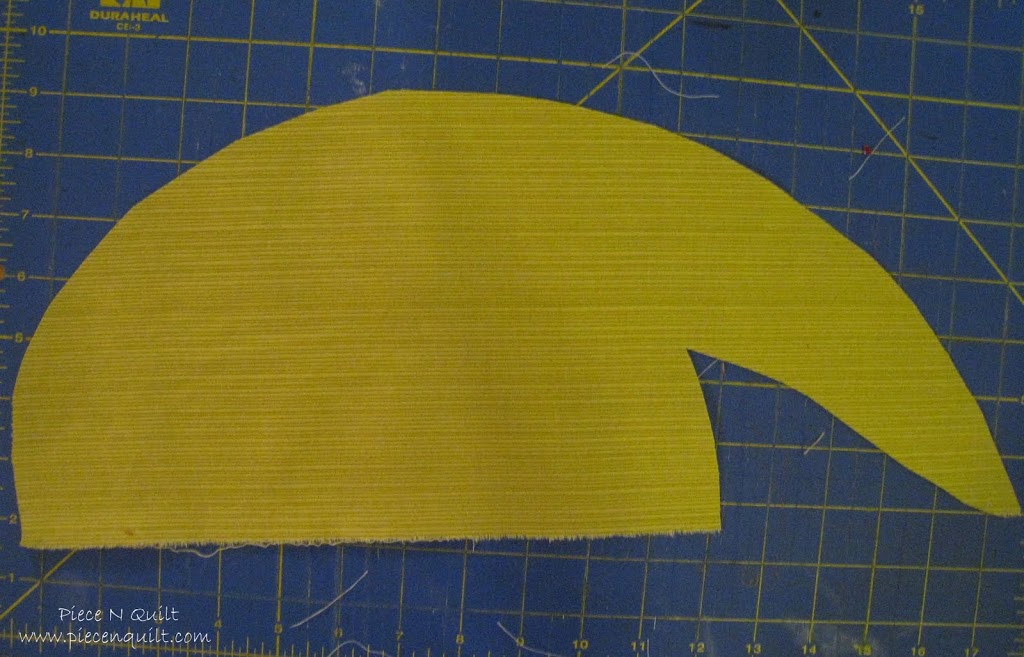
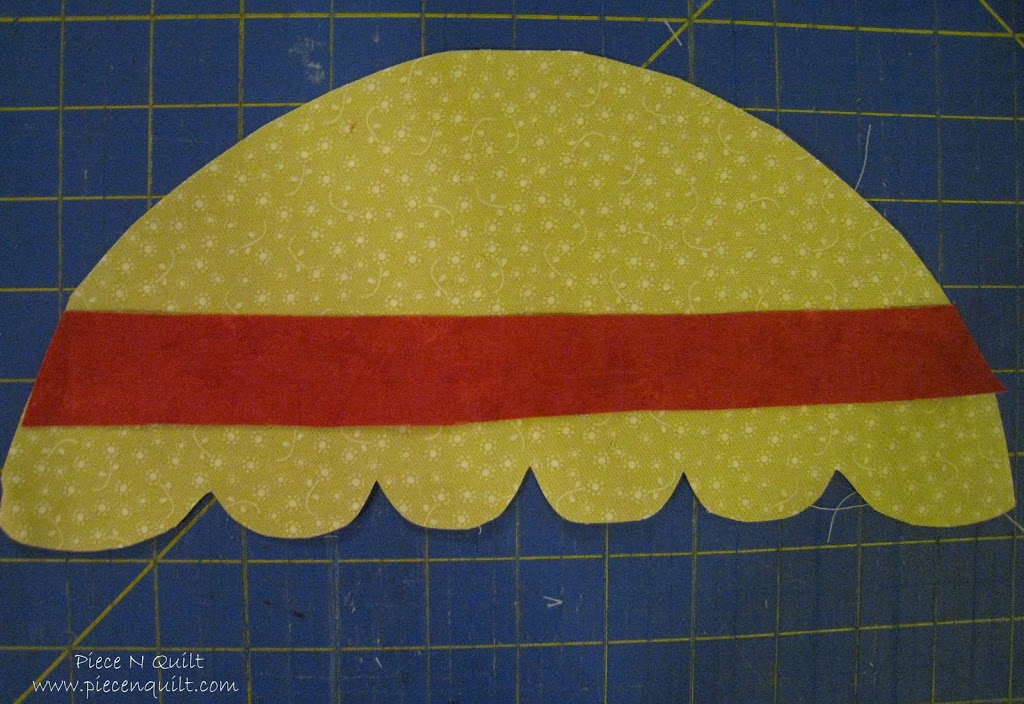
For the dad you will cut out this shape from your Authentic Simple Spot Sprout.
Now you will create the hats.
For the dad you will cut out this shape from your Authentic Simple Spot Sprout.
Now you will cut a 3.25″x14.5″ strip.
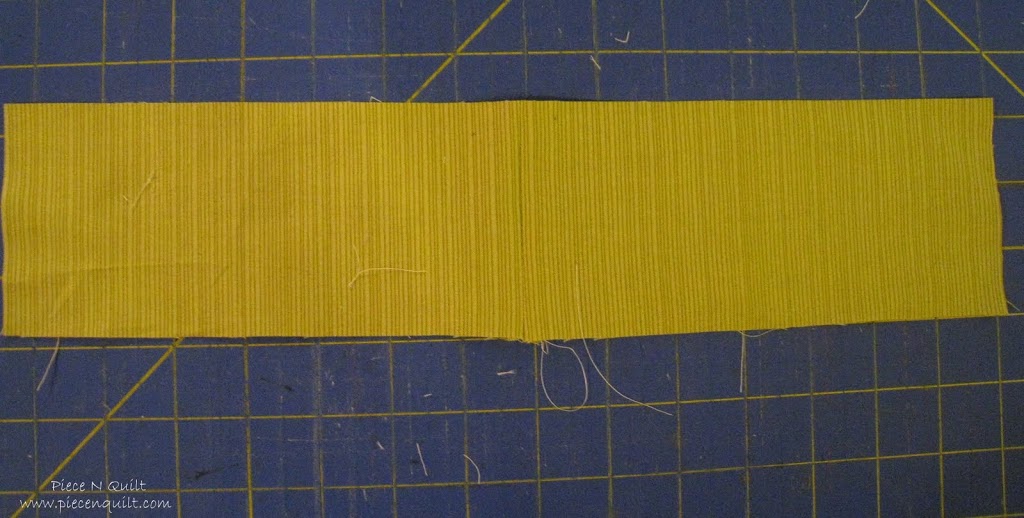
Fold that strip in 1/2 and stitch across the end. As shown in the image below.

Now take this strip and attach it to the dad’s hat as shown in the image below.

So that your seam is toward you. You will then fold this up so that the hat as a 3-D brim.
Repeat this process with the Authentic Spot On Black but make it 3.25″x9″ for the baby hat.
Repeat this process with the Authentic Spot On Black but make it 3.25″x9″ for the baby hat.
Cut out a 1/2 circle, the size of the baby’s head for the baby hat.
Cut out a small oval from the Essence Sandys Solids Red for the top of the baby hat.
Cut out a small oval from the Essence Sandys Solids Red for the top of the baby hat.
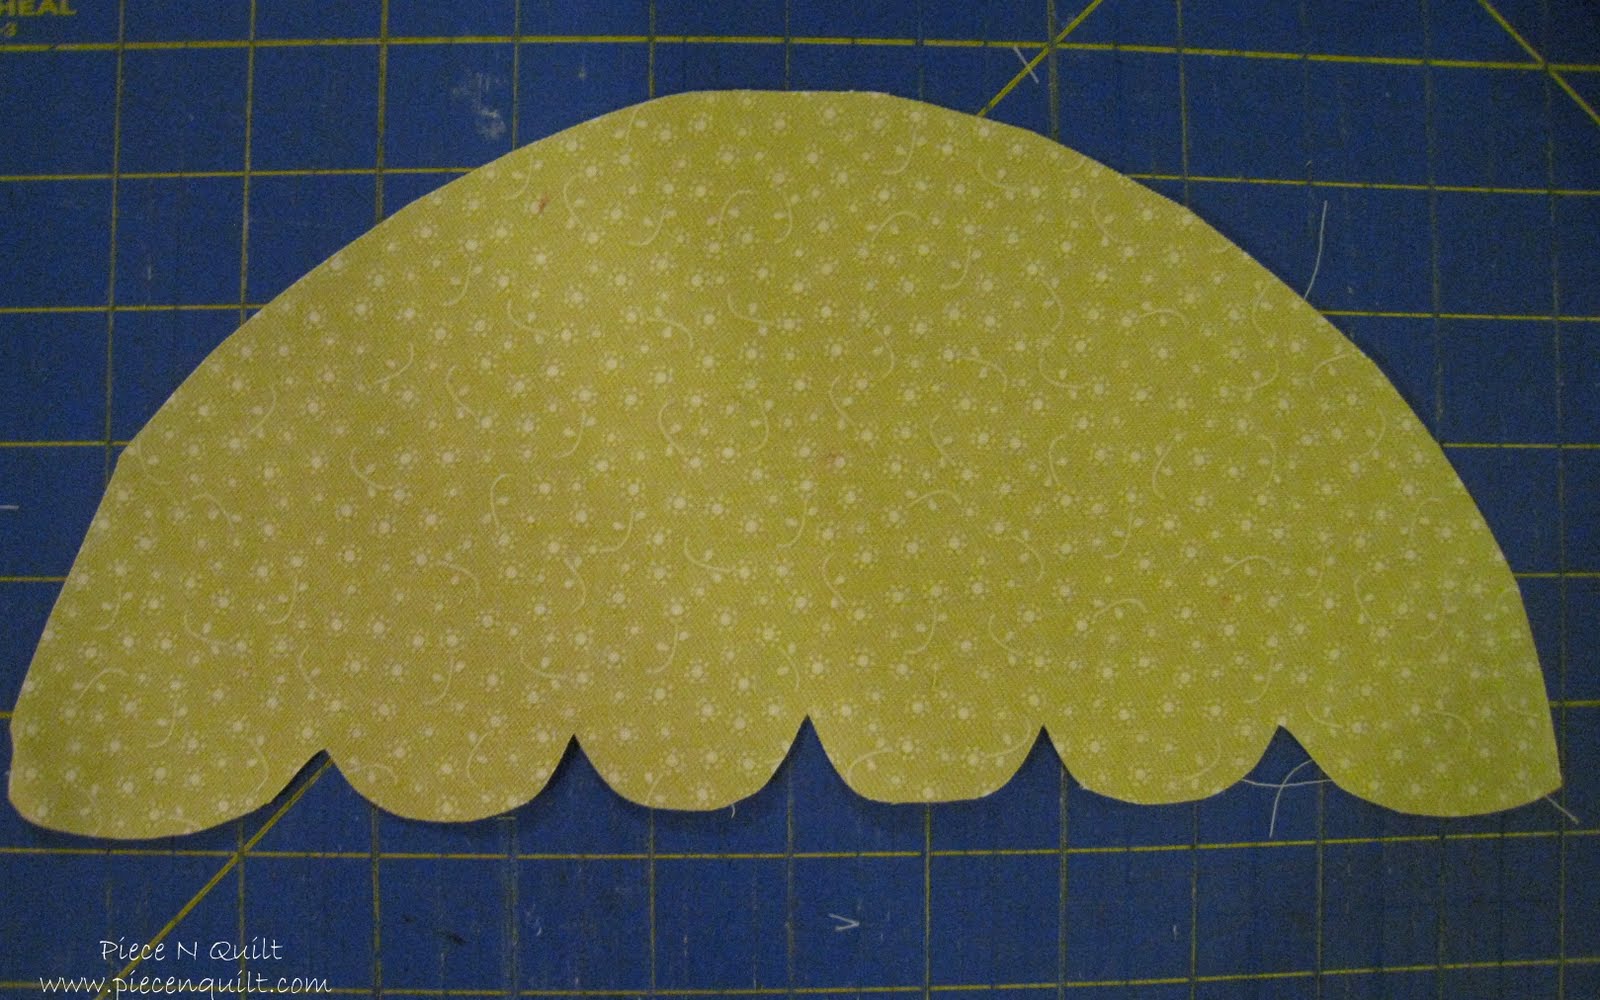
For the mom’s hat cut out a half circle from the Authentic In Bloom Sprout and then scallop the bottom edge as shown in the picture above.
From the Essence Sandys Solids Red cut a 1″ strip, place it on the moms hat and trim the ends to fit the hat.

From the Essence Sandy’s Solids Red 1″ strip you will now cut 3- 1″x5″ strips for the flower. Place them as shown in the image above.
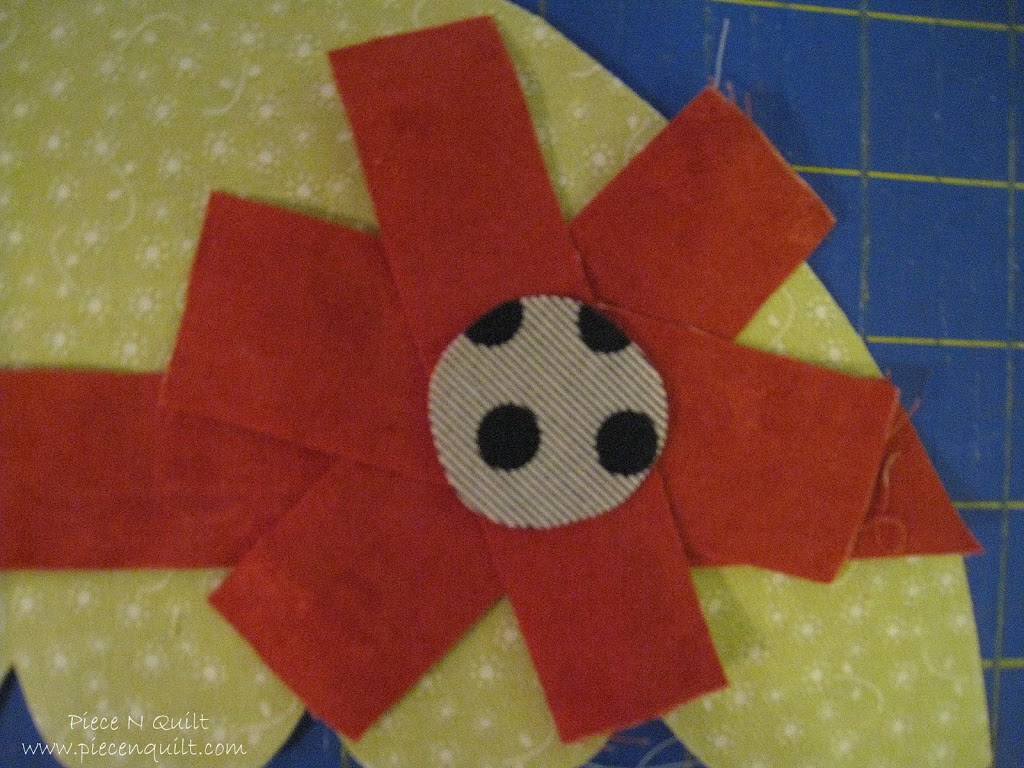
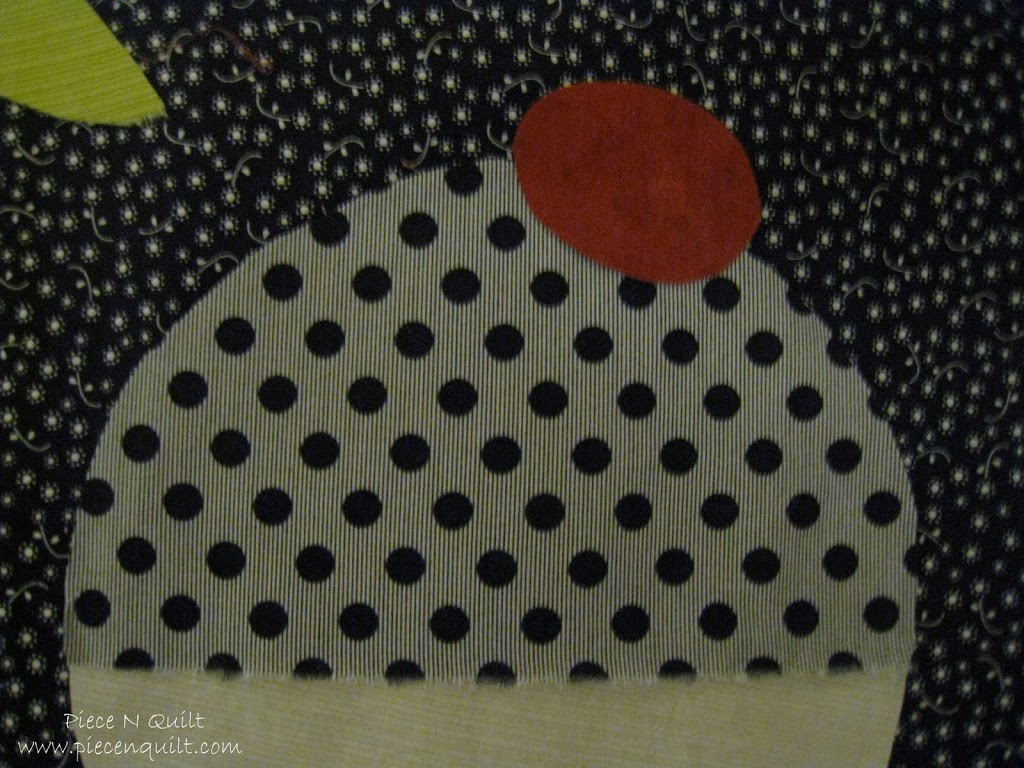
Add a black circle to the center of the flower. A quarter works great for the template.
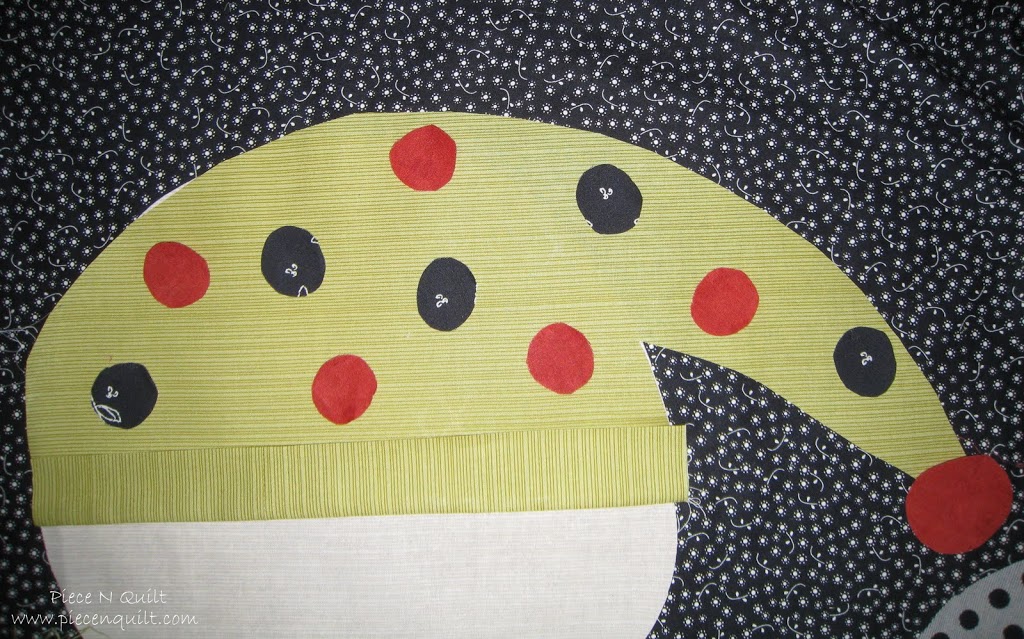
Cut out and add some black and red circles to the dads hat, using a quarter for the template. As shown in the image above.
Apply an oval to mom’s hat.
For mom’s scarf cut 3 pieces all 2-2.5″x8.25 & 1-2.5″x11″ place them as shown in the image above.
For baby’s scarf cut three pieces. 2.25″x7.25″, 2.25″x7.75″ & 2.25″x6″
Place them and baby’s hands on as shown in the image above.
Place them and baby’s hands on as shown in the image above.

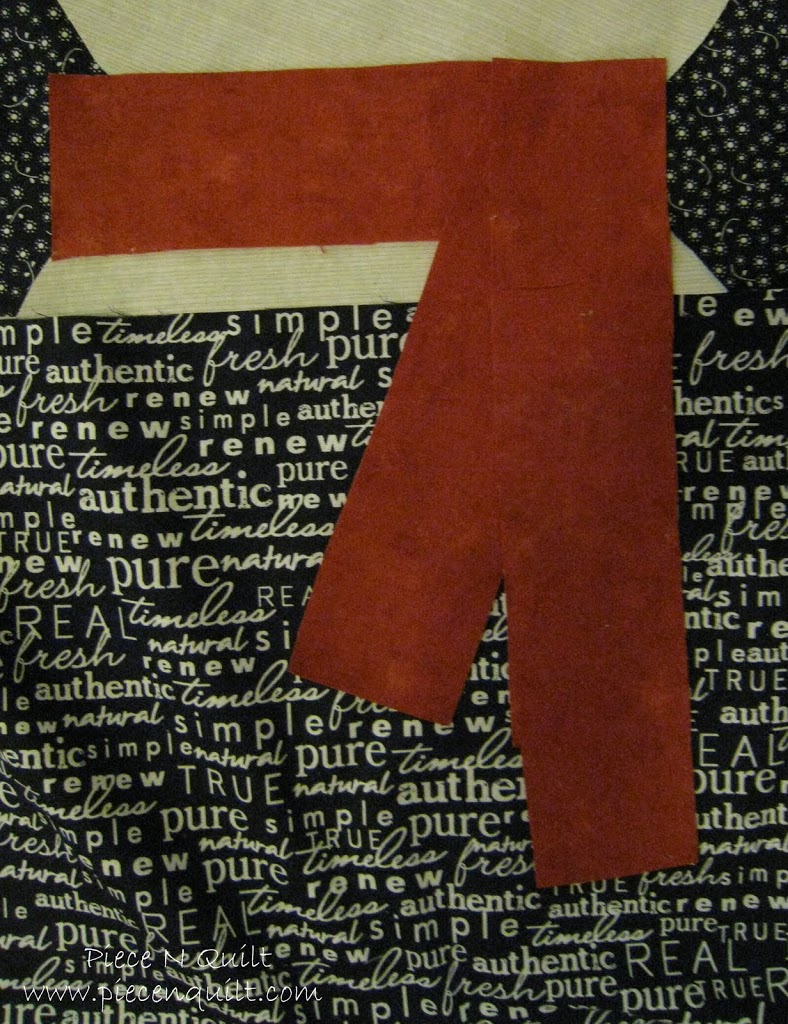
For dad’s scarf cut 3 pieces 3.25″x9.5″, x10.5″, x14″.
Place them as shown in the image above.
Place them as shown in the image above.
Sew the Authentic In Bloom Black top background to the Authentic Word Play Black strip as show in the image above.
Cut out three noses and six eyes as shown in the image above.
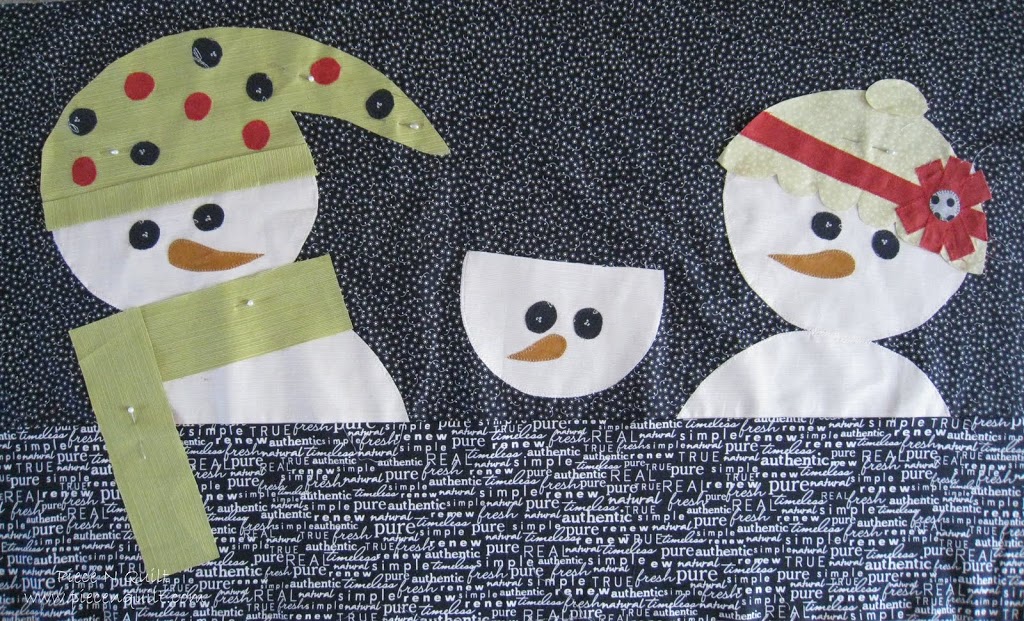
Now begin your applique. I prefer to use a blanket stitch and applique in layers. As shown above.
Cut out three noses and six eyes as shown in the image above.
Now begin your applique. I prefer to use a blanket stitch and applique in layers. As shown above.
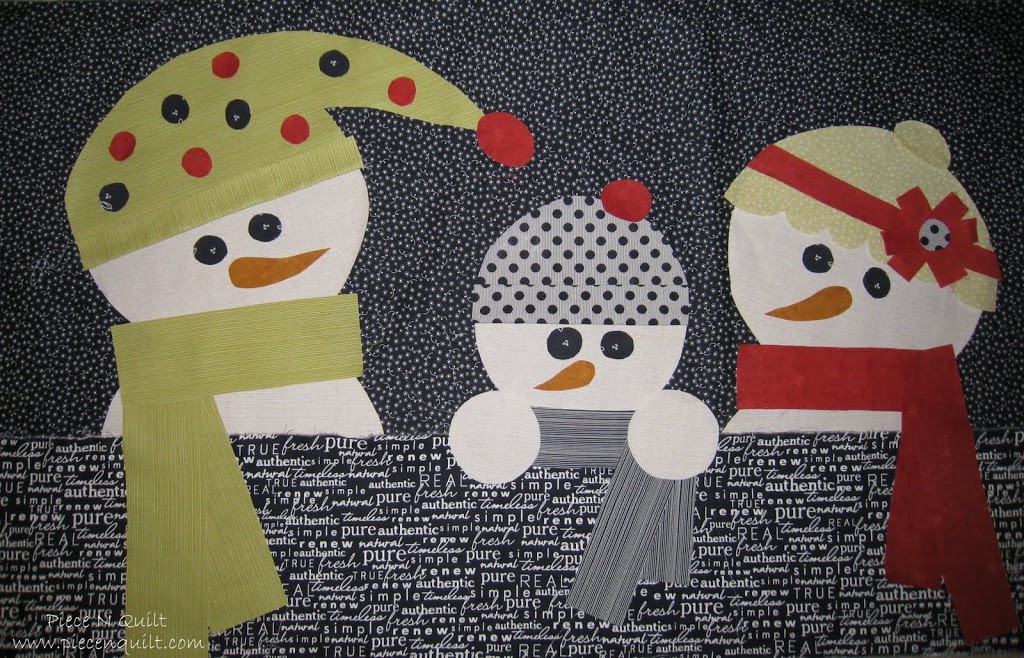
Snowmen applique should look like this when finished.
Attach this portion to the quilt portion.
Attach this portion to the quilt portion.

Now, quilt, bind and enjoy!
Thanks for letting me be a guest blogger today! I would love to hear your comments. Feel free to visit my blog often! 🙂
Thanks for letting me be a guest blogger today! I would love to hear your comments. Feel free to visit my blog often! 🙂


So cute, I love snowmen anything. It will be a nice quilt to have out for the winter.
Very cute!
What a cute quilt. Thanks for the tutorial. I have never made a quilt, but it looks like something I could do! And I love the fabric you used!
XOXO
Jen
I LOVE this quilt! I love that it is made from Authentic, and I think it is such a cute winter quilt!
Adorable! Thanks for sharing this great tute!!
Wow! Go Natalia! I love ucreate and am impressed that you are a guest blogger! What a cute quilt!
This is officially one of the cutest quilts I’ve ever seen!! Thank you so much for sharing this tutorial and being on Ucreate today. You are so AMAZING!
Thanks Kari! I am truly honored to be able to be a guest blogger on your blog! 🙂
Very cute. I love your guest blogger segments, it’s so fun to get to know other crafters.
sew cute!
adorable!
Love
I love this so much, but I would like to know how you would make it into an approx. 24″x24″ size, so I can hang it on my
door for the Winter?
Great questions! It would look beautiful on a door hanging. It’s definitely a question for Natalie at Piece N Quilt. She was our guest for this tutorial. She can be reached at Piece N Quilt
Thanks for stopping by U Create