
I love decorating onesies for baby shower gifts. These outfits provide a personal touch and a one-of-a-kind baby gift. Decorating a onesie can be as simple or as complicated as your creative skills will reach.
For this particular DIY baby gift tutorial, I bought a newborn onesie, 1/4 yard of red fabric and 1/2” elastic.

1. Cut 2 rectangles at 8” x 15”. If you want more ruffle at the top {where you sew it to the onesie} then make the rectangle wider. The length is perfect for those tiny newborn bodies.
2. Sew both rectangles together by placing right sides together and sewing down the long sides. Use a 1/2” seam allowance.
3. Serge (or zigzag stitch) to avoiding fraying fabric.
4. Press the seams and top-stitch {like I did in this Nightgown Tutorial}, if you’d like.
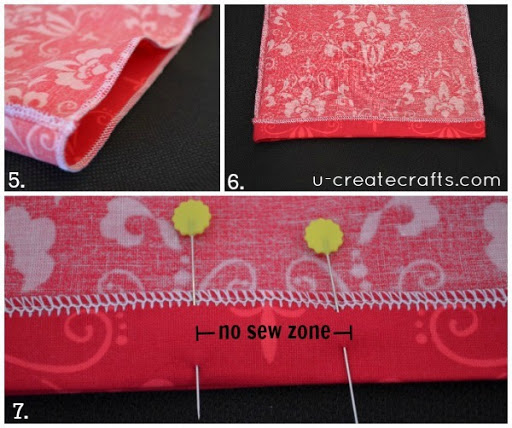
5. Serge (or zigzag) the bottom to avoid fraying fabric.
6. Fold the bottom up a little over half an inch. Press with hot iron.
7. Hem the bottom edge: I put two pins in the hem where to mark the “no sew zone”. This is the zone you will leave open for the elastic. Start sewing at one pin and stop when you get to the other pin. Sew near the top of your serged edge to make sure you have plenty of room for the elastic to go around.
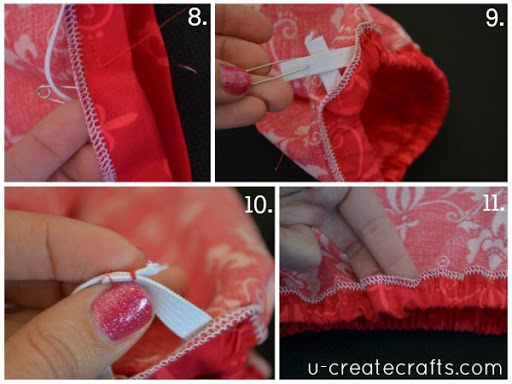
8. Cut a 14” long piece of your 1/2” wide elastic. Put a safety pin in one end and work it into the hem/casing.
9. Pull the elastic all the way around the bottom until the ends meet.
10. Overlap the elastic 1/2” and stitch the ends together securely.
11. Tuck the sewn piece inside the “no sew zone” and sew the hole shut. Now the bottom hem is done!

12. Serge (or zigzag) the top edge and turn it under 1/2”.
13. Sew the top edge about 1/8” from the edge.
14. Set your machine to sew the largest/loosest stitch (basting stitch) and sew just under the first stitch. Leave plenty of thread where you stopped.
15. Pull your threads of the loose stitch you just made to create a gather.
16. Work the material all the way around until you have the gather you want.

17. Slide the little onesie into the gathered top.
18. Pin into place.
19. Undo the snaps of the onesie so it slides onto the arm of your machine.
20. Using a normal stitch {not the loose one you made earlier}, stitch all the way around the gown piece under the loose stitch.
21. Pull the loose stitch out completely by pulling on the long threads you pulled on to create the gather in the first place. This time however, you are going to just rip them completely out. And now you are completely done!
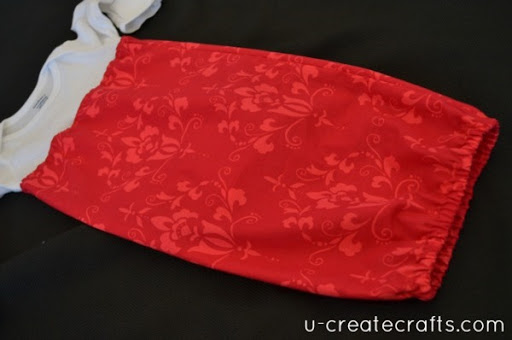
This would be a really cute gift just by itself, but throw in a matching headband or booties and you have a whole newborn ensemble.
Posted by:


I can’t wait to make several of these for my granddaughter. Thanks for the great pictures and instructions. I’ve just completed a ruffeled bed skirt for the crib. When doing the ruffles for the crib skirt, I didn’t do a first stitch (#13). Can you explain how this step is necessary. Thanks again!
#13 stitch keeps the fabric from raveling when gathering the fabric (step 15-16).
Love all the great pictures, I am going to join the skirt to the onesie with a zigzag stitch to allow the onesie to stretch when putting on baby. Also using the largest stitch so that you can easily change the skirt to the next size onesie when baby outgrows the first size.
If you want to keep the babies feet inside the gown, how would you recommend doing this?