
Good morning U Create Readers! So excited to be posting here today. As my readers know I LOVE U Create Immensely!
I’m Allison and I blog over at Freshly Completed. I love to share my projects that I’ve sewn, drawn, painted, baked, and inspirations that I’ve found through others.
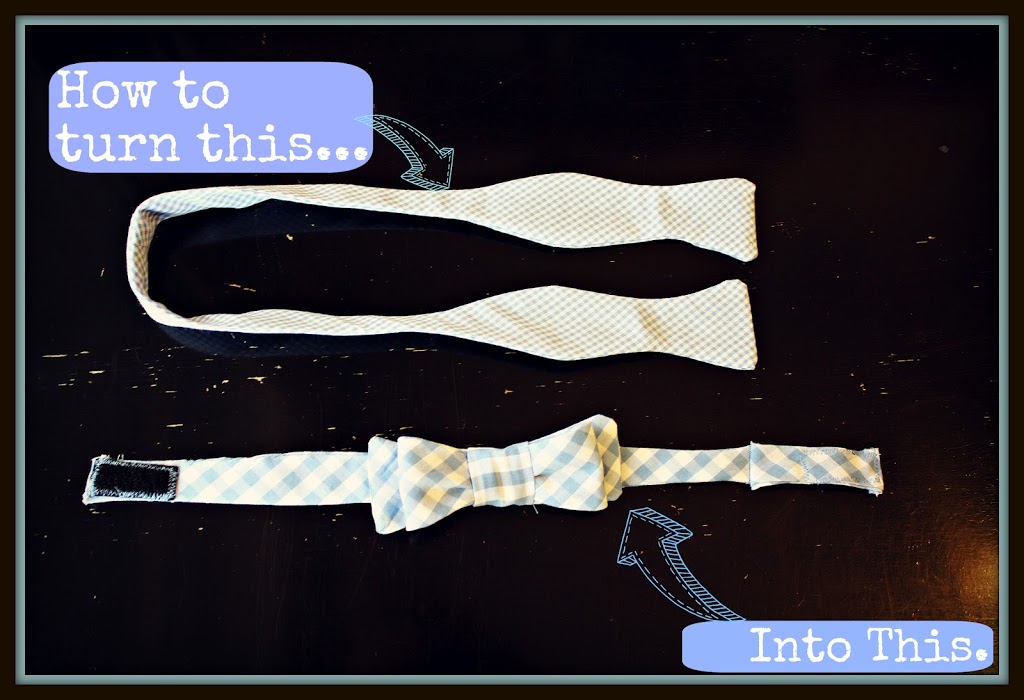
Today I’m so excited to share a tutorial of how to turn your traditional bow tie into a velcro- easy to use bow tie.
Velcro Bow Tie Refashion
MATERIALS NEEDED:
1. Traditional Bow ties
2. Velcro
3. Normal Sewing material
STEP ONE:
Fold bow onto self and pin. Cut bows off the tie.

STEP TWO:
Make a pleat with the top piece of the bow and sew down. Repeat for other side.
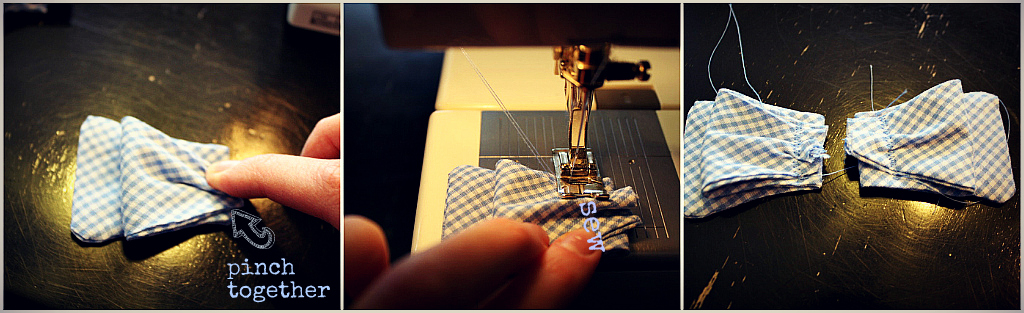
STEP THREE:
Place the bow together, facing each other and sew together.
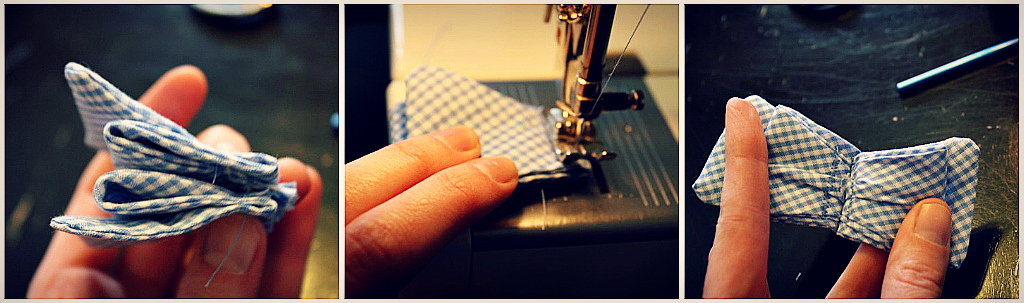
STEP FOUR:
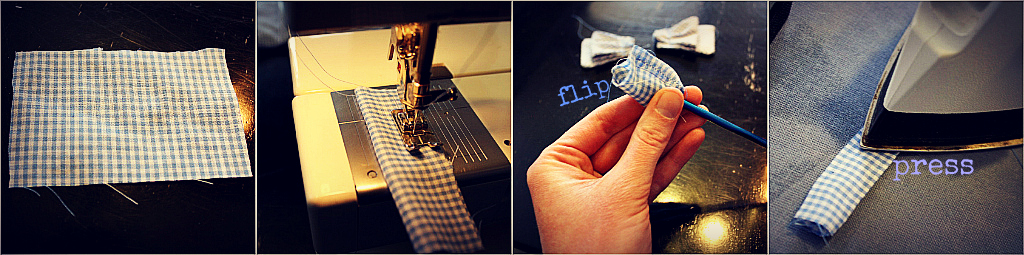
Now we’re making the loop to go over the bow.
Cut out a rectangle (about 4″ x 3″), fold in half and sew.
Flip inside out (I like to use crochet hooks) and press.
Cut out a rectangle (about 4″ x 3″), fold in half and sew.
Flip inside out (I like to use crochet hooks) and press.
STEP FIVE:
Fold in half and sew together.
Pull bow inside loop.
Pull bow inside loop.

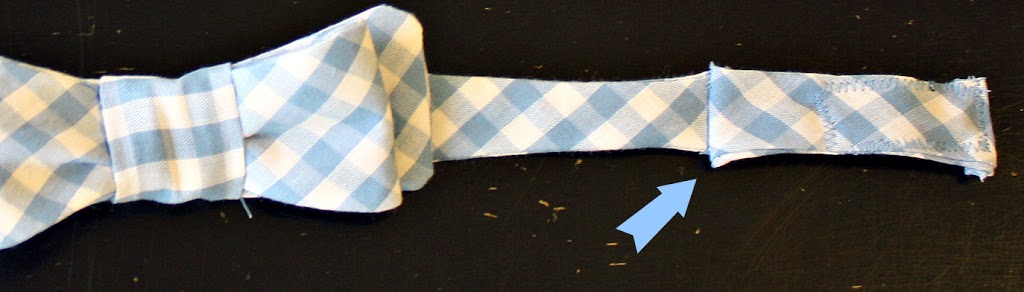
STEP SIX:
Cut out velcro pieces (about an inch long).
Place velcro on the bow tie end, fold ends in, and sew in place.
Trim off any extra velcro that may be sticking out.
Repeat on the other side, on the other end.
Place velcro on the bow tie end, fold ends in, and sew in place.
Trim off any extra velcro that may be sticking out.
Repeat on the other side, on the other end.

Optional: If needed add extra material to one side to add length
STEP SEVEN:
Pull strap through the backside of loop.
Hand sew bow tie strap onto the loop to stay straight and tight.
Pull strap through the backside of loop.
Hand sew bow tie strap onto the loop to stay straight and tight.
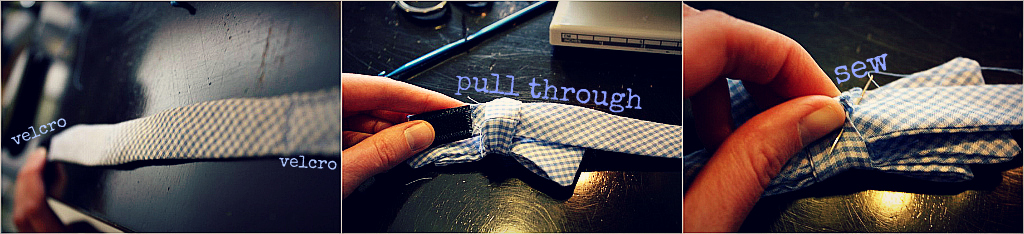

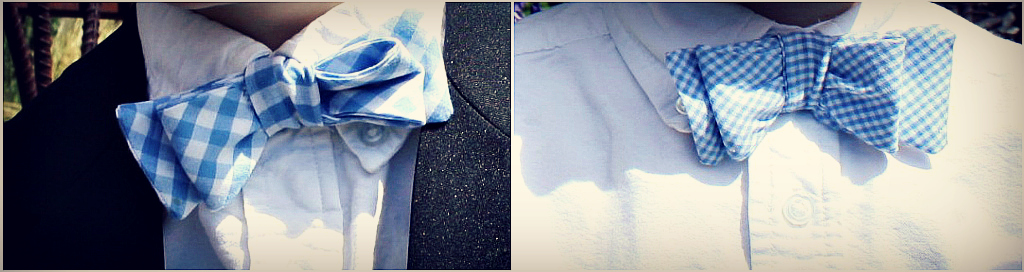
Lastly, try ’em on.

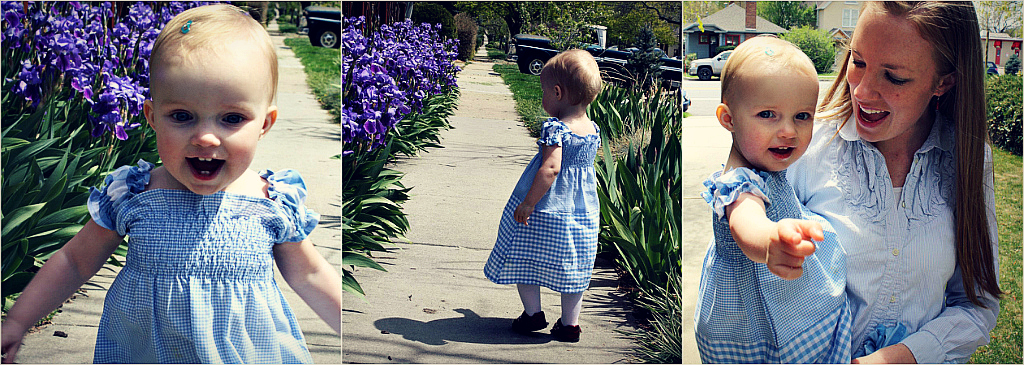
BONUS: Use extra material to make a dress for the 1 year old.
Thanks, U Create for having me!
It’s been an honor.
It’s been an honor.


Thanks for the Feature!! Love being here!!
Oh, I love freshly completed. It’s my FAVORITE blog of all time. She is so creative and makes the cutest things ever.
Love this! And this website!