U Create

It's a good day to create!

  • pinterest
  • facebook
  • instagram
  • twitter
  • rss
  • crafts
    • crochet/knit
    • jewelry
    • kids crafts
    • paper crafts
    • sewing
      • bags
      • boys-clothing
      • girls-clothing
      • women-clothing
      • pillows
      • quilts
  • home decor
    • bathroom
    • build it
    • frames
    • kids
    • kitchen
    • office
  • recipes
    • desserts
    • dinner
    • snacks
    • soups
  • parties
    • baby shower
    • birthday
    • games
    • gift wrapping
    • party decor
    • party favors
  • printables
  • holidays
    • Christmas
    • Easter
    • Father’s Day
    • Halloween
    • July 4th
    • Mother’s Day
    • New Years
    • St. Patrick’s Day
    • Thanksgiving
    • Valentine’s Day
  • gifts
    • baby
    • electronics
    • graduation
    • teacher gifts
  • About
  • Be My Guest
  • Advertise
  • Contact
  • pinterest
  • facebook
  • instagram
  • twitter
  • rss

20 Apr

Stripes & Dots Tee Tutorial

HI Ucreate readers!
My name is Shauna and I blog over at Shwin&Shwin I am beyond thrilled (like pinch me) thrilled to be guest posting on Ucreate today. Kari is beyond kind to invite me and I am pretty sure it is a dream come true. I may have done a ridiculous happy dance when I read the email and my kids may have rolled their eyes and swore their mom was losing it. maybe. So first came the task of what to share…. Oh boy this was big and I thought of all the cool sewing projects I could share, I do after all run a blog that is 90% sewing. Then I said no, I will share a project that anyone could do and have fun with.

So I give you the stripes & dots tee {spring addition}.
Stripes and dots are my two favorite things and this wraps them up into one super cute shirt, but you can use the same technique to make nearly any design imaginable. And guess what?? It is super easy! Woohoo! Let’s get started shall we?
You will need a tee shirt. I used a granimals tee from wally mart for around 3 dollars. You can use any tee you have on hand, perhaps one that has a stain? You could cover that bad boy up and then bam! New shirt. You will also need fabric markers. They come in tons of colors and can be found at nearly any craft store. I am using this nice pastel set today you know due to the whole spring thing. You will also need tape, I used painters tape but any tape will do, and a ruler and some cardboard.
Now to prep your shirt put cardboard inside to protect from any leakage, and it helps give a nice smooth surface to color on. Then with tape and a ruler measure off stripes going up the shirt. You can make the stripes as wide as you like. When taping pull the shirt so it is snug but not super stretched. The tape should also secure it to another piece of cardboard or a table so that the shirt won’t move on you.
Now grab your marker. There are a lot of different markers out there, my favorites for this type of project are the ones with a marker like tip. They are the easiest to use.
Color between the lines. I alternated colors but you can use one color to do the whole shirt. I also like the “vintage” or worn look to the stripes so I color up and down quickly across the shirt if you want a more solid look color slower and fill in all the white. For a deeper or more bold color go back and color it again.
When you get to the sleeves just color up to the sleeve and then tape of the sleeves when you are done with the front and color them the same way.
Once you are done remove the tape. Markers dry super fast like a min, so you don’t have to wait for it to dry. You will see nice crisp white lines. Sweet deal right?

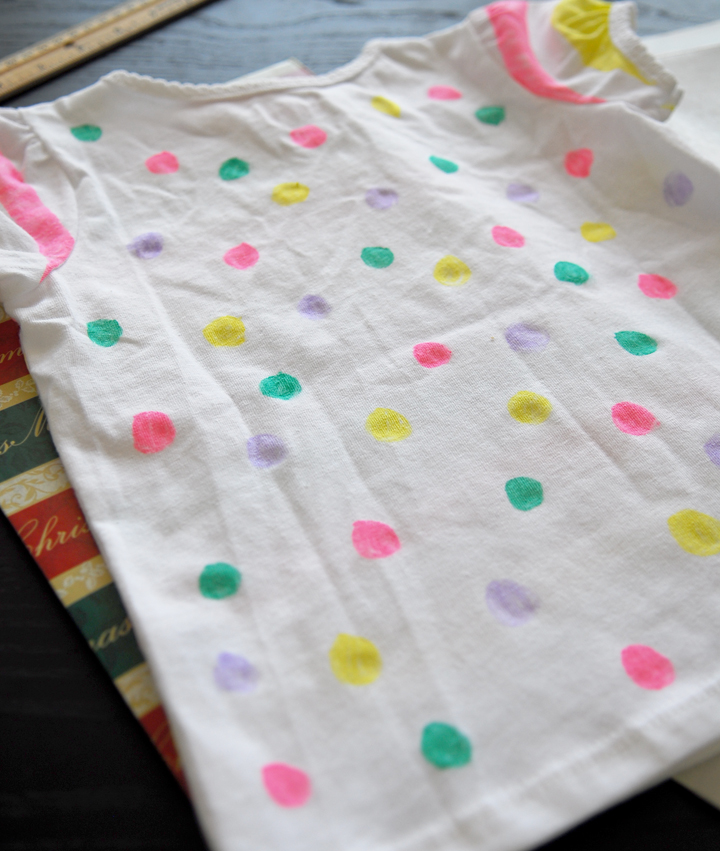
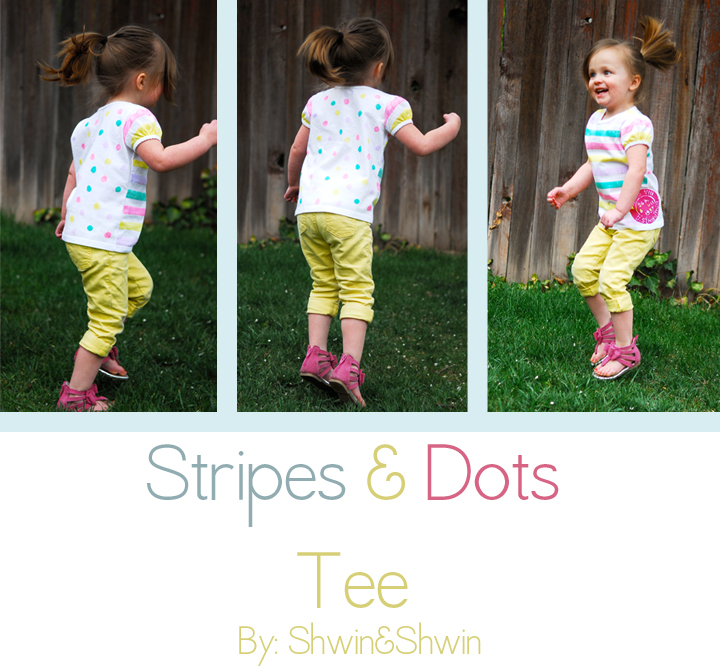
Now for the back you can tape of stripes again and do the back the same as the front, or for fun you can do polka dots. I used all the same colors and drew dots all over the back.

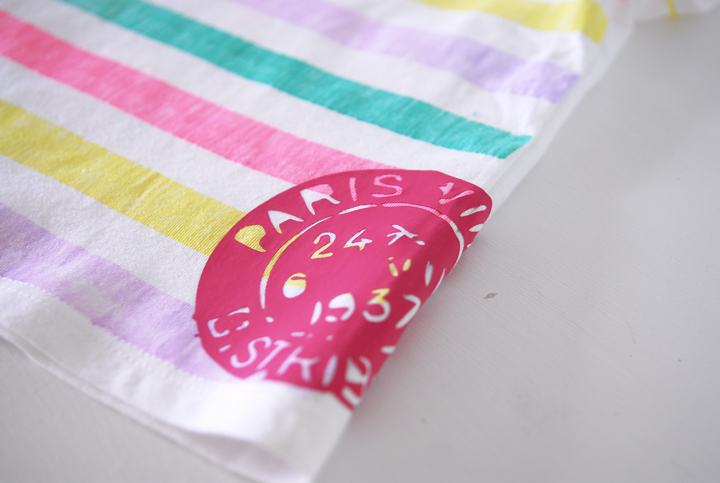
The last thing I did was add a little iron on vinyl to the bottom. Just because I am seriously addicted to the stuff. I bought mine through silhouette and used my silhouette to cut out the design but you can also cut a design out with scissors or a scalpel and iron it right on to any shirt. (you can see more about how here)

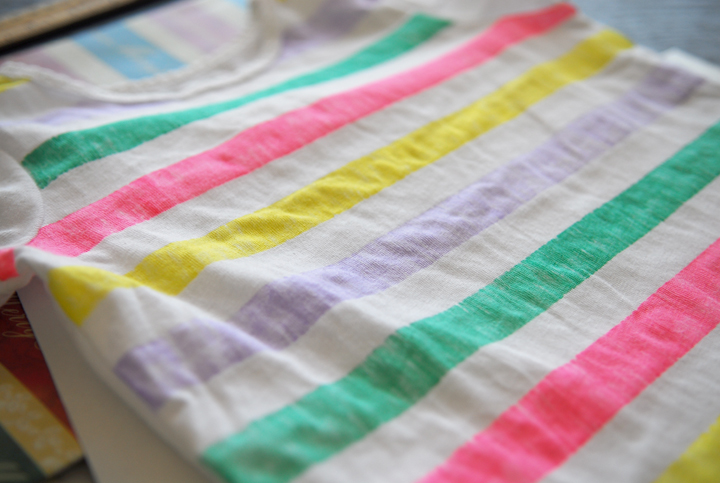
That’s all there is to it. Easy right? And it is dry and ready to wear right away so if you are bored with your clothes you can jazz them up in no time and wear it right out the door.

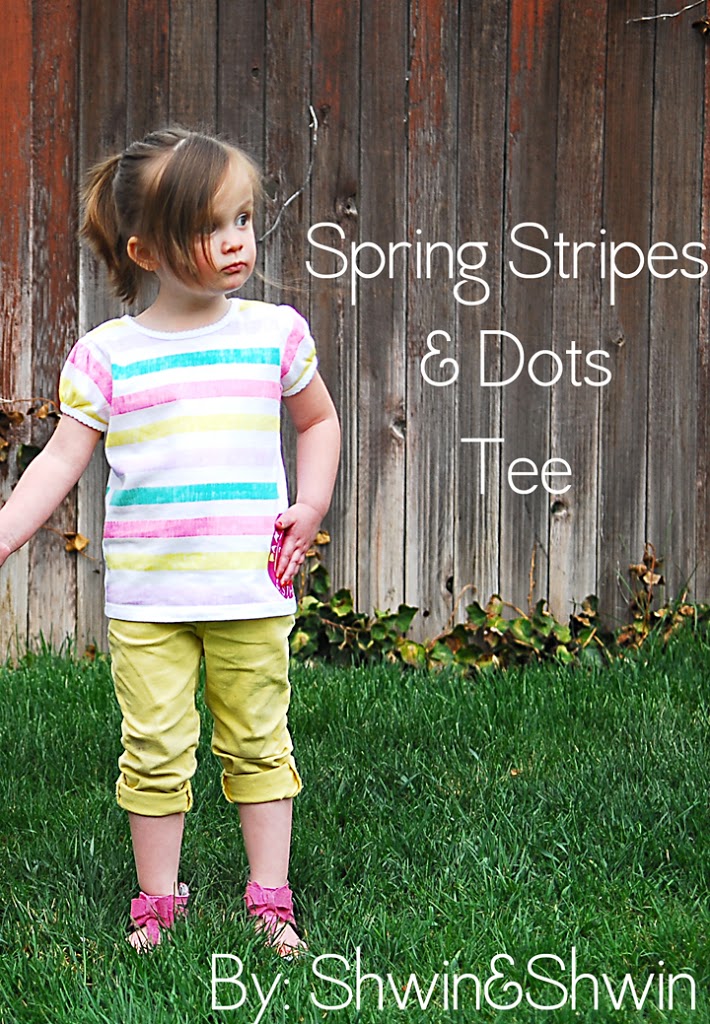
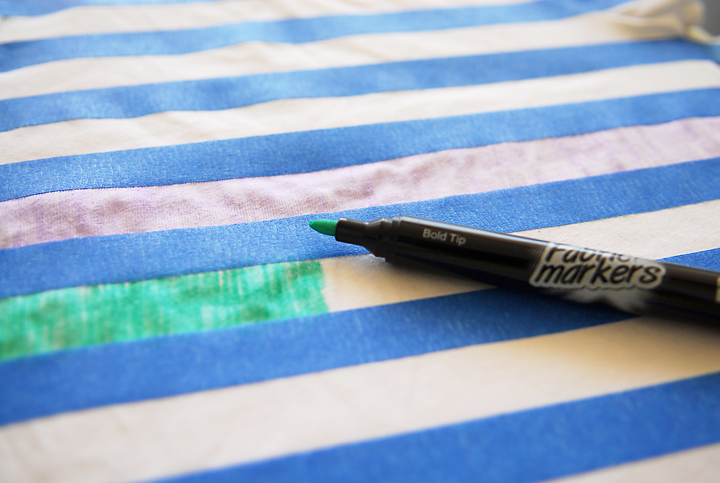
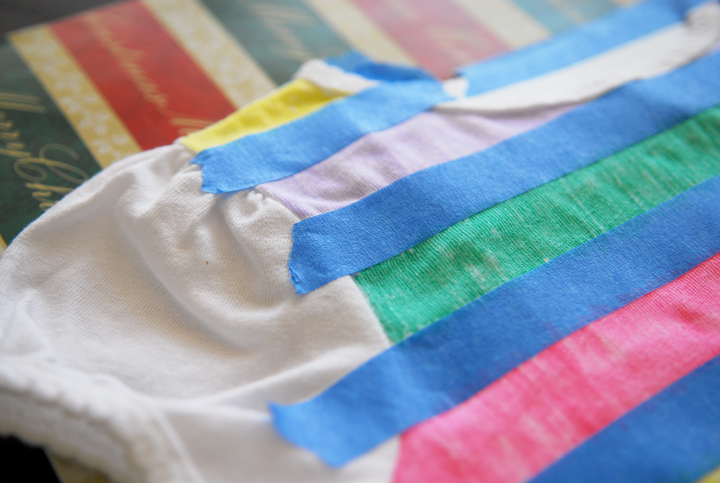
It adds a fun pop to the boring white tee.

And my daughter loved hers so much she was jumping for joy… seriously the girl loves to jump.
Thanks again Kari for having me! It was so much fun creating for Ucreate!

Feel free to come visit Shwin&Shwin anytime for:


Sewing 101 lessons

Hair and Skin Posts

Patterns (free and from our shop)

And much more 🙂

You may also like these

Girl's Apron Tutorial by Sugar Bee Crafts - adorable!Simple Girl’s Apron TutorialElastic Headband Tutorial by Ruffles and StuffDIY Elastic HeadbandsLibrary Maxi Skirt Tutorialapron tutorial4 Quarters Apron Tutorial by Wild WanderingBow Embellishment TutorialDIY Embellished Bow
Previous Post: DIY Velcro Bow Tie
Next Post: Shirred Dress Tutorial

Comments

  1. Christy says

    April 20, 2012 at 11:18 AM

    That’s really cute. Thanks for sharing.

    reply to this comment >
  2. Jessica at Me Sew Crazy says

    April 20, 2012 at 2:48 PM

    love that you used the markers to achieve the stripes on this shirt. Well done Shauna, I love it!

    reply to this comment >
  3. Suki says

    April 20, 2012 at 8:58 AM

    So pretty! I love the sketchy look of the stripes. I think I’m going to do a blue striped version for my son 🙂

    reply to this comment >
    • Kari says

      April 23, 2012 at 3:52 PM

      so many fun colors to use for a boy, too…love it!

      reply to this comment >
  4. LeighAnn says

    April 20, 2012 at 4:49 PM

    Genius! Looks like you spent $20 at Target!

    reply to this comment >
  5. Emily says

    April 20, 2012 at 7:33 PM

    Love the stripes and pictures!

    reply to this comment >
  6. Hillary Monroe says

    April 21, 2012 at 5:51 AM

    This is perfect for those t-shirts that have just a little stain on them – you know, strawberry juice, or blackberry juice… you can “stripe” right over that area! Thanks for the idea!

    reply to this comment >
    • Kari says

      April 23, 2012 at 3:52 PM

      awesome idea!

      reply to this comment >

Leave a Comment Cancel reply

Your email address will not be published. Required fields are marked *

Recipe Rating


Popular Posts

New Year's Eve Minute to Win It games by U Create

New Year’s Eve Minute To Win It Games

Free Printable "Color Your Own" Christmas Banner

Merry Christmas Coloring Banner

Free Pattern: Fall Turkey by U Create

Fall Turkey Printable

Free Printable Pumpkin Games

Halloween Printable: Bugs and Kisses

Halloween Minute To Win It Games

  • pinterest
  • facebook
  • instagram
  • twitter
  • rss
 
Privacy Policy
Back to Top

Copyright © 2023 U-Create • All Rights Reserved • Site Design by Emily White Designs